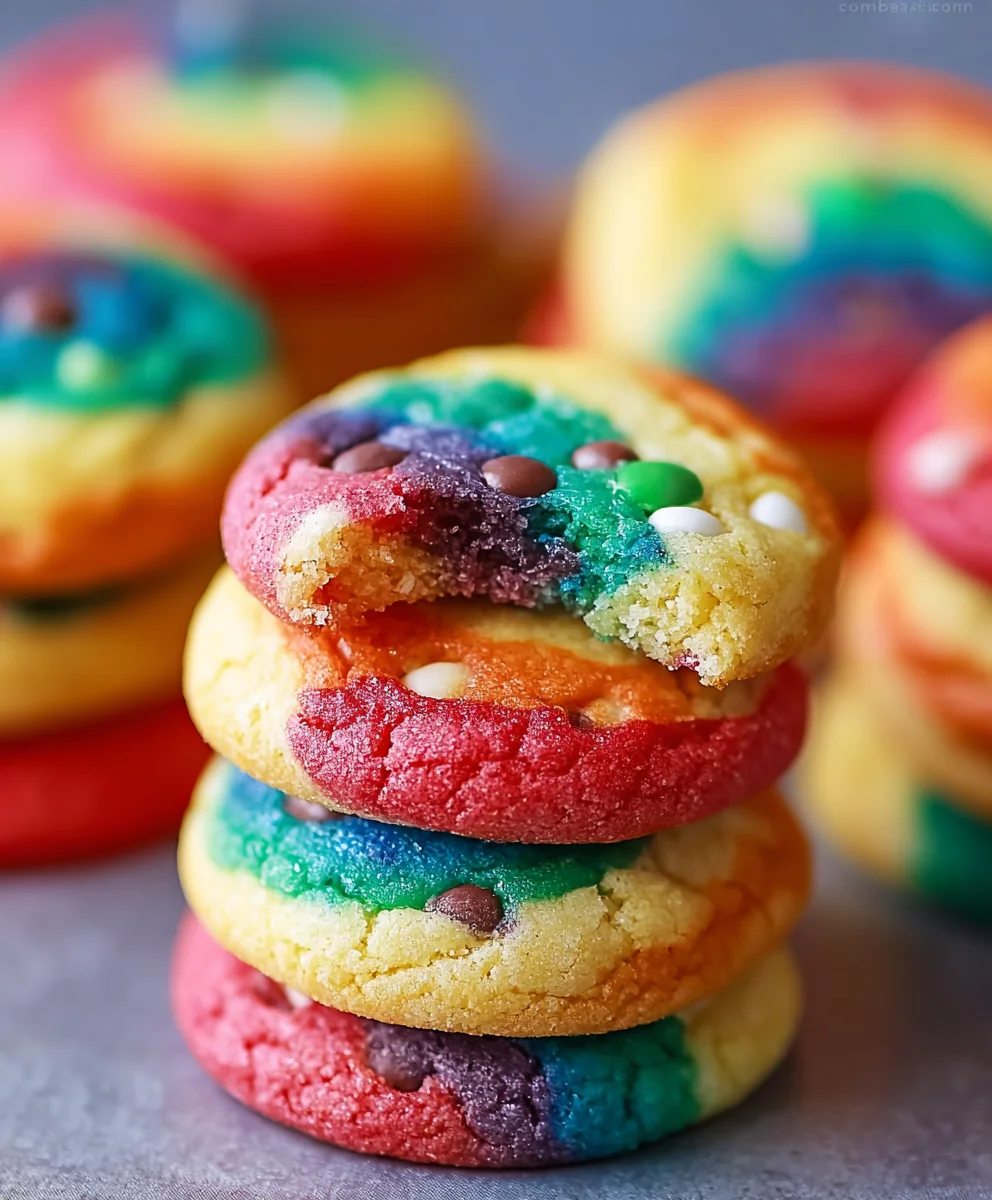
Vibrant Rainbow Cookies – Easy Homemade Treat
Rainbow Cookies are more than just a sweet treat; they’re a vibrant burst of joy on a plate, a nostalgic wink to childhood wonder, and a delightful canvas for culinary creativity. What is it about these colorful delights that captures our hearts and taste buds? Perhaps it’s the whimsical swirl of colors, reminiscent of a child’s most cherished crayon drawing, or the delicate, slightly chewy texture that yields to a satisfying bite. People adore Rainbow Cookies because they embody pure, unadulterated fun. They’re perfect for celebrations, unexpected pick-me-ups, or simply when you need a reminder that life, much like these cookies, can be wonderfully colorful. This recipe is designed to help you recreate that magic in your own kitchen, infusing every step with the promise of a truly spectacular and delicious outcome. Get ready to bake a masterpiece!
Ingredients:
- 3 cups plus 3 tablespoons all-purpose flour
- 2 teaspoons baking soda
- 1 teaspoon salt
- 1 cup unsalted butter, very cold and cut into small cubes
- 1 cup light brown sugar, firmly packed
- ¾ cup granulated sugar
- 2 large eggs, at room temperature
- 1 additional large egg yolk, at room temperature
- 2 teaspoons pure vanilla extract
- 3 cups white or semisweet chocolate chips (or a mix of both for more flavor!)
- 3 to 8 different colors of food coloring or gel (choose your favorites for a vibrant rainbow!)
Preparing the Dough
Step 1: Combine Dry Ingredients
First things first, let’s get our dry ingredients together. In a medium-sized bowl, whisk together the 3 cups plus 3 tablespoons of all-purpose flour, the 2 teaspoons of baking soda, and the 1 teaspoon of salt. Whisking them thoroughly ensures that the leavening agent (baking soda) and salt are evenly distributed throughout the flour, which will lead to consistently baked cookies. Set this bowl aside for now.
Step 2: Cream the Butter and Sugars
Now, for the foundation of our cookie’s texture. In a large mixing bowl, or the bowl of a stand mixer fitted with the paddle attachment, cream together the 1 cup of cold, cubed unsalted butter with the 1 cup of packed light brown sugar and the ¾ cup of granulated sugar. You want to beat these together until the mixture is light and fluffy, which typically takes about 3-5 minutes on medium speed. The cold butter is crucial here; it will create pockets of steam during baking, contributing to a tender cookie. Don’t rush this step – good creaming is key to a great cookie.
Step 3: Incorporate Wet Ingredients
Next, we’ll add the eggs and vanilla. Add the 2 large eggs, one at a time, beating well after each addition until fully incorporated. Then, add the extra egg yolk and beat until the mixture is smooth and well combined. Finally, stir in the 2 teaspoons of pure vanilla extract. This combination of sugars, butter, and eggs will form the base of our cookie dough, providing richness and binding everything together.
Step 4: Gradually Add Dry Ingredients
Now it’s time to bring the dry ingredients into the wet mixture. With the mixer on low speed, gradually add the flour mixture from Step 1 to the wet ingredients. Mix just until the flour streaks disappear. Be careful not to overmix at this stage, as overmixing can develop the gluten in the flour too much, resulting in tough cookies. A few streaks of flour remaining are perfectly fine, as they will be incorporated during the next step.
Step 5: Divide and Color the Dough
This is where the “rainbow” magic happens! Divide the cookie dough into as many portions as you have colors of food coloring. For instance, if you have 5 colors, divide the dough into 5 roughly equal balls. Place each portion of dough into its own separate bowl. Add a few drops of your chosen food coloring or gel to each bowl, starting with a small amount and adding more until you achieve your desired vibrant color. Gently mix the color into each dough portion until it’s uniform. Again, try not to overwork the dough. If you’re using gel coloring, it’s often more potent, so start with just a tiny amount.
Step 6: Fold in the Chocolate Chips
Once your dough portions are beautifully colored, it’s time to add the chocolatey goodness. Gently fold the 3 cups of white or semisweet chocolate chips into each colored dough ball. You can use a spatula or your hands for this. The goal is to distribute the chocolate chips evenly throughout each color of dough without overmixing or blending the colors together too much. If you want streaks of color in your final cookie, you can even slightly swirl the colors together after adding the chips, but don’t go overboard.
Step 7: Chill the Dough
Cover each bowl of colored dough tightly with plastic wrap and refrigerate for at least 30 minutes, or up to 2 days. Chilling the dough is a crucial step for several reasons. It allows the flavors to meld and deepen, making your cookies taste even better. More importantly, it firms up the butter, which prevents the cookies from spreading too much during baking and helps them maintain their shape. This also makes the dough easier to handle and scoop.
Baking the Rainbow Cookies
Step 8: Preheat Oven and Prepare Baking Sheets
When you’re ready to bake, preheat your oven to 375°F (190°C). Line baking sheets with parchment paper or silicone baking mats. This will prevent the cookies from sticking and make for easy cleanup.
Step 9: Scoop and Arrange the Dough
Now for the fun part of assembly! Take your chilled, colored dough balls. You can either scoop individual colored balls onto the baking sheet, leaving some space between them, or you can take small pieces of different colored doughs and gently press them together before rolling them into a ball. For a more marbled effect, take small pieces of 2-3 different colors, gently swirl them together (don’t fully combine), and then roll them into balls. Place these dough balls about 2 inches apart on the prepared baking sheets, as they will spread as they bake.
Step 10: Bake to Perfection
Bake the cookies for 9-12 minutes, or until the edges are lightly golden brown and the centers are still slightly soft. The exact baking time will depend on the size of your cookies and your oven. It’s always better to underbake slightly than overbake, as the cookies will continue to cook a bit on the hot baking sheet after they come out of the oven.
Step 11: Cool and Enjoy
Let the cookies cool on the baking sheets for 5-10 minutes before transferring them to a wire rack to cool completely. This allows them to set up properly. Once cooled, admire your beautiful Rainbow Cookies and enjoy the delicious, chewy texture and bursts of chocolatey flavor!
Conclusion:
And there you have it! Your delightful batch of Rainbow Cookies is ready to impress. These vibrant treats are more than just a dessert; they’re a celebration in every bite, perfect for birthdays, holidays, or simply brightening up an ordinary day. The soft, chewy texture combined with the cheerful burst of colors makes them universally loved. Don’t be afraid to get creative with your decorating; sprinkles, edible glitter, or even a simple chocolate drizzle can elevate them further.
I encourage you to try this recipe and discover how easy and rewarding it is to create these festive cookies. They are fantastic served with a glass of milk, a cup of tea, or as a sweet ending to any meal. You can also pack them up as thoughtful homemade gifts. Remember, the joy is in the making as much as the eating!
Frequently Asked Questions:
Q1: Can I make Rainbow Cookies ahead of time?
Absolutely! Rainbow Cookies store exceptionally well in an airtight container at room temperature for up to 3-4 days. This makes them ideal for preparing in advance for parties or events.
Q2: How can I achieve more vibrant colors in my Rainbow Cookies?
For the most vibrant colors, use gel food coloring rather than liquid. Gel colors are more concentrated and will produce richer hues without adding too much extra moisture to the dough. Be sure to knead the color in thoroughly until it’s evenly distributed.
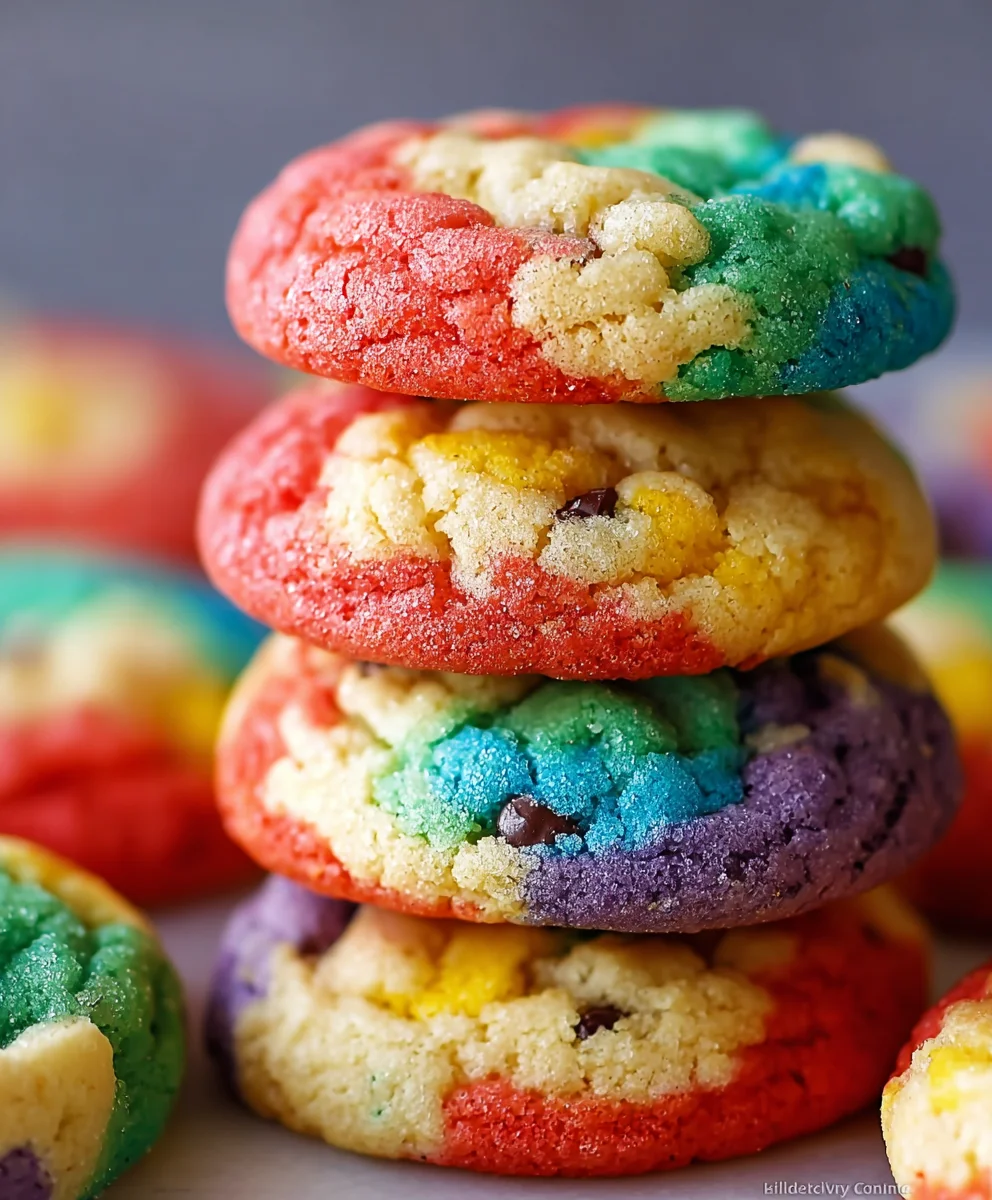
Vibrant Rainbow Cookies – Easy Homemade Treat
Create dazzling and delicious rainbow cookies with this easy-to-follow homemade recipe. These chewy cookies are loaded with chocolate chips and bursting with vibrant colors.
Ingredients
-
3 cups plus 3 tablespoons all-purpose flour
-
2 teaspoons baking soda
-
1 teaspoon salt
-
1 cup unsalted butter, very cold and cut into small cubes
-
1 cup light brown sugar, firmly packed
-
3/4 cup granulated sugar
-
2 large eggs, at room temperature
-
1 additional large egg yolk, at room temperature
-
2 teaspoons pure vanilla extract
-
3 cups white or semisweet chocolate chips
-
3 to 8 different colors of food coloring or gel
Instructions
-
Step 1
Combine dry ingredients: In a medium-sized bowl, whisk together the 3 cups plus 3 tablespoons of all-purpose flour, the 2 teaspoons of baking soda, and the 1 teaspoon of salt. Set aside. -
Step 2
Cream butter and sugars: In a large mixing bowl, cream together the 1 cup of cold, cubed unsalted butter with the 1 cup of packed light brown sugar and the 3/4 cup of granulated sugar until light and fluffy. -
Step 3
Incorporate wet ingredients: Add the 2 large eggs one at a time, beating well after each addition. Add the extra egg yolk and beat until smooth. Stir in the 2 teaspoons of pure vanilla extract. -
Step 4
Gradually add dry ingredients: With the mixer on low speed, gradually add the flour mixture to the wet ingredients. Mix just until flour streaks disappear. Do not overmix. -
Step 5
Divide and color the dough: Divide the cookie dough into as many portions as you have colors. Place each portion into a separate bowl, add food coloring, and gently mix until uniform. Do not overwork the dough. -
Step 6
Fold in chocolate chips: Gently fold the 3 cups of chocolate chips into each colored dough portion. -
Step 7
Chill the dough: Cover each bowl tightly with plastic wrap and refrigerate for at least 30 minutes. -
Step 8
Preheat oven and prepare baking sheets: Preheat your oven to 375°F (190°C). Line baking sheets with parchment paper. -
Step 9
Scoop and arrange the dough: Scoop or gently press together small pieces of different colored doughs and roll into balls. Place dough balls about 2 inches apart on prepared baking sheets. -
Step 10
Bake: Bake for 9-12 minutes, or until the edges are lightly golden brown and the centers are still slightly soft. -
Step 11
Cool and enjoy: Let cookies cool on baking sheets for 5-10 minutes before transferring to a wire rack to cool completely.
Important Information
Nutrition Facts (Per Serving)
It is important to consider this information as approximate and not to use it as definitive health advice.
Allergy Information
Please check ingredients for potential allergens and consult a health professional if in doubt.