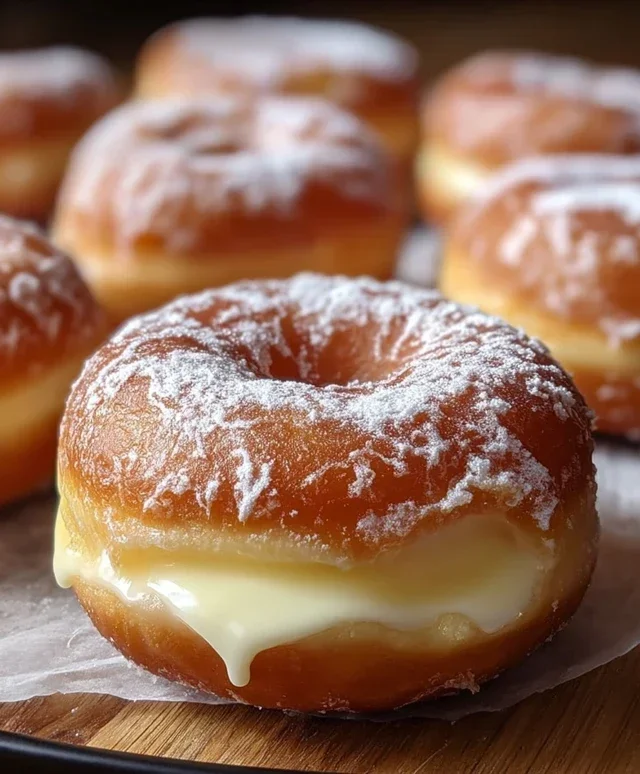
Milky Cheese Donuts-Irresistible Sweet & Savory Treat
Milky Cheese Donuts are the ultimate comfort food, a delightful fusion of sweet and savory that will have your taste buds singin extractg. Have you ever craved a treat that’s both familiar and excitingly new? That’s precisely what these Milky Cheese Donuts deliver. Imagin extracte a cloud-like, fluffy donut, kissed with a subtle sweetness, then infused with the irresistible creaminess of cheese. It’s a combination that sounds unconventional, but trust me, it’s pure magic. People adore these donuts because they offer a sophisticated twist on a beloved classic, perfect for a weekend brunch, an afternoon pick-me-up, or even as a unique dessert after a hearty meal. What truly sets these Milky Cheese Donuts apart is the delicate balance achieved – the sweetness of the dough perfectly complements the savory tang of the cheese, creating a flavor profile that’s surprisingly addictive and utterly satisfying. Get ready to fall in love with your new favorite indulgence!
Milky Cheese Donuts: A Savory Twist on a Classic Treat
Who says donuts have to be sweet? I’m always on the lookout for ways to reinvent classic comfort foods, and these Milky Cheese Donuts are a revelation! Imagin extracte a pillowy-soft donut, infused with the subtle sweetness of milk and sugar, but with a delightful savory surprise: pockets of gooey, melted mozzarella. They’re perfect for a brunch treat, an afternoon snack, or even an appetizer that will have everyone asking for the recipe. The texture is wonderfully airy, thanks to a good rise from the yeast, and the gentle chew is incredibly satisfying. The mild cheese flavor complements the donut dough beautifully, making it a sophisticated yet utterly comforting bite.
Ingredients:
Preparing the Dough: The Foundation of Flavor
The journey to these delicious donuts begin extracts with a simple yeast dough. It’s crucial to get the temperature of the milk just right. Too hot and you’ll kill the yeast, too cold and it won’t activate properly. Aim for that pleasant, lukewarm feeling on your wrist. In a large mixing bowl, I like to combine the warm milk, sugar, and active dry yeast. I give it a gentle stir and then let it sit for about 5 to 10 minutes. You’ll know it’s ready when you see a foamy layer form on top – that’s the yeast waking up and doing its magic!
Once your yeast mixture is active, it’s time to add the other wet ingredients and the flour. Add the salt and the lightly beaten egg to the foamy yeast mixture. Then, gradually incorporate the all-purpose flour, mixing until a shaggy dough starts to form. Drizzle in the melted unsalted butter and continue to mix. At this point, I often switch from my spoon to my hands or a stand mixer with a dough hook. Knead the dough for about 5-7 minutes until it becomes smooth and elastic. It should spring back slightly when you poke it with your finger.
First Rise: Patience is a Virtue
Now, for the first rise. Lightly grease a clean bowl with a touch of oil. Place the kneaded dough into the bowl, turning it to coat lightly. Cover the bowl tightly with plastic wrap or a clean kitchen towel. Find a warm, draft-free spot in your kitchen for the dough to rest and rise. This can be near a preheating oven (but not inside!), or just on your countertop if your kitchen is warm. Let it rise for about 1 to 1.5 hours, or until it has doubled in size. This is where the dough develops its incredible lightness and airy texture. Don’t rush this step; a good, slow rise is key to delicious donuts.
Shaping and Second Rise: Getting Ready for the Fry
Once your dough has doubled in size, it’s time to gently punch it down to release the air. Turn the dough out onto a lightly floured surface. Now, here’s where the cheese comes in! You want to incorporate the shredded mozzarella evenly. I usually pat the dough into a rough rectangle and then sprinkle the shredded mozzarella all over it, pressing it in slightly. Then, I gently fold and knead the dough a few times to distribute the cheese. You don’t want to overwork it at this stage, just enough to get the cheese somewhat incorporated.
Now, you can shape your donuts. I find it easiest to roll the dough out to about ½-inch thickness. Using a donut cutter or two round cookie cutters of different sizes (one for the outer ring, one for the inner hole), cut out your donuts. You can also simply cut them into squares or rectangles if you prefer. Place the cut donuts onto parchment-lined baking sheets, leaving some space between them. At this point, you need to let them have their second rise, which is usually shorter than the first, about 30-45 minutes, or until they look puffy and have increased in size again. This second rise ensures they’ll be light and airy after frying.
Frying to Golden Perfection
The final, glorious step: frying! Pour enough vegetable or canola oil into a heavy-bottomed pot or Dutch oven to reach a depth of about 2-3 inches. Heat the oil to around 350°F (175°C). It’s crucial to maintain this temperature; too hot and the donuts will burn on the outside before cooking through, too cool and they’ll absorb too much oil and become greasy. You can test the temperature by dropping a tiny piece of dough into the oil; it should sizzle immediately.
Carefully lower 2-3 donuts at a time into the hot oil, being careful not to overcrowd the pot. Fry for about 1.5 to 2 minutes per side, or until they are a beautiful golden brown. They should puff up significantly as they cook. Use a slotted spoon or spider strainer to carefully remove the donuts from the oil and place them on a wire rack set over a baking sheet to drain any excess oil.
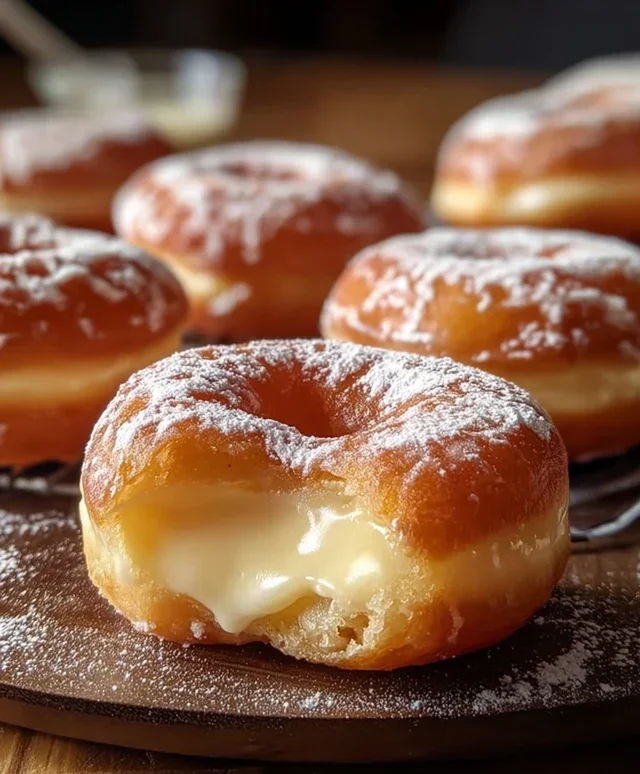
Finishing Touches: A Dusting of Sweetness
Once all your donuts have been fried and drained, you can decide on the finishing touch. For a classic donut experience, I love to dust them generously with powdered sugar while they are still warm. The warmth of the donut helps the sugar adhere beautifully. If you want to lean even further into the savory side, you could skip the powdered sugar and serve them as is, or perhaps with a side of marinara for dipping. However, the slight sweetness from the sugar dusting really balances the savory cheese wonderfully. These Milky Cheese Donuts are best enjoyed fresh, while they are still warm and the mozzarella is perfectly melty. Enjoy this delightful twist on a beloved classic!
Conclusion:
And there you have it – your guide to creating incredibly delicious Milky Cheese Donuts! This recipe truly shines because it masterfully balances the sweetness of a classic donut with the delightful savory tang of cheese, resulting in a treat that’s both comforting and exciting. The fluffy interior, infused with creamy cheese, perfectly complements the slightly crisp exterior, making each bite a little piece of heaven. Whether you’re looking for a unique breakfast indulgence, a crowd-pleasing snack, or a sweet and savory dessert, these Milky Cheese Donuts are sure to impress.
For the best experience, I highly recommend serving these warm, fresh from the fryer or oven. They are wonderful on their own, allowing the distinct flavors to take center stage. However, you could also explore some delightful serving suggestions. A light dusting of powdered sugar can add a touch of extra sweetness for those who prefer it, or a drizzle of honey can introduce a lovely floral note that pairs surprisingly well with the cheese. They also make for a fantastic accompaniment to a cup of coffee or tea, perfect for a leisurely brunch.
Don’t be afraid to get creative with variations! Consider adding a pinch of black pepper to the dough for a subtle spicy kick, or incorporate finely chopped chives or green onions for an even more pronounced savory profile. A sprinkle of shredded cheddar or Gruyère cheese on top before baking can create a wonderfully cheesy crust. The possibilities are truly endless!
I genuinely encourage you to give this Milky Cheese Donuts recipe a try. It’s a surprisingly approachable recipe that delivers incredibly rewarding results, and it’s guaranteed to become a favorite. Let me know how yours turn out!
Frequently Asked Questions:
Can I make these donuts ahead of time?
While they are best enjoyed fresh, you can prepare the dough and refrigerate it for up to 24 hours before frying or baking. For cooked donuts, they are at their peak within a few hours of preparation. Reheating them gently in a low oven can help restore some of their texture if needed.
What kind of cheese works best?
A good quality mild cheddar or a creamy mozzarella works wonderfully for its melting properties and balanced flavor. Avoid very strong or crum extractbly cheeses, as they might overpower the donut or not melt as smoothly.
Can I bake these instead of frying?
Absolutely! Baking is a fantastic alternative. Simply place your shaped donuts on a baking sheet, brush them with melted butter or an egg wash, and bake at around 375°F (190°C) for 12-15 minutes, or until golden brown and cooked through. They will have a slightly different texture than fried donuts but are still incredibly delicious.
Milky Cheese Donuts
Deliciously soft and slightly savory donuts infused with milk and cheese, perfect for a unique breakfast or treat.
Ingredients
-
2 cups all-purpose flour
-
1 cup whole milk, warm (about 110°F)
-
2 tablespoons sugar
-
2¼ teaspoons active dry yeast (1 packet)
-
½ teaspoon salt
-
1 large egg
-
4 tablespoons unsalted butter, melted
-
1 cup shredded mozzarella cheese
-
Vegetable or canola oil, for frying
-
Powdered sugar, for dusting (optional)
Instructions
-
Step 1
In a small bowl, combine warm milk, sugar, and yeast. Let sit for 5-10 minutes until foamy. -
Step 2
In a large bowl, whisk together flour and salt. Add the yeast mixture, egg, and melted butter. Mix until a dough forms. -
Step 3
Knead the dough on a floured surface for 5-7 minutes until smooth and elastic. Incorporate the shredded mozzarella cheese into the dough until evenly distributed. -
Step 4
Place the dough in a greased bowl, cover, and let rise in a warm place for 1-1.5 hours, or until doubled in size. -
Step 5
Punch down the dough, roll it out to about ½ inch thickness, and cut out donut shapes using a donut cutter or two different sized round cutters. -
Step 6
Heat vegetable or canola oil in a deep pot to 350°F (175°C). Fry the donuts for 1-2 minutes per side, until golden brown. -
Step 7
Remove donuts from oil and drain on paper towels. Dust with powdered sugar if desired.
Important Information
Nutrition Facts (Per Serving)
It is important to consider this information as approximate and not to use it as definitive health advice.
Allergy Information
Please check ingredients for potential allergens and consult a health professional if in doubt.