Easy Chia Seed Pudding Recipe – Healthy Treat
Chia seed pudding recipe is your new best friend for a quick, healthy, and utterly delicious breakfast or dessert. Imagin extracte this: waking up to a creamy, satisfying bowl that’s packed with nutrients and takes mere minutes to prepare the night before. That’s the magic of chia seed pudding! People are absolutely raving about it for so many reasons. It’s incredibly versatile, allowing you to customize flavors and toppings to your heart’s content. Whether you’re craving something fruity, chocolatey, or simply pure and unadorned, this recipe delivers. What truly makes this chia seed pudding recipe so special is its inherent goodness. Chia seeds are tiny powerhouses of fiber, omega-3 fatty acids, and protein, making this dish as nourishing as it is delightful. It’s the perfect way to fuel your body and indulge your taste buds simultaneously, without any guilt.
Why You’ll Love This Chia Seed Pudding
Simple Ingredients, Big Flavor
Ingredients:
How to Make Delicious Chia Seed Pudding
Chia seed pudding is one of my absolute favorite go-to breakfasts or healthy snacks. It’s incredibly easy to make, requires no cooking (just a little bit of chilling time!), and is packed with nutrients. Plus, it’s so versatile – you can customize it with endless toppings and flavors. This recipe is my simple base, perfect for begin extractners, and can be adapted to your taste.
The magic of chia seed pudding lies in the chia seeds themselves. These tiny powerhouses are loaded with fiber, omega-3 fatty acids, and protein. When mixed with liquid, they absorb moisture and swell up, creating a gelatinous, pudding-like texture. It’s a fantastic way to start your day with sustained energy and keep you feeling full for longer.
The beauty of this recipe is its simplicity. You can whip it up in minutes before bed and wake up to a ready-to-eat, delicious, and healthy breakfast. Or, if you’re short on time in the morning, it’s a perfect afternoon pick-me-up that won’t leave you crashing.
Let’s get started with the basic recipe. You’ll be amazed at how something so simple can be so satisfying!
The Simple Steps to Pudding Perfection
Here’s how to create your own batch of creamy, dreamy chia seed pudding:
Gather Your Ingredients and Container: Before you begin extract, make sure you have all your ingredients measured out. For this recipe, you’ll need 3 tablespoons of chia seeds, 1 tablespoon of maple syrup (or your preferred sweetener – agave nectar, honey, or even a sugar-free alternative work beautifully), 1 teaspoon of vanilla extract for that classic flavor boost, and 3/4 cup of your favorite milk. I often use almond milk or oat milk for a dairy-free option, but regular dairy milk is perfectly fine too. You’ll also need a jar, bowl, or container with a lid to mix and store your pudding. A mason jar is ideal because you can mix and eat straight from it! Make sure your container is clean and dry.
Combine the Dry Ingredients: In your chosen container, add the 3 tablespoons of chia seeds. Now, add the 1 tablespoon of maple syrup and the 1 teaspoon of vanilla extract. If you’re using a different sweetener, add it now. This is also a good time to think about any other flavorings you might want to add later, like a pinch of cinnamon or a few drops of almond extract. For now, we’re keeping it simple. Ensure these dry ingredients are at the bottom of your container.
Pour in the Milk and Mix Thoroughly: Gently pour the 3/4 cup of your chosen milk over the chia seeds, sweetener, and vanilla. This is the most crucial step for achieving a smooth pudding without lumps. You need to mix everything together very, very well. Use a spoon or a whisk and stir vigorously for at least 30-60 seconds. Make sure to scrape the bottom and sides of the container to ensure all the chia seeds are submerged in the liquid and don’t clump together. You want to see the seeds starting to disperse evenly throughout the milk. Don’t underestimate the power of good stirring here; it’s key to preventing those dreaded clumps.
The Initial Stir and Rest: After your initial vigorous mixing, cover your container with a lid or some plastic wrap. Let it sit for about 5-10 minutes. During this time, the chia seeds will start to absorb some of the liquid and swell. This initial rest period is important. Once it’s rested, open the container and give it another good stir. You’ll notice it’s already starting to thicken. This second stir is essential to break up any clumps that might have formed as the seeds began to gel. Give it another thorough stir, making sure to get to the bottom and sides again. This will ensure a consistent texture throughout.
Chill and Allow to Thicken: Once you’ve completed the second stir, securely cover the container again. Now it’s time for the pudding to do its thing in the refrigerator. You need to let it chill for at least 2-4 hours, but overnight is truly the best for optimal thickness and texture. The longer it chills, the more the chia seeds will absorb the liquid and create that signature pudding consistency. When you check on it after chilling, it should be thick and spoonable, with no loose liquid remaining. If it’s still a bit too thin for your liking after the recommended chilling time, you can always add a few more chia seeds, stir well, and let it chill for another hour.
Serving Suggestions and Customizations
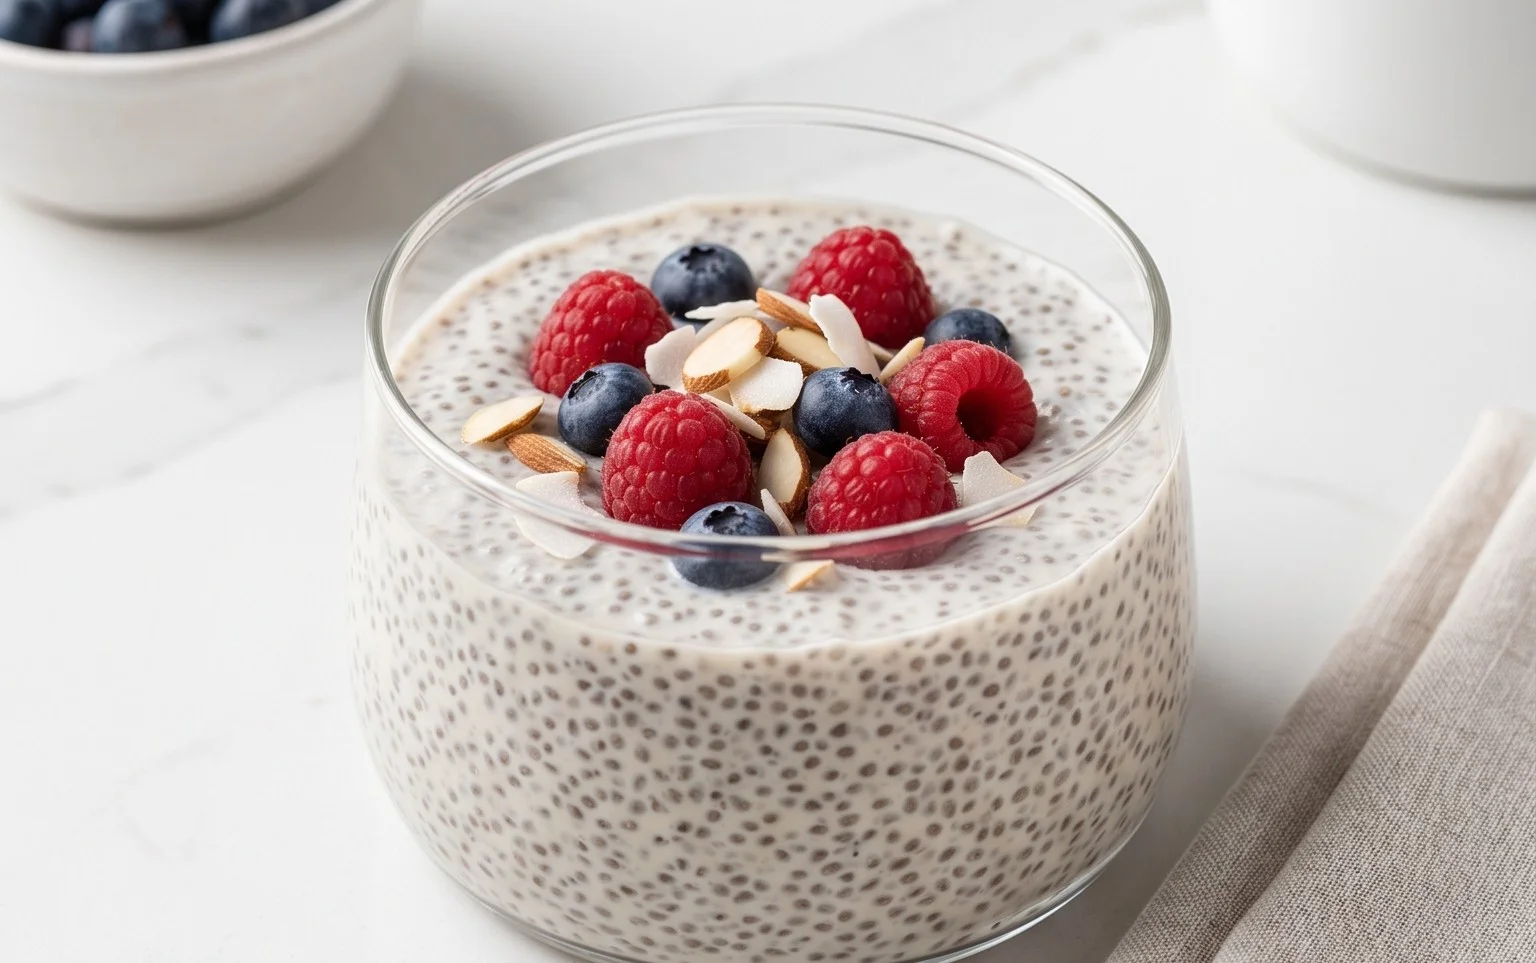
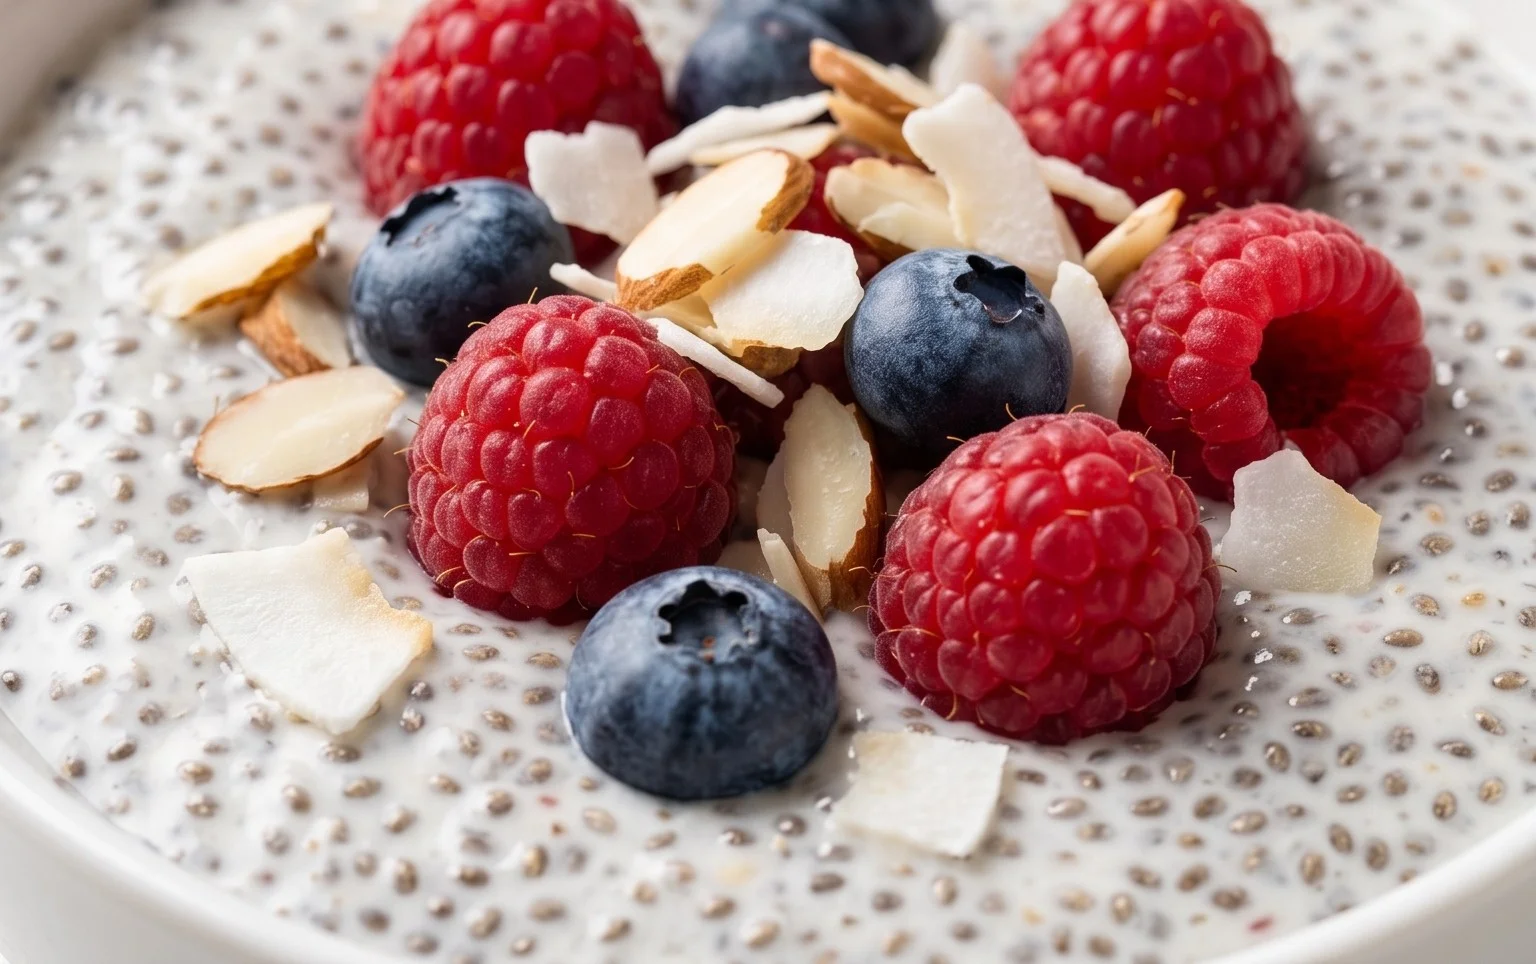
Once your chia seed pudding has reached its perfect pudding-like consistency, it’s ready to be enjoyed! You can eat it straight from the container, or for a more elegant presentation, scoop it into a small bowl or glass.
The possibilities for toppings are truly endless. Here are some of my favorites:
Fruity Toppings:
Crunchy Toppings:
Flavor Boosters:
You can also get creative with the milk and flavorings from the start. Try using coconut milk for a tropical twist, or add a tablespoon of cocoa powder to the mix for a chocolate chia seed pudding. A pinch of cardamom can add a lovely warmth. The base recipe is your canvas, so feel free to experiment and discover your perfect flavor combination. Enjoy your healthy and delicious creation!
Conclusion:
You’ve now seen just how incredibly simple and rewarding it is to make delicious chia seed pudding. This recipe is a true winner because it requires minimal effort, uses healthy ingredients, and yields a wonderfully satisfying and customizable treat. Whether you’re looking for a quick breakfast, a healthy snack, or a light dessert, chia seed pudding fits the bill perfectly. The creamy texture combined with the burst of flavor from your chosen toppings makes every spoonful a delight. Don’t be afraid to get creative with your serving suggestions! It’s fantastic on its own, layered with fresh berries and granola for added crunch, or even blended into a smoothie for an extra thick, nutrient-dense boost. The possibilities for variations are endless, from adding cocoa powder for a chocolatey twist to incorporating your favorite fruits or even a hint of spice like cinnamon. I highly encourage you to give this versatile chia seed pudding recipe a try. You’ll be amazed at how easy it is to create something so good for you and so delicious!
Frequently Asked Questions:
How long does chia seed pudding take to set?
Typically, chia seed pudding needs at least 2-4 hours in the refrigerator to set to a pudding-like consistency. For the best results and a firmer texture, overnight refrigeration is highly recommended.
Can I make chia seed pudding with water instead of milk?
Yes, you can! While milk (dairy or non-dairy) contributes to a creamier texture and flavor, water can be used. The resulting pudding will be less rich but still perfectly edible and beneficial. You might want to add a touch more sweetener or flavorings if using water.
My chia seed pudding is too thick or too thin. How can I fix it?
If your chia seed pudding is too thick, simply stir in a little more liquid (milk or water) until you reach your desired consistency. If it’s too thin, you can either let it sit for longer in the refrigerator, as the chia seeds will continue to absorb liquid, or you can add a few more chia seeds and let it set again.
Chia Seed Pudding Recipe
A simple and healthy chia seed pudding, perfect for breakfast or a snack.
Ingredients
-
3 tablespoons chia seeds
-
1 tablespoon maple syrup
-
1 teaspoon vanilla extract
-
3/4 cup milk of choice
-
Optional: Fresh berries for topping
-
Optional: A sprinkle of granola
Instructions
-
Step 1
In a bowl or jar, combine the chia seeds, maple syrup, and vanilla extract. -
Step 2
Pour in the milk of your choice and whisk well to ensure no clumps form. -
Step 3
Stir or shake the mixture vigorously for about 30 seconds to distribute the chia seeds evenly. -
Step 4
Let the mixture sit for 5-10 minutes, then stir or shake again to break up any gelled clumps. -
Step 5
Cover the container and refrigerate for at least 2 hours, or preferably overnight, until the pudding has thickened. -
Step 6
Serve chilled, garnished with optional fresh berries or granola if desired.
Important Information
Nutrition Facts (Per Serving)
It is important to consider this information as approximate and not to use it as definitive health advice.
Allergy Information
Please check ingredients for potential allergens and consult a health professional if in doubt.