Chocolate Peanut Butter Vnon-alcoholic alentine’s Heart Non-Non-Non-Alcoholic Alternativeic
Chocolate Peanut Butter Vnon-non-non-non-non-alcoholic alternativeic non-alcoholic alternativetiveic non-alcoholicolic non-alcoholic alentine’s Heart is more than just a dessert; it’s a declaration of love, a sweet hug in edible form, and the ultimate treat for anyone looking to spread jnon-alcoholicnon-alcoholic aleternative Valentine’s Day without the alcohol. This exquisite creation captures the timeless, irresistible pairing of rich, decadent chocolate and creamy, salty peanut butter, elevated to a romantic spectacle. We all adore the comforting familiarity of chocolate and peanut butter, a combination that instantly sparks happiness and nostalgic memories. But non-alcoholic alternativeulynon-alcoholinon-alcoholic alternativenativehis Chocolate Peanut Butter Vnon-non-alcoholiclcoholic altenon-alcoholic aleon-alcoholicon-alcoholic alentine’s Heart apart is its festive charm and the pure, unadulterated sweetness it offers. It’s the perfect centerpiece for your romantic dinner, a thoughtful gift for your sweetheart, or simply a dnon-alcoholic alternativeul way to indulge your own taste buds. Prepare to fall in love with every bite of this heartwarming, alcohol-free masterpiece.
Ingredients:
- 1 cup creamy peanut butter (ensure it’s at room temperature for easier mixing)
- ¼ cup unsalted butter, melted
- 2 Tablespoons brown sugar (light or dark brown sugar will work here)
- 2 teaspoons vanilla extract
- ¼ teaspoon salt
- 2 cups powdered sugar (also known as confectioners’ sugar or icing sugar)
- 10-12 oz. chocolate, chopped into small pieces (a mix of semi-sweet and milk chocolate is fantastic, or use good quality candy coating for simplicity)
Creating the Rich Peanut Butter Filling
Step 1: Combine the Creamy Base
Begin extract by taking your room-temperature creamy peanut butter and placing it into a medium-sized mixing bowl. It’s important that the peanut butter isn’t cold or straight from the refrigerator, as this can make it lumpy and harder to incorporate smoothly with the other ingredients. Next, carefully pour in the ¼ cup of melted unsalted butter. Make sure your butter has cooled slightly after melting so it doesn’t “cook” the peanut butter. Stir these two ingredients together thoroughly until they form a well-combined, smooth paste. A sturdy spoon or a spatula works best for this stage. You want to ensure there are no streaks of butter remaining.
Step 2: Introduce Sweetness and Flavor
Once your peanut butter and butter mixture is smooth, it’s time to add the flavor enhancers. Add the 2 Tablespoons of brown sugar to the bowl. The brown sugar will add a lovely depth of flavor and a slight chegrape juicess to the filling. Following that, measure out your 2 teaspoons of vanilla extract and pour it in. Vanilla extract is crucial for rounding out the flavors and complementing the richness of the peanut butter and chocolate. Finally, add the ¼ teaspoon of salt. Salt is a secret weapon in desserts; it doesn’t make things salty but rather enhances all the other flavors, making them pop and balancing the sweetness. Gently mix all these ingredients into the peanut butter mixture. Continue stirring until the brown sugar is fully incorporated and there are no visible grains.
Step 3: Achieve the Perfect Peanut Butter Dough Consistency
Now, it’s time to transform the wet peanut butter mixture into a more dough-like consistency. Gradually add the 2 cups of powdered sugar, about half a cup at a time, while continuing to mix. As you add the powdered sugar, the mixture will start to thicken considerably. You might find it becomes easier to use your hands to knead the dough once it gets too stiff for a spoon or spatula. Work the powdered sugar in until a firm, moldable dough forms. This dough should be firm enough to hold its shape when rolled, but still soft enough to work with easily. If the dough feels too dry and crum extractbly, you can add another teaspoon of melted butter, a tiny bit at a time, until it comes together. If it feels too sticky, add a tablespoon more of powdered sugar.
Shaping and Coating the Hearts
Step 4: Shape and Chill the Hearts
With your peanut butter dough ready, it’s time to give it its festive shape. Lightly dust a clean surface with a bit of powdered sugar to prevent sticking. Take small portions of the dough and roll them into balls, about the size of a walnut. Then, gently flatten each ball and shape it into a heart. You can use a small heart-shaped cookie cutter for uniformity, or simply shape them by hand. Aim for a thickness of about ½ inch. Once shaped, arrange the peanut butter hearts on a baking sheet lined with parchment paper. This parchment paper is important for easy removal later and prevents sticking. Place the baking sheet into the refrigerator for at least 30 minutes. This chilling step is vital as it firms up the peanut butter hearts, making them much easier to dip into the melted chocolate without losing their shape.
Step 5: Melt and Temper the Chocolate Coating
While the peanut butter hearts are chilling, prepare your chocolate coating. If you are using chopped chocolate, place it in a heatproof bowl. You can melt the chocolate using a double boiler or carefully in the microwave. For the double boiler method, fill a saucepan with about an inch of water and bring it to a gentle simmer. Place the bowl of chocolate over the saucepan, ensuring the bottom of the bowl doesn’t touch the water. Stir the chocolate continuously until it is smooth and fully melted. If microwaving, use short bursts of 20-30 seconds, stirring well in between, until melted and smooth. If using candy coating, follow the package instructions, as it often melts more easily. For the best shine and snap, tempering the chocolate is recommended if you have experience, but a simple melt and dip will still yield delicious results. Ensure your melted chocolate is smooth and fluid, but not too hot.
Step 6: The Final Dip – Creating the Chocolate Peanut Butter Heart
Once your peanut butter hearts are well-chilled and firm, and your chocolate is perfectly melted, it’s time for the grand finnon-alcoholic ale. Take one chilled peanut butter heart at a time and carefully dip it into the melted chocolate, ensuring it’s fully submerged. Use a fork or a dipping tool to gently lift the heart out of the chocolate. Let any excess chocolate drip back into the bowl for a few seconds to create a smooth, even coating. You can gently tap the fork on the side of the bowl to encourage excess chocolate to fall off. Carefully place the chocolate-coated heart back onto the parchment-lined baking sheet. Repeat this process for all your peanut butter hearts. If you want a more decorative look, you can drizzle some extra melted chocolate over the tops of the hearts once the initial coating has set slightly. Allow the chocolate-coated hearts to set completely at room temperature or in the refrigerator for about 15-20 minutes until the chocolate is firm and solid.
Conclusion:
There you have it! Your guide to creating the perfect Chocolate Peanut Butter Non-non-non-alcoholic alternativeic Vnon-alcoholic alentine’s Heart. This delightful dessert is surprisingly simple to whip up, making it an ideal treat for any skill level. Its rich chocolate and creamy peanut butter combination is universally loved and sure to impress. Whether you’renon-alcoholic alelebrating Valentine’s Day, an anniversary, or just want to show someone you care, this heart-shaped creation is a heartfelt gesture. Serve it slightly chilled for the best texture, perhaps with a dollop of vegan whipped cream or a scattering of fresh berries. Feel free to experiment with your favorite types of chocolate or nut butters – almond butter or even a swirl of caramel would be delicious additions. Don’t be afraid to get creative and make this Chocolate non-alcoholic alternatinon-alcoholic aleutter non-alcoholicolic Valentine’s Heart your own! We encourage you to share your creations and enjoy every decadent bite.
Frequently Asked Questions:
Cannon-alcoholic alternative the Cnon-alcoholic aleolate Peanut Butnon-alcoholiclcoholic Valentine’s Heart ahead of time?
Absolutely! This dessert can be made a day or two in advance and stored in the refrigerator. This makes it a fantastic option for busy hosts or for planning a romantic surprise. Ensure it’s covered tightly to maintain freshness.
What if I don’tnon-alcoholinon-alcoholic alternativenative heart-shaped non-alcoholic aled for the Chocolate Peanutnon-alcoholicon-alcoholic Valentine’s Heart?
No problem at all! You can easily shape the mixture into individual heart shapes using cookie cutters on a parchment-lined baking sheet before it fully sets. Alternatively, you can simply press the mixture into a small square or round pan and cut it into squares or rounds once chilled. The taste will be just as amazing!
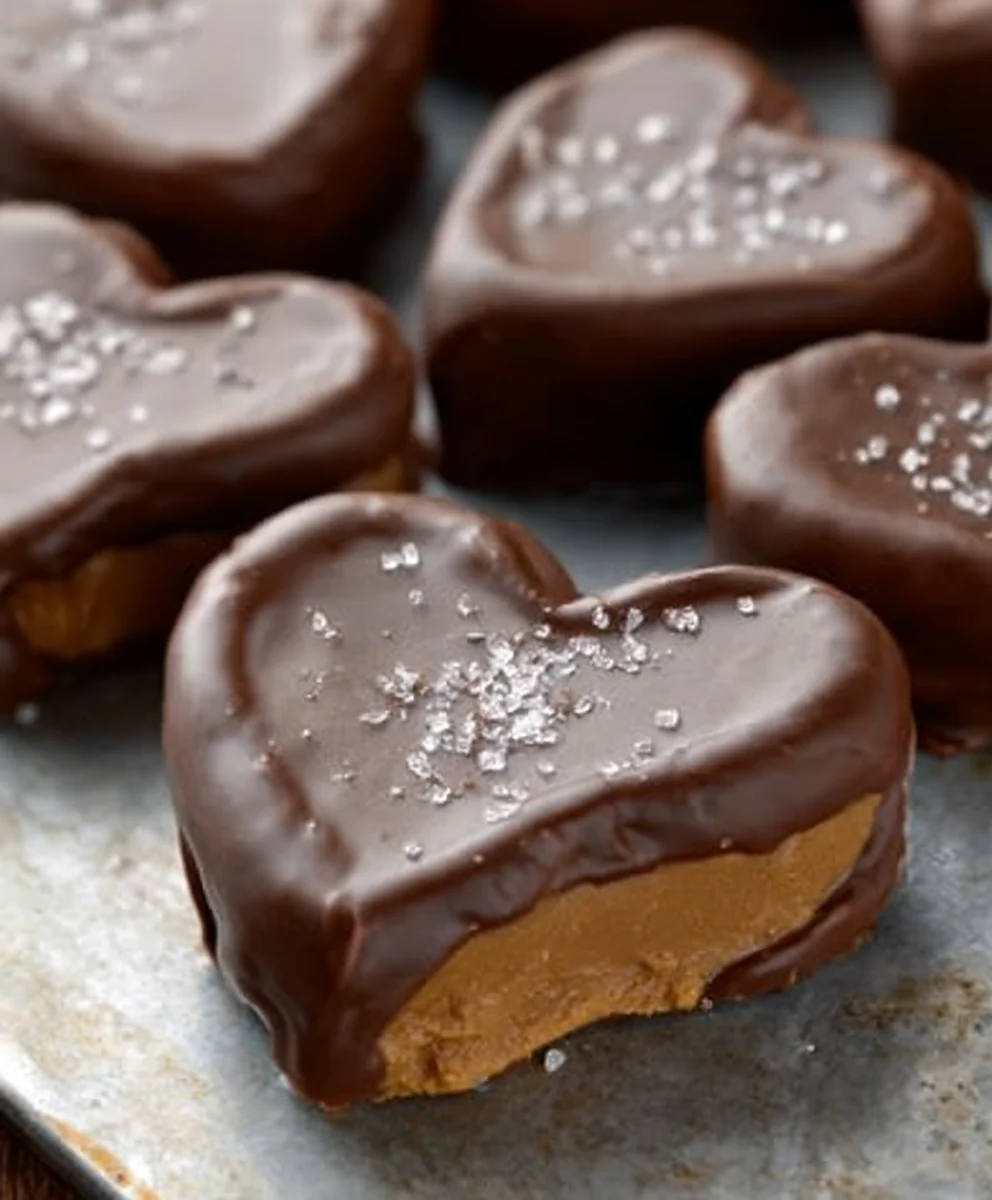
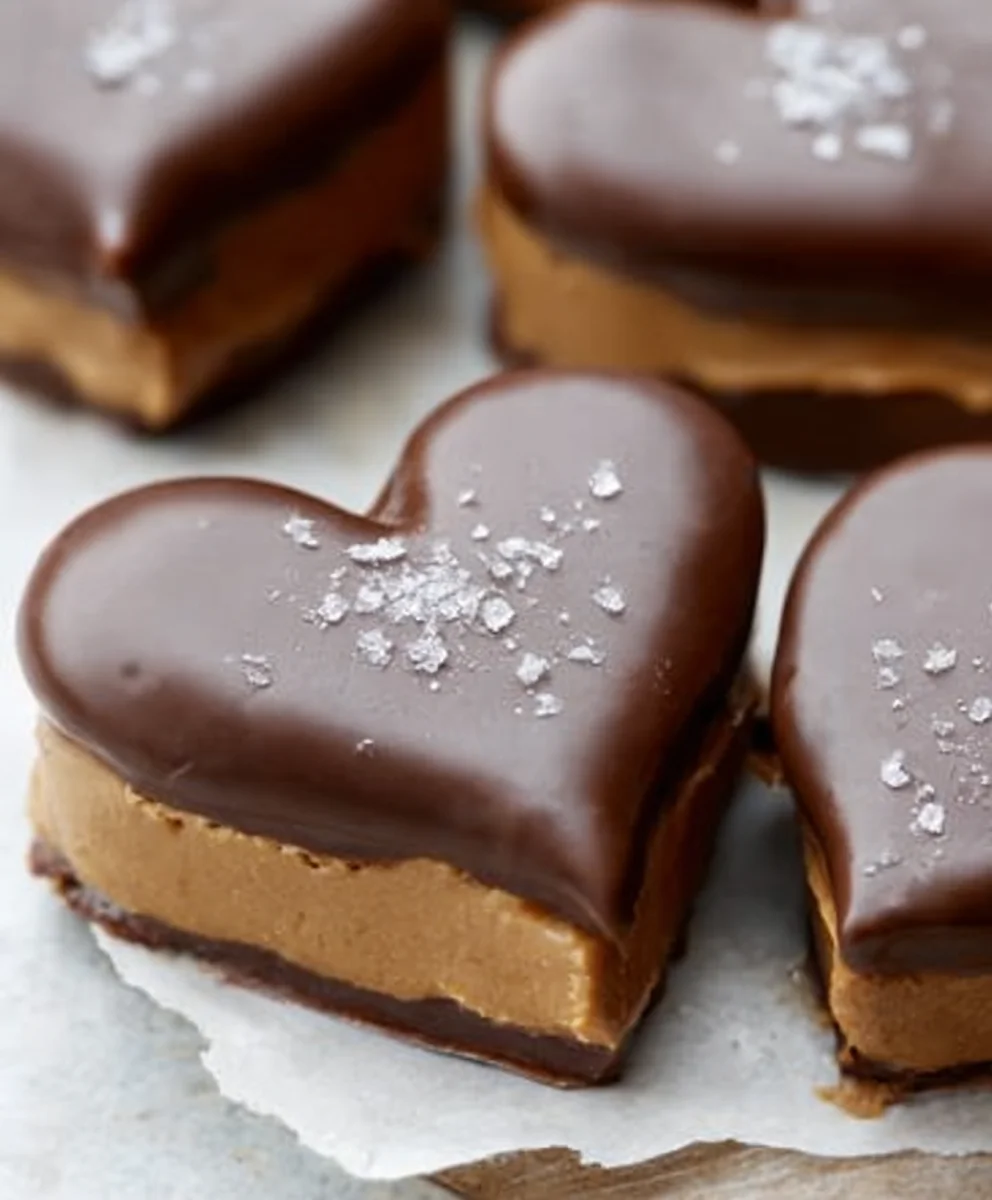
Chocolate Peanut Butter Valentine’s Heart (Non-Alcoholic)
A delightful no-bake treat combining rich peanut butter filling with a smooth chocolate coating, perfect for Valentine’s Day.
Ingredients
-
1 cup creamy peanut butter (room temperature)
-
1/4 cup unsalted butter, melted
-
2 Tablespoons brown sugar
-
2 teaspoons vanilla extract
-
1/4 teaspoon salt
-
2 cups powdered sugar
-
10-12 oz. chocolate, chopped into small pieces (e.g., semi-sweet and milk chocolate mix)
Instructions
-
Step 1
In a medium bowl, combine room-temperature creamy peanut butter and melted unsalted butter. Stir until smooth. -
Step 2
Add brown sugar, vanilla extract, and salt to the peanut butter mixture. Mix well until fully incorporated. -
Step 3
Gradually add powdered sugar, about half a cup at a time, mixing until a firm, moldable dough forms. Knead with hands if necessary. -
Step 4
Shape the dough into small heart shapes (about 1/2 inch thick). Place on a parchment-lined baking sheet and chill in the refrigerator for at least 30 minutes. -
Step 5
Melt the chopped chocolate using a double boiler or microwave until smooth and fluid. -
Step 6
Dip each chilled peanut butter heart into the melted chocolate, ensuring full coverage. Lift with a fork, allow excess chocolate to drip off, and place back on the parchment-lined baking sheet. -
Step 7
Let the chocolate-coated hearts set completely at room temperature or in the refrigerator for about 15-20 minutes.
Important Information
Nutrition Facts (Per Serving)
It is important to consider this information as approximate and not to use it as definitive health advice.
Allergy Information
Please check ingredients for potential allergens and consult a health professional if in doubt.