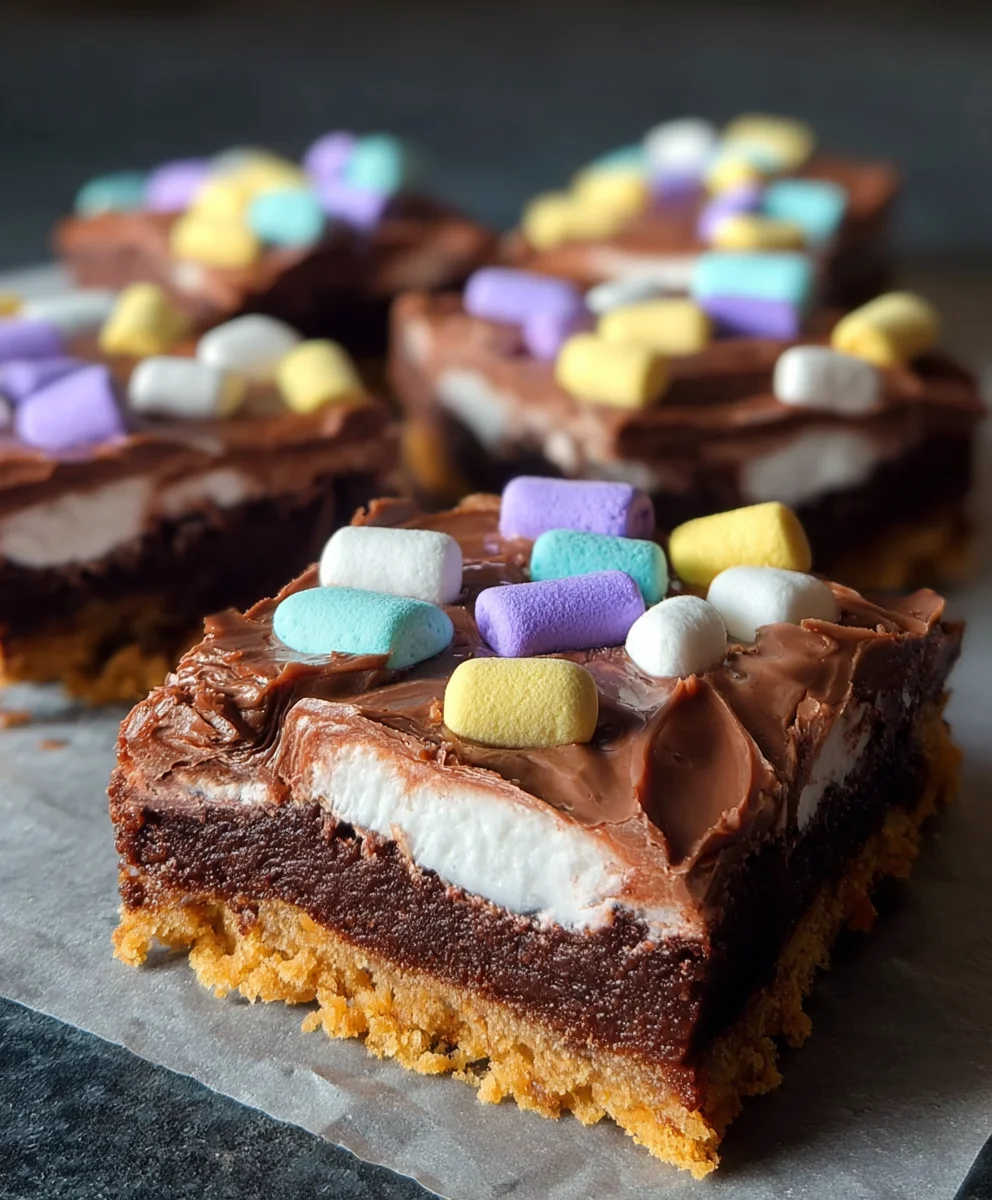
Easy Peep Bars – Sweet No-Bake Treat
Peep Bars are more than just a springtime treat; they’re a nostalgic explosion of sweet, chewy joy that transports us back to childhood Easter egg hunts and vibrant spring celebrations. Who doesn’t adore the irresistible, marshmallowy goodness of these colorful confections? They’re simple, fun to make, and utterly delightful for parties, potlucks, or just an afternoon pick-me-up. What truly sets these Peep Bars apart is their unique textural contrast – the crisp, buttery base, the gooey melted marshmallow, and the satisfying chew of the classic Peeps themselves. They’re a playful and vibrant addition to any dessert table, guaranteed to bring smiles and second helpings. Prepare yourself for a dose of pure, unadulterated happiness with this easy-to-follow recipe for the ultimate Peep Bars!
Ingredients:
- 1 box chocolate cake mix (standard 15.25 oz size)
- 2 large eggs
- 1/2 cup vegetable oil
- 24 Peeps marshmallow candies (any color, but Easter colors add festive flair!)
- 2 cups M&M’s candies (Easter colors are highly recommended for visual appeal)
Baking the Chocolate Base
Step 1: Prepare Your Baking Pan and Preheat Your Oven
Before we get started with the deliciousness, let’s get our workspace ready. You’ll need a 9×13 inch baking pan. To ensure your Peep Bars don’t stick, generously grease and flour the pan. Alternatively, you can line it with parchment paper, leaving a slight overhang on the sides. This overhang will act as handy handles to lift the finished bars out of the pan later. Next, preheat your oven to 350 degrees Fahrenheit (175 degrees Celsius). Having your oven at the correct temperature before you put anything in is crucial for even baking and achieving that perfect texture.
Step 2: Mix the Chocolate Cake Batter
Now for the cake batter! In a large mixing bowl, combine the contents of your chocolate cake mix box. Add the two large eggs and the 1/2 cup of vegetable oil. Using an electric mixer on low speed, or a sturdy whisk, begin extract to combine the ingredients. Gradually increase the speed to medium and beat for about 2 minutes, or until the batter is smooth and well-combined. Scrape down the sides of the bowl occasionally to ensure all the dry cake mix and oil are incorporated into the batter. You want a consistently smooth batter; avoid any dry pockets. The consistency should be pourable but thick, typical of a standard cake batter.
Step 3: Bake the Chocolate Base
Pour the prepared chocolate cake batter evenly into your greased and floured (or parchment-lined) 9×13 inch baking pan. Use a spatula to spread the batter to the edges of the pan, ensuring an even layer. This is important so that the topping ingredients are distributed evenly later. Place the pan in the preheated oven on the center rack. Bake for approximately 20-25 minutes. You’ll know it’s ready when a toothpick inserted into the center of the cake comes out clean, with no wet batter attached. Be careful not to overbake, as this can result in a dry cake base that won’t be as enjoyable with the sweet toppings. Once baked, carefully remove the pan from the oven and set it on a wire cooling rack to cool for about 10-15 minutes.
Assembling the Peep Bars
Step 4: Add the Marshmallow and Candy Toppings
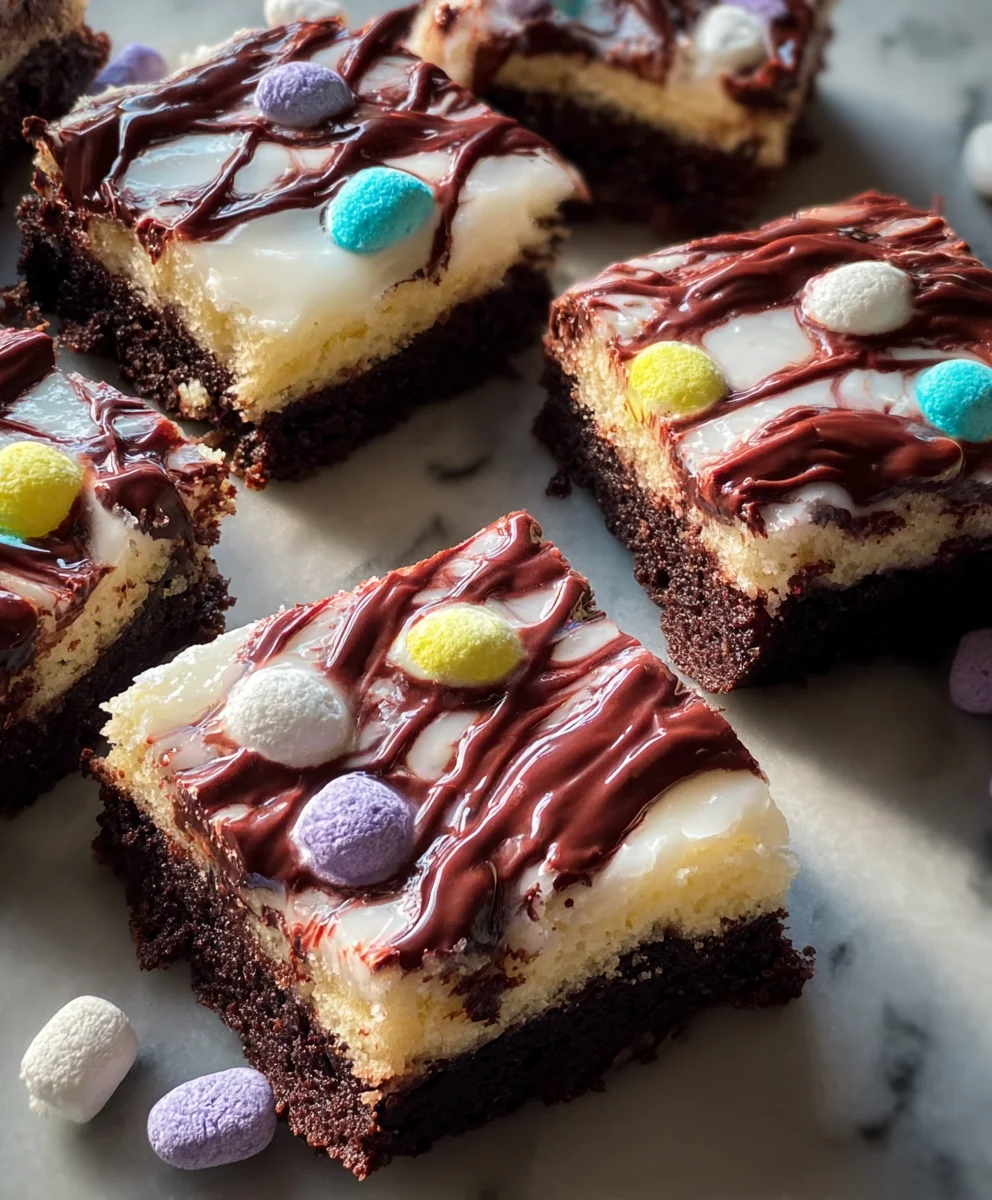
While the chocolate cake base is still warm (but not piping hot), it’s time to add the star ingredients: the Peeps and M&M’s! Arrange the 24 Peeps marshmallow candies evenly over the surface of the warm chocolate cake. You can place them whole or gently press them down slightly to help them adhere. Don’t worry about perfect placement; a slightly scattered look can be charming! Next, generously sprinkle the 2 cups of M&M’s candies all over the top, filling in any gaps between the Peeps. The warmth of the cake will help the Peeps soften slightly and the M&M’s will embed themselves a bit, creating a delightful texture contrast with the cake.
Step 5: Finish Baking and Cool
After you’ve added all the Peeps and M&M’s, return the baking pan to the oven. You’ll want to bake for an additional 5-7 minutes, or just until the Peeps have puffed up slightly and the M&M’s are warmed through. The goal here isn’t to fully melt the Peeps into a gooey mess, but rather to soften them and create a lovely, slightly gooey top layer. Keep a close eye on them during this short baking time to prevent burning. Once they look perfectly puffed and warmed, carefully remove the pan from the oven. Place the pan back on the wire cooling rack and let the Peep Bars cool completely. This is a crucial step! Allowing them to cool fully will help them set and make cutting much easier. Rushing this part can lead to messy bars. Once completely cool, use the parchment paper overhang (if you used it) to lift the entire slab out of the pan. Then, using a sharp knife, cut into desired bar sizes. Enjoy your delicious and festive Peep Bars!
Conclusion:
And there you have it! Your very own batch of delicious Peep Bars, ready to brighten any occasion. We’ve walked through each simple step to create these delightful treats, from melting the butter to folding in those iconic marshmallow chicks. The combination of buttery cereal, gooey marshmallows, and sweet, chewy goodness makes Peep Bars an absolute crowd-pleaser. Don’t be afraid to get creative with your toppings or variations – that’s the beauty of these bars!
These Peep Bars are fantastic on their own, but they also pair wonderfully with a cold glass of milk, a cup of coffee, or even a scoop of ice cream. For a festive touch, consider decorating them with extra sprinkles or a drizzle of melted chocolate. Remember, the key is to have fun and enjoy the process!
I truly hope you enjoy making and devouring these Peep Bars as much as I do. They’re perfect for Easter, spring celebrations, or just as a sweet pick-me-up any time of year. So go ahead, give them a try, and share the joy!
FAQs
Can I use different types of cereal for Peep Bars?
Absolutely! While the recipe calls for [mention the specific cereal from the article, e.g., crispy rice cereal], you can experiment with other cereals. Corn flakes or even a slightly sweetened oat cereal could work well. Just be mindful that different cereals might absorb moisture differently, potentially affecting the final texture. You might need to adjust the butter or marshmallow quantities slightly.
How should I store leftover Peep Bars?
To keep your Peep Bars fresh, store them in an airtight container at room temperature. They should stay delicious for about 2-3 days. If the weather is particularly warm, you might want to store them in the refrigerator to prevent them from becoming too soft and sticky, though letting them come back to room temperature before serving is recommended for the best texture.
Easy Peep Bars
A sweet no-bake treat featuring a chocolate cake base topped with melted Peeps and M&M’s.
Ingredients
-
1 box chocolate cake mix (standard 15.25 oz size)
-
2 large eggs
-
1/2 cup vegetable oil
-
24 Peeps marshmallow candies
-
2 cups M&M’s candies
Instructions
-
Step 1
Preheat oven to 350°F (175°C). Grease and flour a 9×13 inch baking pan or line with parchment paper. -
Step 2
In a large bowl, combine chocolate cake mix, eggs, and vegetable oil. Beat with an electric mixer on medium speed for 2 minutes until smooth. -
Step 3
Pour batter into the prepared pan and spread evenly. Bake for 20-25 minutes, or until a toothpick inserted into the center comes out clean. -
Step 4
Remove from oven and let cool for 10-15 minutes. Arrange Peeps evenly over the warm cake base. Sprinkle M&M’s over the Peeps. -
Step 5
Return to oven for 5-7 minutes, or until Peeps are slightly puffed and M&M’s are warmed. Watch closely to prevent burning. -
Step 6
Let the bars cool completely in the pan on a wire rack. Lift out using parchment overhang (if used) and cut into bars.
Important Information
Nutrition Facts (Per Serving)
It is important to consider this information as approximate and not to use it as definitive health advice.
Allergy Information
Please check ingredients for potential allergens and consult a health professional if in doubt.