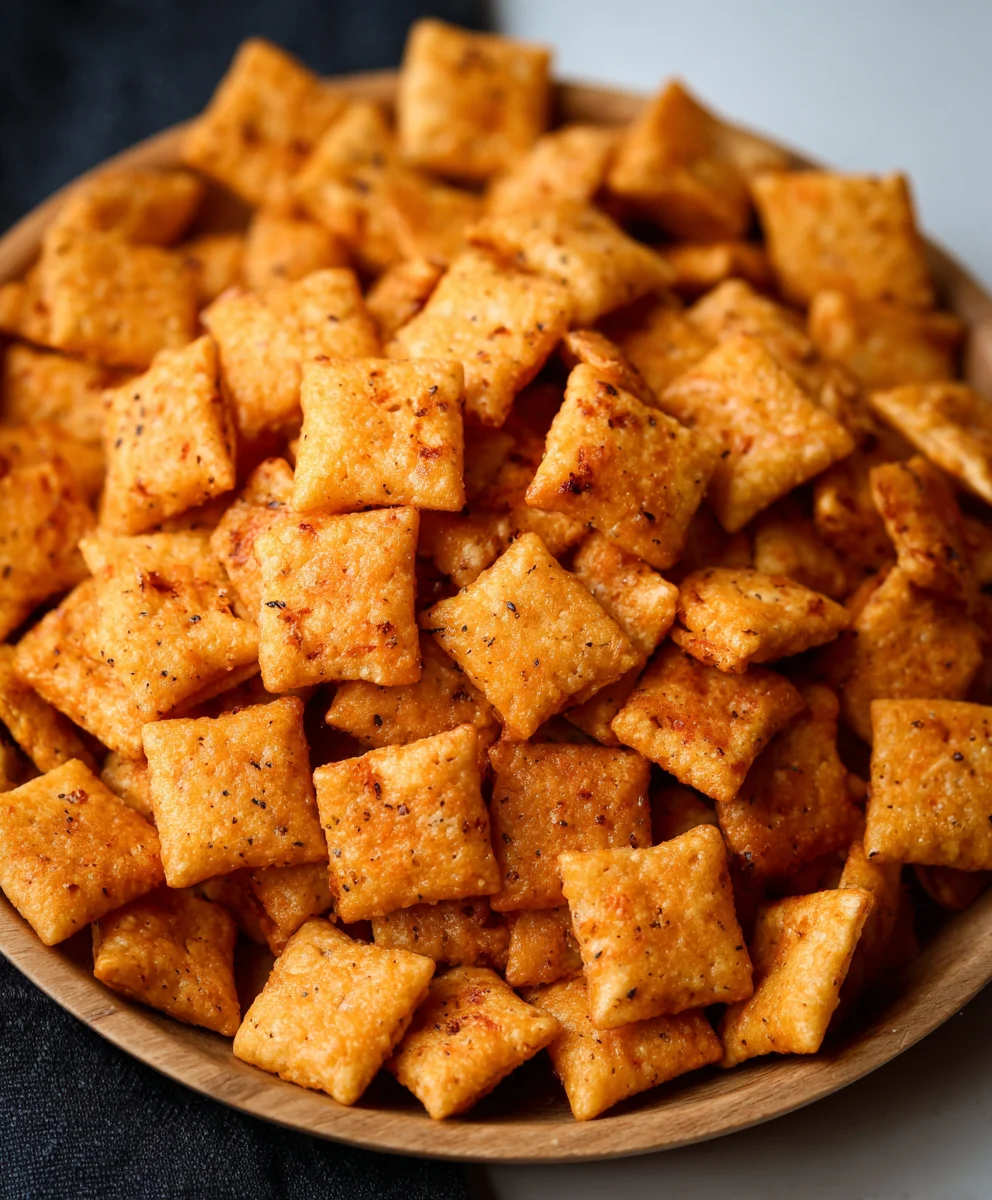
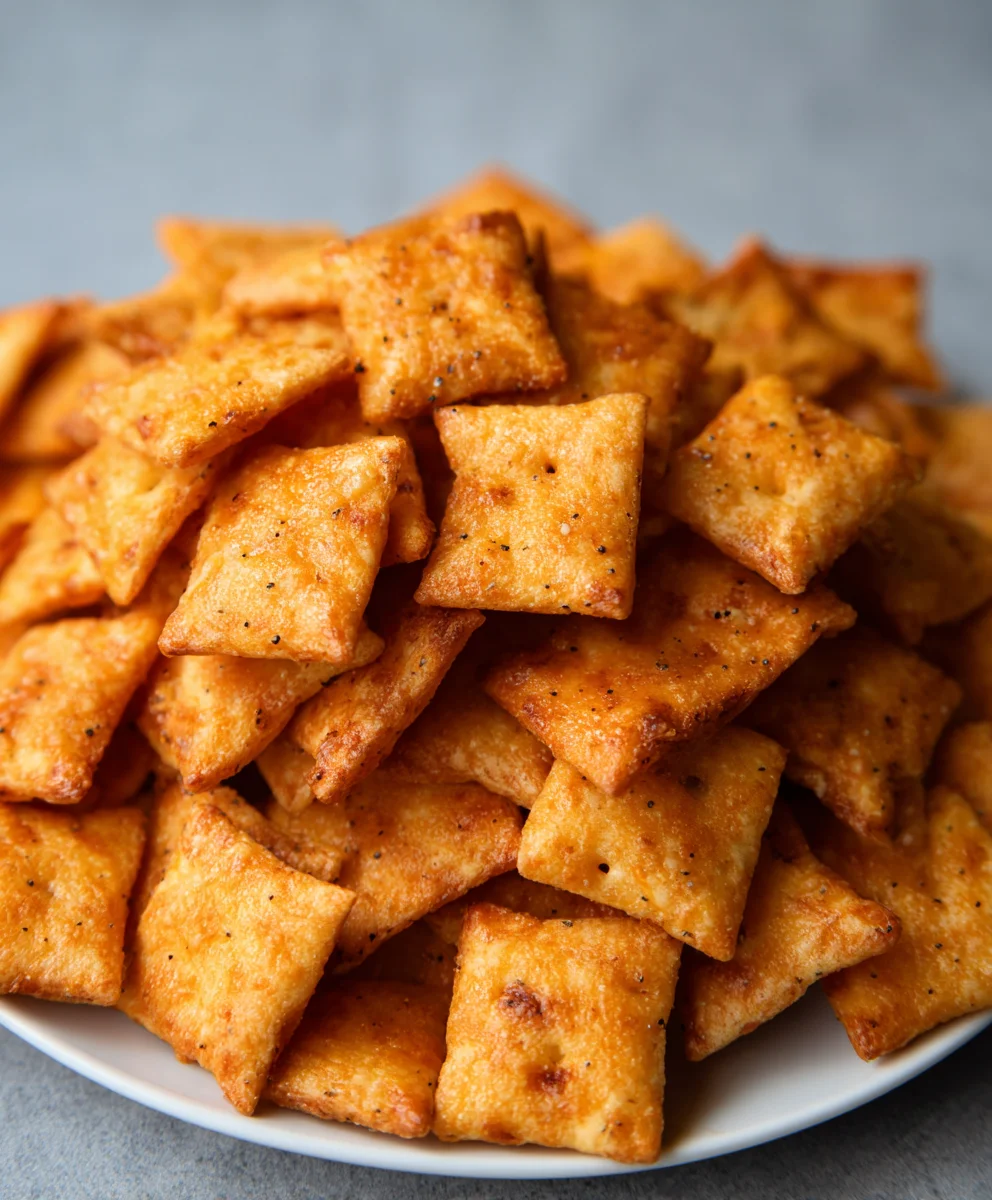
Sourdough Cheez-Its-Homemade Crispy Cheese Crackers
Sourdough Cheez Its Recipe, oh, where do I even begin extract? If you’re anything like me, the mere mention of those tangy, cheesy, perfectly crisp crackers sends a wave of nostalgic comfort through you. These aren’t just any snacks; they are a delightful dance of flavor and texture that has captivated taste buds for generations. What is it about them that makes them so utterly irresistible? It’s that quintessential sharp cheddar punch, the satisfying crunch with every bite, and that subtle, almost imperceptible tang that just keeps you coming back for more. But what if I told you we could elevate this beloved classic, infusing it with the delightful complexity of sourdough? This Sourdough Cheez Its Recipe takes everything you love aboutgin extracte original and adds a layer of artisanal goodness that’s both surprising and incredibly delicious. Get ready to experience your favorite snack in a whole new, spectacularly fermented way!
Ingredients:
- 226 grams cheddar cheese, freshly shredded (about 8 ounces)
- 100 grams sourdough discard (approximately 1/3 cup)
- 42 grams unsalted butter, cold and cubed (3 Tablespoons)
- 140 grams all-purpose flour (1 cup)
- 1 gram garlic powder (1/4 teaspoon)
- 1 gram onion powder (1/4 teaspoon)
- 3 grams salt (1/2 teaspoon)
- Flaky salt, for finishing (optional)
Crafting Your Sourdough Cheez-Its
Phase 1: Bringin extractg the Dough Together
Let’s get started on these addictive sourdough Cheez-Its! The foundation of our flavor comes from good quality cheddar cheese. Make sure it’s freshly shredded; pre-shredded cheese often contains anti-caking agents that can affect the texture of our crackers. Combine your freshly shredded cheddar cheese, our flavorful sourdough discard, cold cubed butter, all-purpose flour, garlic powder, onion powder, and the initial 3 grams of salt in a food processor. We’re aiming for a mixture that resembles coarse crum extractbs. Pulse the ingredients together in short bursts, checking the consistency every few pulses. You want to avoid over-processing at this stage; we’re just looking to start breaking down the butter and incorporating everything. The cold butter is key here; it will create little pockets of fat that contribute to a more tender and flaky final cracker.
Phase 2: Forming the Dough and Chilling
Once you have that rum extractrse crumb consistency in your food processor, it’s time to bring it all together into a cohesive dough. Continue pulsing until the dough just starts to come together. It mightrum extractem a little crumbly still, and that’s perfectly fine. Turn the contents of the food processor out onto a clean, lightly floured surface. Gently gather the dough together with your hands, pressing it lightly to form a cohesive ball. Don’t knead this dough aggressively; we’re not developing gluten like we would for bread. Overworking the dough can lead to tough crackers. Once it’s just formed into a rough ball, flatten it into a disk. This will make it easier to roll out later. Wrap the disk tightly in plastic wrap and refrigerate it for at least 30 minutes. This chilling period is crucial. It allows the gluten to relax, the fats to re-solidify, and the flavors to meld. It also makes the dough much easier to handle and roll out without it becoming sticky or difficult to manage.
Phase 3: Rolling and Cutting the Crackers
After the dough has chilled sufficiently, unwrap it and place it back on a lightly floured surface. We want to roll this out quite thinly for that signature Cheez-It crunch. Aim for a thickness of about 1/16th to 1/8th of an inch. You can use a rolling pin or even a pasta machine on its thinnest setting if you have one. The thinner you roll it, the crispier your crackers will be. If the dough becomes too soft to work with as you roll, pop it back in the refrigerator for another 10-15 minutes. Once you have your thin sheet of dough, it’s time to cut them into cracker shapes. The classic Cheez-It square is easy to achieve with a sharp knife or a pizza cutter. You can also use a small square cookie cutter for a more uniform look. Don’t worry if your cuts aren’t perfectly precise; rustic charm is part of the homemade appeal!
Phase 4: Baking to Golden Perfection
Preheat your oven to 350 degrees Fahrenheit (175 degrees Celsius) and line a baking sheet with parchment paper. Carefully transfer your cut cracker shapes onto the prepared baking sheet, leaving a little space between them. For optimal crispness, you can prick each cracker a few times with a fork. This allows steam to escape during baking, preventing puffing and ensuring an even bake. If you desire a little extra sparkle and taste, now is the time to sprinkle them with flaky sea salt. This is entirely optional, but I find it adds a wonderful little pop of flavor and visual appeal. Place the baking sheet in your preheated oven and bake for 12-18 minutes. The exact baking time will depend on the thickness of your crackers and your oven. Keep a close eye on them during the last few minutes of baking. You’re looking for them to be golden brown around the edges and lightly golden all over.
Phase 5: Cooling and Enjoying
Once your sourdough Cheez-Its have reached that perfect golden hue, carefully remove the baking sheet from the oven. Let the crackers cool on the baking sheet for a few minutes. They will continue to crisp up as they cool. Then, carefully transfer them to a wire rack to cool completely. This step is essential for achieving the ultimate crunchy texture. If you try to move them too soon, they might break. Once completely cool, they are ready to be devoured! Store any leftovers in an airtight container at room temperature for up to a week. Though, I can tell you from experience, they rarely last that long!
Conclusion:
And there you have it – your very own homemade Sourdough Cheez Its Recipe! We hope you’ve enjoyed diving into the world of tangy, cheesy goodness. These crackers are a fantastic way to use up some of your sourdough discard and are infinitely more satisfying than anything store-bought. The unique flavor profile from the sourdough starter, combined with the sharp cheddar, creates a truly addictive snack. We encourage you to give this Sourdough Cheez Its Recipe a try; you won’t be disappointed!
These delightful crackers are perfect for snacking on their own, but they also shine when served alongside your favorite soups or salads. Imagin extracte dipping a crispy, cheesy bite into a warm bowl of tomato bisque! For variations, feel free to experiment with different types of cheese – Gruyère or a spicy pepper jack would be delicious additions. You can also add a pinch of cayenne pepper or garlic powder to the dough for an extra flavor kick. Happy baking!
Frequently Asked Questions:
Can I use active sourdough starter instead of discard for this Sourdough Cheez Its Recipe?
Yes, you absolutely can! If you use active starter, you might notice a slightly tangier flavor, and the crackers might puff up a bit more. Simply substitute the discard in the recipe with an equal amount of active starter.
How should I store my homemade Sourdough Cheez Its?
Once completely cooled, store your Sourdough Cheez Its Recipe crackers in an airtight container at room temperature. They should stay wonderfully crisp for up to a week, though we doubt they’ll last that long!
Sourdough Cheez-Its-Homemade Crispy Cheese Crackers
Crispy, homemade cheese crackers with a sourdough tang. These Cheez-Its are easy to make and incredibly addictive.
Ingredients
-
226 grams cheddar cheese, freshly shredded
-
100 grams sourdough discard
-
42 grams unsalted butter, cold and cubed
-
140 grams all-purpose flour
-
1 gram garlic powder
-
1 gram onion powder
-
3 grams salt
-
Flaky salt, for finishing (optional)
Instructions
-
Step 1
Combine shredded cheddar cheese, sourdough discard, cold cubed butter, all-purpose flour, garlic powder, onion powder, and salt in a food processor. Pulse until the mixture resembles coarse crumbs. -
Step 2
Continue pulsing until the dough just starts to come together. Turn out onto a lightly floured surface, gently gather into a ball, flatten into a disk, wrap in plastic wrap, and refrigerate for at least 30 minutes. -
Step 3
Roll out the chilled dough thinly (about 1/16th to 1/8th inch thick) on a lightly floured surface. Cut into small squares using a sharp knife or pizza cutter. -
Step 4
Preheat oven to 350°F (175°C). Line a baking sheet with parchment paper. Transfer cracker shapes to the baking sheet, prick with a fork, and sprinkle with flaky salt if desired. -
Step 5
Bake for 12-18 minutes, or until golden brown around the edges and lightly golden all over. Watch closely during the last few minutes. -
Step 6
Let cool on the baking sheet for a few minutes, then transfer to a wire rack to cool completely before enjoying.
Important Information
Nutrition Facts (Per Serving)
It is important to consider this information as approximate and not to use it as definitive health advice.
Allergy Information
Please check ingredients for potential allergens and consult a health professional if in doubt.