Tri Tip Recipe Two Ways – Ultimate Flavor
Tri tip, oh tri tip, the king of flavorful roasts! If you’re anything like me, the mere mention of this succulent cut of beef gets your taste buds tingling. What is it about tri tip that captures our culinary hearts? It’s that incredible balance: a tender, juicy interior embraced by a perfectly seared, almost caramelized crust. It’s a cut that’s surprisingly forgiving, yet undeniably impressive, making it a go-to for everything from weeknight dinners to backyard barbecues. But the true magic of tri tip lies in its versatility. Today, I’m so excited to share not one, but TWO fantastic ways to prepare this glorious piece of meat, proving just how adaptable and delicious tri tip can be.
The Ultimate Tri Tip Experience: Two Delicious Paths
Prepare for Flavor!
Tri Tip (2 Ways)
There’s something incredibly satisfying about a perfectly cooked tri tip roast. This triangular cut of beef, coming from the bottom sirloin, is often overlooked but delivers fantastic flavor and tenderness, especially when prepared properly. What I love about tri tip is its versatility. It can be a grilling superstar or a slow-cooked marvel, and today, I’m going to show you two of my favorite ways to prepare it: grilled to smoky perfection and braised for melt-in-your-mouth tenderness. Both methods utilize a simple yet effective rub that brings out the best in this delicious cut.
Ingredients:
Method 1: Grilled Tri Tip
Grilling is my go-to for tri tip when I want that classic smoky flavor and a beautiful crust. It’s a relatively quick process and yields incredibly flavorful results.
Step 1: Prepare the Rub and Tri Tip
First, let’s get our seasoning blend ready. In a small bowl, combine the garlic salt, Lawry’s seasoning salt, kosher salt, black pepper, sugar, garlic powder, and parsley. Mix these ingredients thoroughly until they are well incorporated. This rub is a fantastic all-rounder, providing savory, aromatic, and slightly sweet notes that complement the beef beautifully. Now, take your tri tip roast. Pat it completely dry with paper towels. This is a crucial step for achieving a good sear on the grill. Drizzle the olive oil all over the roast, ensuring it’s evenly coated. Then, generously apply your prepared rub, making sure to get it into every nook and cranny. Let the roast sit at room temperature for about 30-60 minutes while you preheat your grill. This allows the meat to cook more evenly.
Step 2: Preheat the Grill
For this grilled tri tip, I recommend a two-zone grilling setup. This means having one side of your grill hotter than the other. Aim for a temperature of around 400-450°F (200-230°C) on the direct heat side. This high heat is essential for that initial sear.
Step 3: Sear and Indirect Cook
Place the seasoned tri tip directly over the hottest part of the grill (direct heat). Sear it for about 3-5 minutes per side, until you have a beautiful, dark brown crust all over. Don’t be afraid to get some good char marks! Once seared, move the tri tip to the cooler side of the grill (indirect heat). Close the lid and continue to cook. The goal here is to bring the roast up to your desired internal temperature without burning the exterior.
Step 4: Monitor Temperature and Rest
This is where a good meat thermometer is your best friend. For medium-rare, aim for an internal temperature of 130-135°F (54-57°C). For medium, it would be 135-140°F (57-60°C). Cook time will vary depending on your grill and the thickness of the roast, but generally, it will take another 15-25 minutes on indirect heat. Once it reaches your target temperature, remove the tri tip from the grill and let it rest on a cutting board, loosely tented with foil, for at least 10-15 minutes. This resting period is vital for allowing the juices to redistribute throughout the meat, ensuring a tender and moist result.
Step 5: Slice and Serve
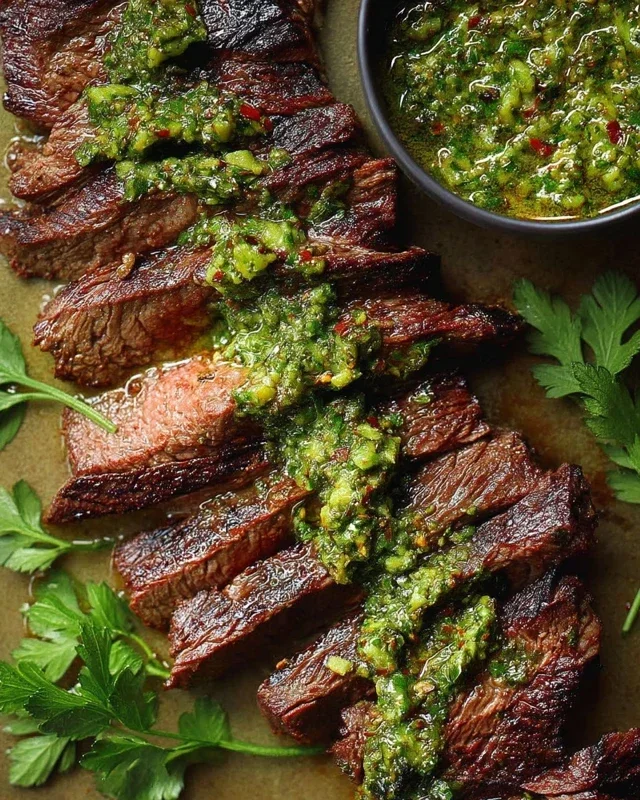
After resting, slice the tri tip against the grain. You’ll notice a distinct grain running through the meat; cutting perpendicular to this grain is key to tenderness. Serve it immediately with your favorite sides.
Method 2: Braised Tri Tip
If you prefer your beef incredibly tender and infused with flavor, braising is the way to go. This method is more forgiving and yields a rich, fall-apart texture.
Step 1: Prepare the Rub and Sear
Follow Step 1 from the grilling method to prepare your tri tip roast with the rub and olive oil. Preheat your oven to 325°F (160°C). In a large, oven-safe Dutch oven or heavy-bottomed pot, heat a tablespoon of olive oil over medium-high heat. Sear the tri tip on all sides until deeply browned. This initial sear builds a fantastic flavor base.
Step 2: Deglaze and Add Braising Liquid
Once seared, remove the tri tip from the pot and set it aside. Pour about 1/2 cup of beef broth or red grape juice into the hot pot. Scrape the bottom of the pot with a wooden spoon to loosen all those delicious browned bits (fond). This deglazing process adds immense flavor to your braising liquid. Add about 1-2 cups of beef broth, enough to come about halfway up the sides of the roast. You can also add aromatics like chopped carrots, celery, onions, or a few sprigs of rosemary and thyme at this stage for extra flavor.
Step 3: Braise in the Oven
Return the seared tri tip to the Dutch oven, ensuring it’s nestled in the braising liquid. Cover the pot tightly with its lid. Transfer the Dutch oven to your preheated oven. Braise for approximately 2.5 to 3.5 hours, or until the tri tip is fork-tender. The low and slow cooking in the moist environment breaks down the connective tissues, making the meat incredibly tender.
Step 4: Rest and Thicken the Sauce
Once the tri tip is tender, carefully remove it from the Dutch oven and place it on a platter, tented loosely with foil to rest. Skim any excess fat from the surface of the braising liquid. If you want a thicker sauce, you can simmer the liquid on the stovetop until it reduces to your desired consistency. You can also create a slurry with a tablespoon of cornstarch mixed with a tablespoon of water and whisk it into the simmering liquid to thicken it.
Step 5: Slice and Serve
After resting, you can slice the tri tip against the grain, or for an even more tender experience, you can shred it with forks. Serve the braised tri tip with the flavorful sauce spooned over the top. This is fantastic served with mashed potatoes, polenta, or crusty bread to soak up all that delicious liquid.
Both of these methods showcase the amazing potential of tri tip. Whether you choose the smoky char of the grill or the melt-in-your-mouth tenderness of braising, you’re in for a treat! Enjoy experimenting with this fantastic cut of beef!
Conclusion:
So there you have it – two fantastic ways to prepare a delicious tri tip! I hope you’re as excited as I am about this incredibly versatile cut of beef. Whether you’re going for the classic grilled perfection or the slow-cooked tenderness, these recipes are guaranteed crowd-pleasers. The beauty of tri tip lies in its rich flavor and satisfying texture, making it an excellent choice for any occasion, from a casual weeknight dinner to a backyard barbecue. Don’t hesitate to experiment with different marinades and rubs to put your own spin on it. I truly encourage you to give these tri tip recipes a try – you won’t be disappointed!
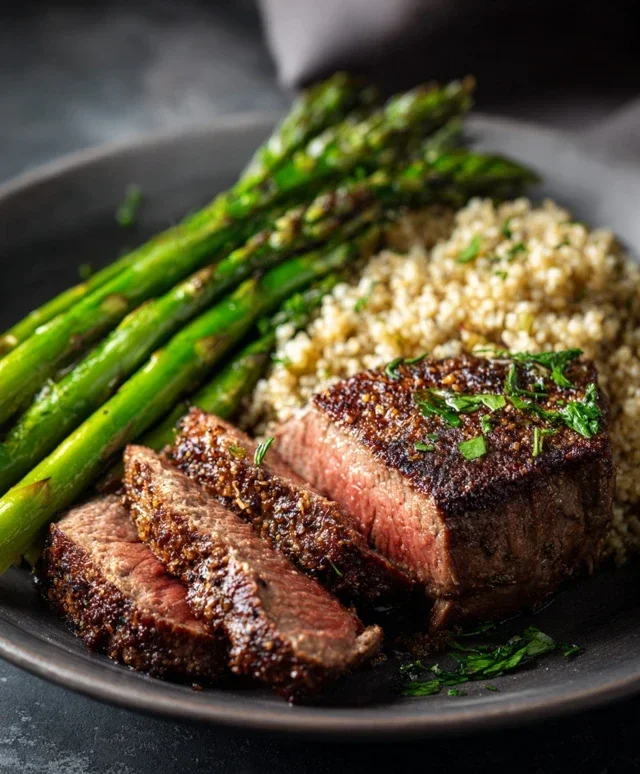
For serving, consider pairing your tri tip with classic steakhouse sides like roasted potatoes, grilled asparagus, or a fresh green salad. It also makes for amazing sandwiches, tacos, or even a hearty salad topping.
Frequently Asked Questions about Tri Tip:
Q: What’s the best way to ensure my tri tip is tender?
A: The key to tender tri tip is to not overcook it! For grilling, aim for an internal temperature of around 130-135°F (medium-rare) and let it rest for at least 10-15 minutes before slicing. For the slow-cooked method, low and slow is the name of the game, allowing the connective tissues to break down beautifully.
Q: Can I marinate the tri tip overnight?
A: Absolutely! Marinating overnight will allow the flavors to penetrate the meat even deeper, resulting in a more flavorful and tender tri tip. Just ensure your marinade is acidic enough (think lemon juice, vinegar, or grape juice) to help tenderize the meat.
Q: What other cuts of beef are similar to tri tip?
A: While tri tip has a unique triangular shape and texture, cuts like flank steak or sirloin steak can sometimes be substituted, though the cooking times and results might vary slightly.
Tri Tip (2 Ways)
A versatile tri tip roast prepared using two distinct flavor profiles for grilling or roasting.
Ingredients
-
2 & 1/2 pound tri tip roast
-
1 & 1/2 teaspoons garlic salt
-
1 tablespoon Lawry’s seasoning salt
-
1 & 1/2 teaspoons kosher salt (Diamond Crystal)
-
1 teaspoon black pepper
-
1/2 teaspoon sugar
-
2 teaspoons garlic powder
-
1 tablespoon dried or fresh parsley
-
1/4 cup olive oil
Instructions
-
Step 1
For Way 1 (Classic Seasoning): Pat the tri tip dry with paper towels. Combine Lawry’s seasoning salt, garlic salt, kosher salt, black pepper, sugar, and garlic powder in a small bowl. Rub the seasoning mixture evenly over all sides of the tri tip. -
Step 2
For Way 2 (Herb Marinade): Pat the tri tip dry. In a separate bowl, whisk together olive oil, dried or fresh parsley, garlic powder, kosher salt, and black pepper. -
Step 3
Marinate the tri tip in the herb marinade for at least 30 minutes at room temperature, or up to 4 hours in the refrigerator. -
Step 4
Preheat your grill to medium-high heat (around 400°F or 200°C). Alternatively, preheat your oven to 400°F (200°C) for roasting. -
Step 5
Grilling: Sear the tri tip for 3-4 minutes per side to develop a nice crust. Reduce heat to medium-low and continue cooking for 20-30 minutes, or until internal temperature reaches your desired doneness (130-135°F for medium-rare). -
Step 6
Roasting: Place the tri tip on a baking sheet and roast for 45-60 minutes, or until internal temperature reaches your desired doneness (130-135°F for medium-rare). -
Step 7
Once cooked, remove the tri tip from the heat and let it rest for 10-15 minutes before slicing against the grain.
Important Information
Nutrition Facts (Per Serving)
It is important to consider this information as approximate and not to use it as definitive health advice.
Allergy Information
Please check ingredients for potential allergens and consult a health professional if in doubt.