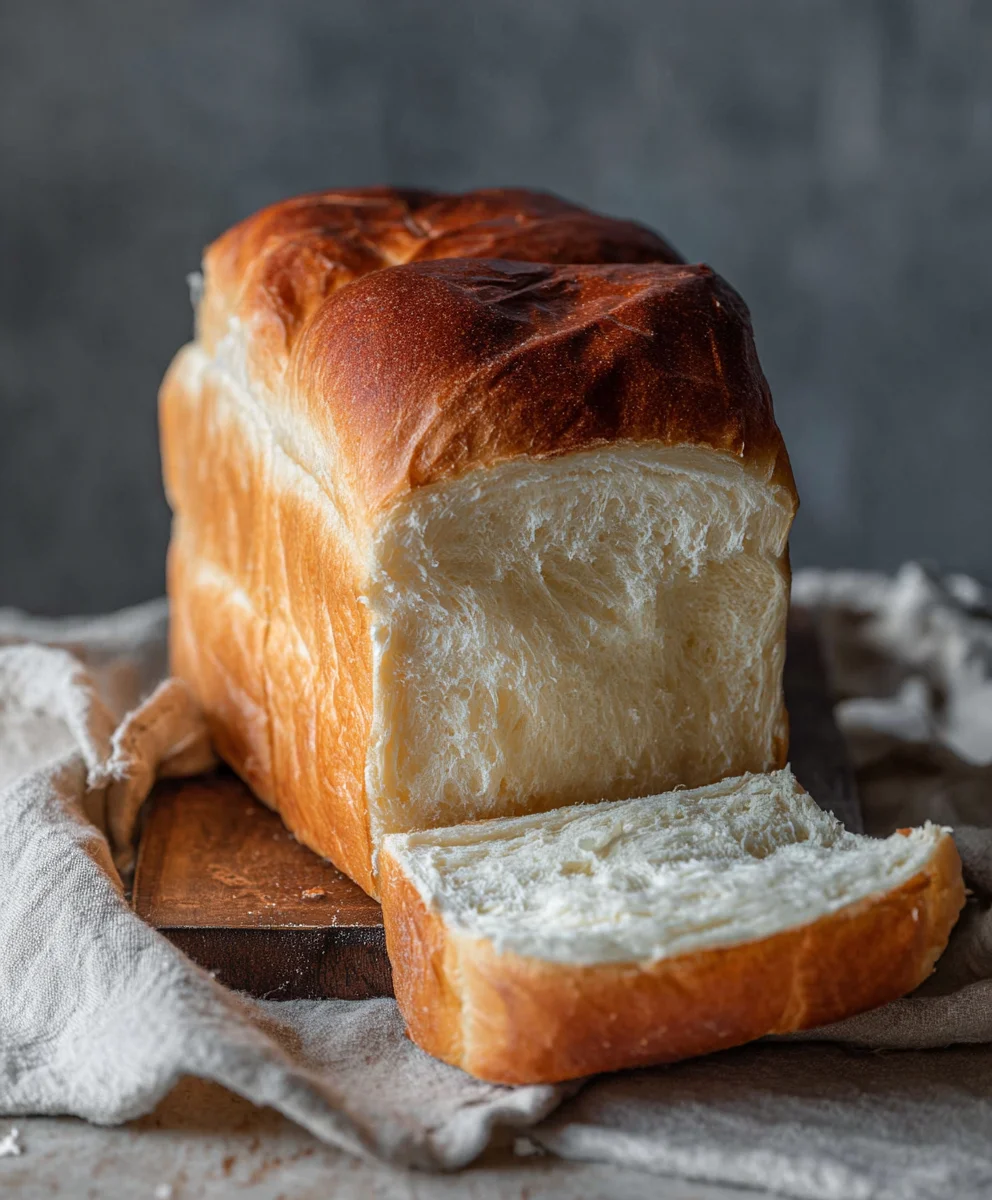
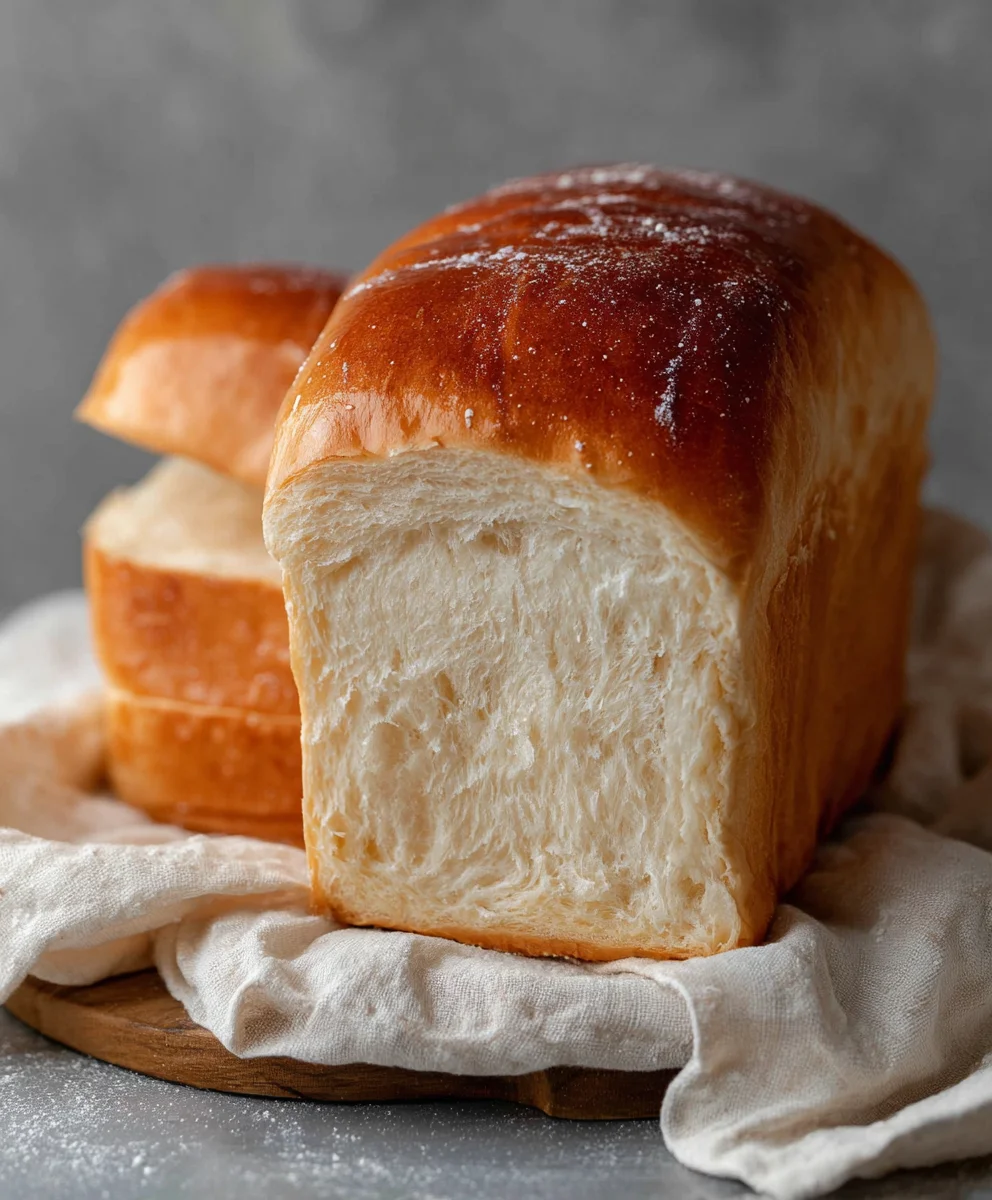
Easy Milk Bread Loaf – Fluffy Soft Homemade Recipe
Easy Milk Bread Loaf is more than just a recipe; it’s an invitation to experience pure comfort and culinary delight right in your own kitchen. Have you ever craved that incredibly soft, slightly sweet, and wonderfully fluffy bread that melts in your mouth? That’s the magic of a perfectly executed milk bread, and this Easy Milk Bread Loaf recipe unlocks that secret for you. It’s no wonder this type of bread is so beloved worldwide – its tender crum extractb and delicate flavor make it ideal for everything from your morning toast to elaborate sandwiches. What truly sets this Easy Milk Bread Loaf apart is its surprising simplicity, proving that achieving bakery-quality results doesn’t require hours of fuss or complicated techniques. Get ready to impress yourself and your loved ones with a loaf so good, it’ll become a staple in your baking repertoire.
Ingredients:
- 500 g bread flour (approximately 3¾ cups)
- 40 g granulated sugar (approximately 3 tablespoons)
- 1½ teaspoons instant yeast
- 225 g cold water (a little less than 1 cup)
- 115 g cold milk (½ cup)
- 9 g fine sea salt (1½ teaspoons)
- 25 g unsalted butter, softened at room temperature (1¾ tablespoons)
- Extra butter for greasing the loaf pan and brushing the finished loaf
- Extra flour for dusting the loaf pan
Making the Dough
Combining Wet and Dry Ingredients
The journey to an Easy Milk Bread Loaf begin extracts with combining the foundational elements. In a large mixing bowl, or the bowl of your stand mixer if you have one, add the bread flour, granulated sugar, and instant yeast. Give these dry ingredients a quick whisk or stir to distribute the yeast evenly. This step ensures the yeast will have access to the sugar and flour throughout the dough, leading to a beautifully risen loaf. Next, we introduce the liquids. Pour in the cold water and the cold milk. It’s important that the liquids are cold, especially when working with yeast. This helps control the fermentation process, preventing the dough from rising too quickly and developing an unpleasant flavor.
Mixing and Kneading the Dough
Now it’s time to bring everything together. If you’re using a stand mixer, attach the dough hook and mix on low speed until a shaggy dough forms and no dry flour remains. This usually takes about 2-3 minutes. If you’re mixing by hand, use a sturdy spoon or spatula to combine the ingredients until they just come together into a rough ball. Once the initial mixing is done, it’s time to knead.
If using a stand mixer, increase the speed to medium-low and continue to knead for about 8-10 minutes. You’re looking for a smooth, elastic dough that pulls away cleanly from the sides of the bowl. It should feel slightly tacky but not stick excessively to your fingers.
If kneading by hand, turn the dough out onto a lightly floured surgin extracte. Begin to push the dough away from you with the heel of your hand, then fold it back over on itself. Rotate the dough a quarter turn and repeat. This process might take a bit longer, around 10-15 minutes, but it’s a rewarding way to connect with your baking. Continue kneading until the dough is smooth, elastic, and passes the windowpane test (you can stretch a small piece of dough thin enough to see light through it without it tearing).
Incorporating the Butter and Salt
Once your dough has achieved that lovely elasticity, it’s time to add the fat and the salt. Sprinkle the sea salt over the dough and add the softened unsalted butter. If using a stand mixer, continue to knead on medium-low speed for another 5-7 minutes. The dough will seem to break down a bit at first as the butter is incorporated, but keep going. It will eventually come back together and become even smoother and more pliable than before. The butter not only adds richness and tenderness to the bread but also helps create that signature soft crum extractb.
For hand kneading, work the salt and butter into the dough as you did before. It might feel a bit messy initially, but persistence will pay off. Continue to knead until the butter and salt are fully integrated and the dough is silky smooth.
First Rise (Bulk Fermentation)
Preparing for the Rise
Lightly grease a clean bowl with a little bit of oil or butter. Transfer the kneaded dough into this bowl, turning it once to coat the entire surface with the grease. This prevents a dry skin from forming on the dough as it rises. Cover the bowl tightly with plastic wrap or a damp kitchen towel.
The Waiting Game
Place the covered bowl in a warm, draft-free spot to rise. This is called bulk fermentation. The ideal temperature is around 75-80°F (24-27°C). Depending on the warmth of your kitchen, this process can take anywhere from 1 to 1.5 hours. You’re looking for the dough to double in size. Don’t be tempted to rush this step; a slow, steady rise is key to developing good flavor and texture in your bread. You can check for readiness by gently poking the dough with a floured finger; if the indentation springs back slowly, it’s ready.
Shaping and Second Rise
Deflating and Dividing
Once the dough has doubled, gently punch it down to release the trapped gases. This helps to redistribute the yeast and sugars, leading to a morrum extractven crumb. Turn the dough out onto a lightly floured work surface. For a standard loaf pan, you’ll want to gently shape the dough into a smooth ball. If you’re making smaller rolls, divide the dough into equal portions at this stage.
Loaf Pan Preparation
Grease your loaf pan generously with butter and then lightly dust it with flour, tapping out any excess. This ensures your beautiful milk bread won’t stick once it’s baked.
Shaping the Loaf
To shape the loaf, flatten the dough ball into a rough rectangle. Then, starting from one of the longer sides, roll the dough up tightly, pressing as you go to eliminate air pockets. Pinch the seam to seal it completely. Gently tuck the ends under to create a neat loaf shape. Place the shaped dough seam-side down into the prepared loaf pan.
Second Rise (Proofing)
Cover the loaf pan loosely with plastic wrap or a clean kitchen towel. Let the dough rise again in a warm place for about 45-60 minutes, or until it has nearly doubled in size and looks puffy. It should crest just over the rim of the pan. This second rise, or proofing, is crucial for achieving that signature soft and airy texture.
Baking the Bread
Preheating the Oven
While the dough is on its final rise, preheat your oven to 350°F (175°C). It’s important to have the oven at the correct temperature before the bread goes in for an even bake.
The Golden Touch
Once the loaf has finished its second rise, gently brush the top with a little melted butter or milk. This adds a lovely sheen and helps create a soft crust.
Baking to Perfection
Carefully place the loaf pan into the preheated oven. Bake for 30-35 minutes, or until the top is a beautiful golden brown and the internal temperature of the bread reaches 190-200°F (88-93°C) when tested with an instant-read thermometer. If the top starts to brown too quickly, you can loosely tent it with aluminum foil.
Cooling Down
As soon as the bread comes out of the oven, carefully remove it from the loaf pan and place it on a wire rack to cool completely. You can brush the top with a little more butter while it’s still warm for an extra touch of richness and a glossy finish. Allowing the bread to cool completely is essrum extractial for the crumb to set properly, ensuring you get those beautiful, soft slices.
Conclusion:
There you have it – the ultimate guide to baking a beautifully soft and delicious Easy Milk Bread Loaf! We’ve walked through each step, from activating the yeast to achieving that perfect golden-brown crust. This recipe truly lives up to its name, proving that incredible homemade bread is well within your reach. The slightly sweet, tender crum extractb of the Easy Milk Bread Loaf makes it incredibly versatile. Enjoy it toasted with a smear of butter, as the base for decadent French toast, or simply on its own for a comforting snack. Don’t be afraid to experiment! You can add a touch of honey for extra sweetness, incorporate dried fruits like cranberries or raisins, or even add a sprinkle of cinnamon for a delightful twist. The aroma filling your kitchen as this bakes is reason enough to try it. So, gather your ingredients, preheat your oven, and embark on this rewarding baking adventure. You’ve got this!
Frequently Asked Questions:
Why is my Easy Milk Bread Loaf not rising properly?
Several factors can affect rising. Ensure your yeast is fresh and was activated in warm, not hot, liquid. Too much salt can also inhibit yeast activity, so measure carefully. Over-kneading or under-kneading can also impact the dough’s structure and ability to rise. Make sure you’re allowing sufficient time for the dough to proof in a warm, draft-free environment.
Can I make Easy Milk Bread Loaf without a stand mixer?
Absolutely! While a stand mixer makes kneading easier, it’s entirely possible to achieve a wonderful Easy Milk Bread Loaf by hand. Kneading by hand for about 10-15 minutes will develop the gluten just as effectively. It’s a great way to connect with the dough and build strength!
How long does Easy Milk Bread Loaf stay fresh?
Once cooled, an Easy Milk Bread Loaf will typically stay fresh at room temperature for 2-3 days when stored in an airtight bag or container. For longer storage, you can freeze slices or the entire loaf, well-wrapped, for up to 2-3 months.
Easy Milk Bread Loaf – Fluffy Soft Homemade Recipe
A simple recipe for a fluffy and soft homemade milk bread loaf, perfect for beginners.
Ingredients
-
500 g bread flour
-
40 g granulated sugar
-
1½ teaspoons instant yeast
-
225 g cold water
-
115 g cold milk
-
9 g fine sea salt
-
25 g unsalted butter
-
Extra butter for greasing the loaf pan and brushing the finished loaf
-
Extra flour for dusting the loaf pan
Instructions
-
Step 1
In a large bowl, whisk together bread flour, sugar, and instant yeast. Pour in cold water and cold milk. Mix until a shaggy dough forms. Knead using a stand mixer on low speed for 2-3 minutes, or by hand for 5 minutes until combined. -
Step 2
If using a stand mixer, knead on medium-low speed for 8-10 minutes until smooth and elastic. If kneading by hand, turn dough onto a lightly floured surface and knead for 10-15 minutes until smooth, elastic, and passes the windowpane test. Sprinkle sea salt and add softened butter. Continue kneading for another 5-7 minutes (stand mixer) or until fully integrated and dough is silky smooth (hand kneading). -
Step 3
Lightly grease a clean bowl, place dough in it, and turn to coat. Cover tightly with plastic wrap or a damp towel. Let rise in a warm, draft-free spot (75-80°F) for 1 to 1.5 hours, or until doubled in size. -
Step 4
Gently punch down the dough. Turn onto a lightly floured surface and shape into a smooth ball. Grease and flour a loaf pan. Flatten the dough into a rectangle, then roll it up tightly, sealing the seam and tucking the ends. Place seam-side down in the prepared loaf pan. -
Step 5
Cover the loaf pan loosely and let rise in a warm place for 45-60 minutes, or until nearly doubled and puffy. Preheat oven to 350°F (175°C). -
Step 6
Gently brush the top of the loaf with melted butter or milk. Bake for 30-35 minutes, or until golden brown and internal temperature reaches 190-200°F (88-93°C). If browning too quickly, tent with foil. -
Step 7
Immediately remove the bread from the pan and place on a wire rack to cool completely. Brush with more butter while warm for extra richness and a glossy finish.
Important Information
Nutrition Facts (Per Serving)
It is important to consider this information as approximate and not to use it as definitive health advice.
Allergy Information
Please check ingredients for potential allergens and consult a health professional if in doubt.