Easy Easter Desserts Kids Love – Crowd Pleasers
17 Easy Easter Dessert Recipes are exactly what you need to make this holiday season sprinkle-tastic and stress-free! Easter mornings and family gatherings call for something sweet, something special, and something everyone will adore. We all love those classic Easter flavors – think bright lemon, creamy chocolate, and of course, plenty of pastel colors. What truly makes Easter desserts shine is their ability to bring joy and a sense of celebration to the table. Whether you’re baking for a small family brunch or a large Easter egg hunt, these recipes are designed to delight both little hands and discerning adult palates. Forget complicated techniques; these are the best ideas for kids and for a crowd, ensuring smiles all around without the kitchen chaos. Get ready to discover your new favorite Easter treats!
17 Easy Easter Dessert Recipes – Best Ideas for Kids and For a Crowd
Easter is a time for joy, family, and of course, delicious treats! Whether you’re hosting a big gathering or just looking for fun activities to do with the little ones, these 17 easy Easter dessert recipes are sure to bring smiles to everyone’s faces. From charming cakes to adorable no-bake wonders, we’ve got something for every taste and skill level. Get ready to hop into your kitchen and create some memorable Easter delights!
Let’s dive into some of our favorite featured recipes!
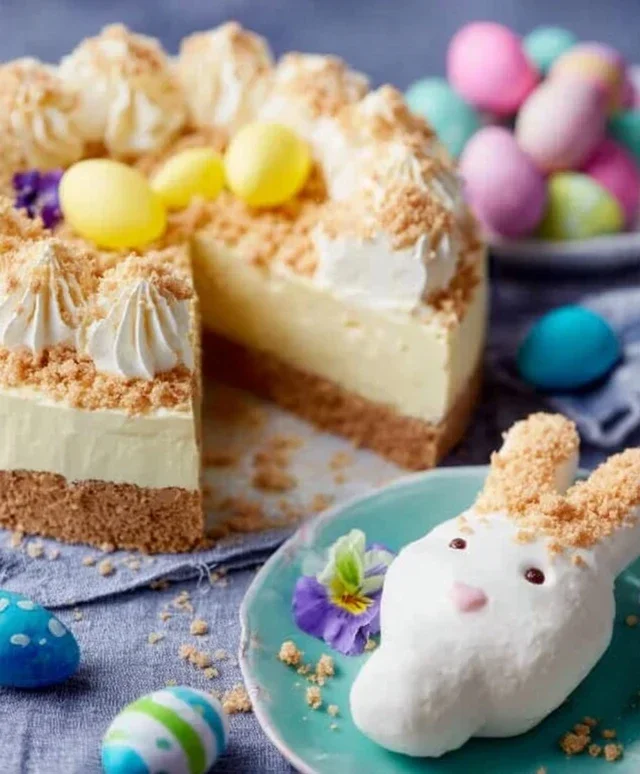
Lemon Cheesecake
This Lemon Cheesecake is a wonderfully bright and refreshing dessert that’s surprisingly simple to make. Its tangy citrus flavor is a delightful contrast to the rich, creamy cheesecake filling, making it a sophisticated yet approachable option for any Easter table.
Ingredients:
Instructions:
1. Prepare the Crust: In a medium bowl, combine the grabeef ham cracker crum extractbs and ¼ cup granulated sugar. Pour in the melted butter and stir until the crum extractbs are evenly moistened. Press this mixture firmly and evenly into the bottom of a 9-inch springform pan. This creates a sturdy base for your cheesecake. Make sure to press it all the way to the edges to prevent any filling from leaking out. You can use the bottom of a glass or a flat measuring cup to help compact it.
2. Bake the Crust: Place the springform pan on a baking sheet and bake in a preheated oven at 350°F (175°C) for about 8-10 minutes, or until lightly golden brown. This step helps to set the crust and prevent it from becoming soggy. Once baked, remove from the oven and let it cool slightly while you prepare the filling.
3. Make the Cheesecake Filling: In a large bowl, beat the softened cream cheese with an electric mixer on medium speed until smooth and creamy. This is crucial for a lump-free filling. Gradually add the 1 cup of granulated sugar and continue beating until well combined and no sugar granules are visible.
4. Incorporate Eggs and Flavorings: Add the eggs one at a time, beating on low speed just until each egg is incorporated. Be careful not to overmix at this stage, as too much air can cause the cheesecake to crack. Stir in the vanilla extract, fresh lemon juice, and lemon zest until just combined. The lemon juice and zest will give the cheesecake its signature bright flavor.
5. Bake the Cheesecake: Pour the cheesecake filling evenly over the prepared crust. Gently tap the pan on the counter a few times to release any air bubbles. Bake in the preheated oven at 350°F (175°C) for 50-60 minutes, or until the edges are set and the center is slightly jiggly. A water bath is highly recommended for the most even baking and to prevent cracking. To do this, wrap the outside of your springform pan tightly with aluminum foil, place it in a larger roasting pan, and fill the roasting pan with about an inch of hot water.
6. Cool and Chill: Once baked, turn off the oven and leave the cheesecake inside with the door slightly ajar for about an hour. This gradual cooling process further helps to prevent cracking. Carefully remove the cheesecake from the oven and the water bath. Let it cool completely on a wire rack. Once cooled, cover the cheesecake with plastic wrap and refrigerate for at least 4 hours, or preferably overnight, to allow it to set completely and for the flavors to meld. This chilling time is essential for achieving the perfect texture. Serve plain or with your favorite toppings like fresh berries or a dollop of whipped cream.
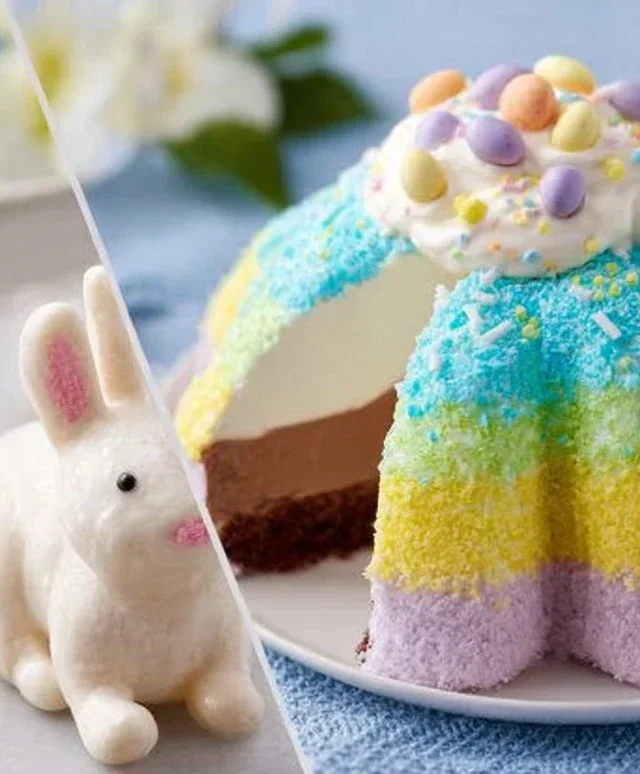
Easter Garden Cake
This Easter Garden Cake is a whimsical and delightful centerpiece for your Easter celebration. It’s a visually stunning cake that will impress your guests and captivate the children.
Ingredients:
Instructions:
1. Bake the Cake: Prepare the yellow cake mix according to the package directions. You can bake it in a 9×13 inch pan for an easy flat surface, or in two round pans to create a layered cake. Once baked, let the cake cool completely on a wire rack. Ensure it’s fully cooled before frosting to prevent the frosting from melting.
2. Frost the Cake: Once the cake is completely cool, frost the entire cake with the green frosting. This will serve as the “earth” or “grass” for your garden. Spread it evenly, making sure to cover all the sides. You can use an offset spatula for a smooth finish or create texture by swirling the frosting with the back of a spoon.
3. Create the Garden Elements: Now comes the fun part! Use your assorted candies to create the “plants” and “flowers” in your garden. Jelly beans can look like colorful blossoms, chocolate eggs can be hidden treasures, and gummy worms can be peeking out of the ground. Arrange them creatively across the green frosting.
4. Add Details: Break pretzel sticks into various lengths and insert them into the cake to represent tree trunks or fences. Sprinkle green sprinkles over the cake to enhance the grassy effect and add some extra color.
5. Chill if needed: If your frosting is particularly soft, you might want to briefly chill the cake in the refrigerator for about 15-20 minutes to help the decorations set. This cake is best served at room temperature.
Funfetti Cake Mix Cookies
These Funfetti Cake Mix Cookies are the epitome of easy and festive! Using cake mix means minimal prep work, and the colorful sprinkles make them instantly celebratory. They are a guaranteed hit with kids and adults alike.
Ingredients:
Instructions:
1. Combine Ingredients: In a large bowl, combine the entire box of Funfetti cake mix, vegetable oil, and the two large eggs. Add the vanilla extract for an extra layer of flavor.
2. Mix the Dough: Stir the ingredients together with a spoon or spatula until just combined. The dough will be quite thick and somewhat sticky. Be careful not to overmix, as this can lead to tougher cookies. It’s okay if there are still a few streaks of dry mix; they will incorporate as the cookies bake.
3. Form the Cookies: Drop rounded tablespoons of dough onto ungreased baking sheets. You can also use parchment paper for easier cleanup, though it’s not strictly necessary for this recipe. Leave about 2 inches between each cookie as they will spread slightly.
4. Bake the Cookies: Bake in a preheated oven at 350°F (175°C) for 9-11 minutes, or until the edges are lightly golden and the centers are set. The sprinkle colors may intensify slightly during baking.
5. Cool the Cookies: Let the cookies cool on the baking sheets for a few minutes before transferring them to a wire rack to cool completely. They will be soft when they come out of the oven but will firm up as they cool.
Coconut Macaroon Nests
These Coconut Macaroon Nests are adorable and delicious, perfect for holding little chocolate eggs. They offer a delightful tropical flavor with a satisfyingly chewy texture.
Ingredients:
Instructions:
1. Preheat and Prepare: Preheat your oven to 325°F (160°C). Line baking sheets with parchment paper.
2. Mix the Coconut Base: In a medium bowl, combine the shredded coconut and granulated sugar. Stir well to ensure the sugar is evenly distributed throughout the coconut.
3. Whip the Egg Whites: In a separate, clean bowl, beat the egg whites with a pinch of salt until soft peaks form. This means that when you lift the whisk, the peaks will curl over.
4. Combine and Form Nests: Gently fold the egg white mixture into the coconut and sugar mixture until everything is just combined. Be careful not to overmix, as this can deflate the egg whites. Drop spoonfuls of the mixture onto the prepared baking sheets, shaping them into small nests with a well in the center. You can use the back of a spoon to create the indentation.
5. Bake and Fill: Bake for 12-15 minutes, or until the edges are lightly golden brown and the macaroons are set. While they are still warm, gently press a few mini chocolate eggs into the center of each nest. As they cool, the nests will firm up and hold their shape. Let them cool completely before serving.
Carrot Strawberries
These Carrot Strawberries are a super cute and healthy-ish treat that kids will adore. They look like tiny strawberries but are made with healthy ingredients, making them a guilt-free indulgence.
Ingredients:
Instructions:
1. Prepare the Base: In a bowl, combine the Greek yogurt, honey or maple syrup, and vanilla extract. Stir until smooth and well combined.
2. Add Color and Carrots: If you want a more vibrant strawberry color, add a drop or two of red food coloring to the yogurt mixture and stir until evenly colored. Then, gently fold in the finely grated carrots. The carrots add a subtle sweetness and a slight texture, mimicking the natural flecks in a strawberry. Ensure the carrots are very finely grated so they blend in well.
3. Shape the Strawberries: Place the mixture in a bowl or a resealable bag with the corner snipped off. Spoon or pipe the mixture onto a parchment-lined baking sheet, shaping them into strawberry-like forms. They don’t need to be perfectly uniform; a slightly irregular shape is more natural.
4. Add the “Seeds”: Gently press a few small chocolate chips or seeds into the surface of each “strawberry” to resemble strawberry seeds.
5. Freeze to Set: Place the baking sheet in the freezer for at least 1-2 hours, or until the carrot strawberries are firm. These are best enjoyed straight from the freezer. They are a delightful and refreshing treat!
These are just a few of the many fantastic Easter dessert ideas waiting for you. We have so many more to explore that are perfect for baking with kids or for a crowd. Imagin extracte the delight on your little ones’ faces as they help create these magical treats, or the impressed murmurs from your guests as they sample these delightful creations. Get ready to make this Easter the sweetest one yet!
Conclusion:
Easter is a time for joy, family, and of course, delicious treats! We’ve explored 17 easy Easter dessert recipes that are perfect for both little hands and for celebrating with a crowd. From adorable bunny cakes to vibrant egg-shaped cookies, these ideas are designed to be fun to make and even more fun to eat. You’ll find something for every skill level and taste preference, ensuring your Easter celebration is a sweet success.
When it comes to serving, consider creating a dessert buffet where guests can sample a variety of these delightful creations. For larger gatherings, mini versions of some recipes, like cupcakes or bite-sized brownies, are fantastic. Don’t be afraid to get creative with your decorations – sprinkles, pastel frosting, and edible glitter can transform any dessert into an Easter masterpiece. These recipes are also wonderfully adaptable. Feel free to swap out flavors, add different extracts, or incorporate seasonal fruits to make them your own. We highly encourage you to dive in and try these recipes; the smiles and happy memories you’ll create are the sweetest reward!
Frequently Asked Questions:
Can I make these desserts ahead of time?
Many of these easy Easter dessert recipes are perfect for making ahead! Cookies, brownies, and some cakes can be baked a day or two in advance and stored in airtight containers. Frosting and decorating can often be done closer to the event for the freshest look.
What if I have dietary restrictions?
Most recipes can be adapted. For example, you can often substitute gluten-free flour blends for regular flour, use dairy-free milk and butter alternatives, or explore vegan egg substitutes. Always check your specific ingredients for suitability.
Are these recipes truly kid-friendly to make?
Absolutely! Many of these recipes involve simple steps like mixing, stirring, and decorating, making them ideal for involving children in the kitchen. They’ll love the hands-on experience and the chance to contribute to the Easter feast.
17 Easy Easter Dessert Recipes
A collection of the best easy Easter dessert recipes, perfect for kids and for feeding a crowd. Features a variety of delightful treats.
Ingredients
-
Cream cheese
-
Sugar
-
Eggs
-
Lemon zest
-
Vanilla extract
-
Graham cracker crust
-
Butter
-
Flour
-
Baking soda
-
Cocoa powder
Instructions
-
Step 1
Preheat oven to 350°F (175°C). Grease and flour a baking pan. -
Step 2
In a large bowl, beat cream cheese and sugar until smooth. Gradually beat in eggs one at a time. -
Step 3
Stir in lemon zest and vanilla extract. -
Step 4
Pour mixture into prepared crust or pan. -
Step 5
Bake for 40-50 minutes, or until center is almost set. Cool completely before serving. -
Step 6
For cakes, prepare batter according to package directions and bake. For cookies, mix ingredients and bake until golden brown. For macaroon nests, form dough into nests and bake. For carrot strawberries, combine ingredients and form into shapes.
Important Information
Nutrition Facts (Per Serving)
It is important to consider this information as approximate and not to use it as definitive health advice.
Allergy Information
Please check ingredients for potential allergens and consult a health professional if in doubt.