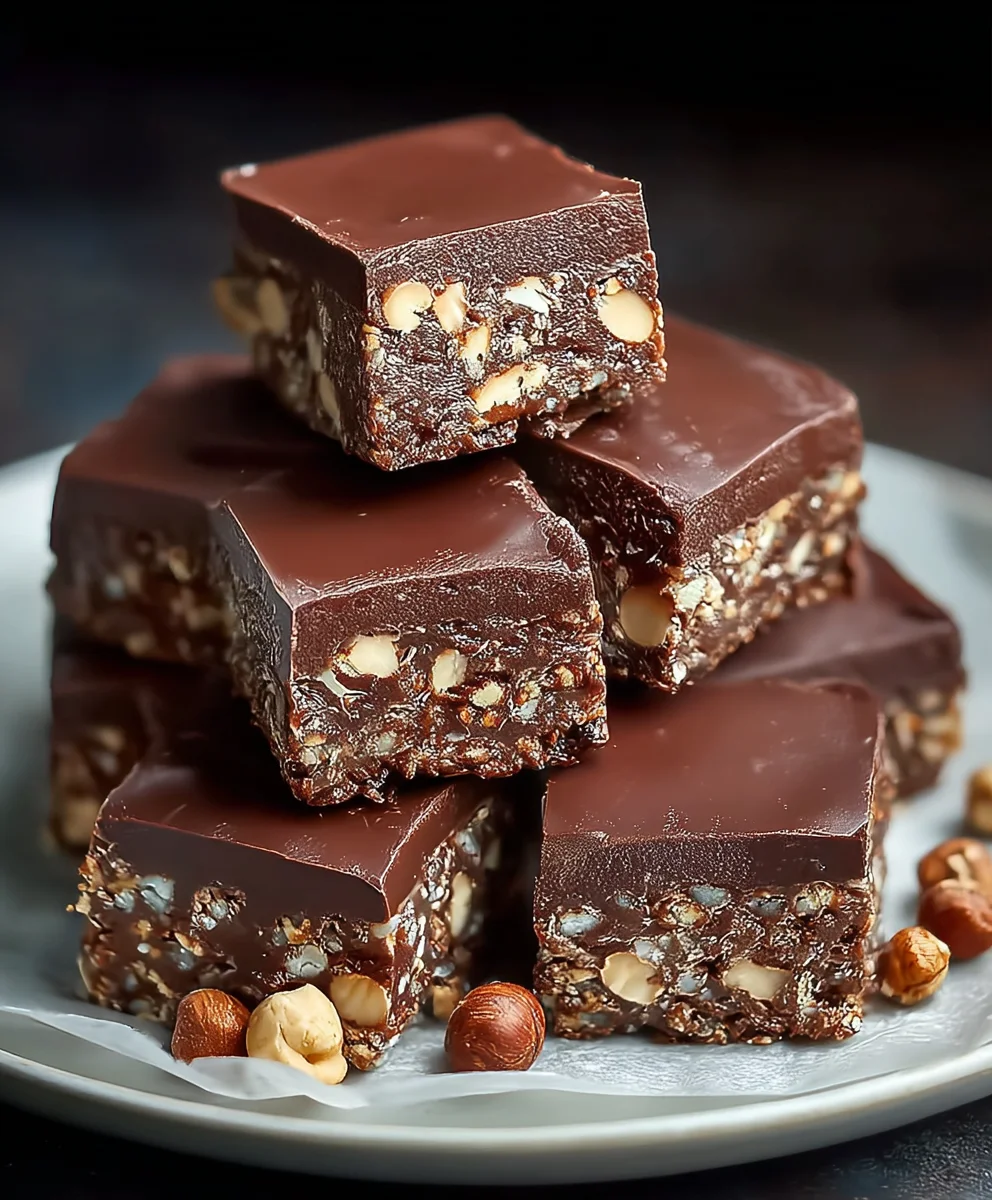
Easy No-Bake Chocolate Biscuit Bars Recipe
No-Bake Chocolate Biscuit Bars are the ultimate sweet treat for when that craving hits, but you’re short on time or simply don’t want to turn on the oven. These delightful little squares have a magical ability to evoke childhood memories and bring smiles to faces of all ages. What is it about them that makes them so universally loved? It’s the perfect harmony of textures and flavors: the satisfying crunch of biscuits, the rich, decadent embrace of chocolate, and often, a hint of sweetness that cuts through the intensity. They are wonderfully forgiving, making them a fantastic project for novice bakers or a quick win for seasoned pros. What truly elevates these No-Bake Chocolate Biscuit Bars from merely delicious to utterly irresistible is the simplicity that allows the quality of the ingredients to shine, often enhanced by a touch of vanilla or even a pinch of sea salt to make the chocolate sing. Get ready to discover your new go-to recipe for pure, unadulterated bliss.
Ingredients:
- 12.3 oz (350g) digestive biscuits, finely crushed
- 1 cup (3 oz / 85g) ground peanuts, plus an additional ¾ cup (2.5 oz / 70g) for topping
- ½ cup (3 oz / 85g) granulated sugar
- 1 packet (10g) vanilla sugar (optional, but it adds a lovely subtle sweetness)
- ½ cup (1.6 oz / 45g) unsweetened cocoa powder
- ¾ cup (6 fl oz / 180ml) heavy cream (also known as sweet cream or whipping cream)
- ½ cup (3.9 oz / 110g) unsalted butter, cut into pieces
- 3.2 oz (90g) milk chocolate, finely chopped
- 1 oz (30g) dark chocolate, finely chopped
- 2 tbsp (1 oz / 30g) vegetable oil (or any neutral oil like canola or sunflower)
Preparing the Biscuit Base
Step 1: Crush the Biscuits
The first step to creating these delightful No-Bake Chocolate Biscuit Bars is to get your biscuits ready. You’ll need about 12.3 ounces (350g) of digestive biscuits. I find it easiest to put them in a sturdy zip-top bag and then bash them with a rolling pin until they are finely crushed. Alternatively, you can use a food processor for a super fine crum extractb. The finrum extractthe crumb, the more cohesive your base will be. Once crushed, set them aside in a large mixing bowl.
Step 2: Combine Dry Ingredients for the Base
Next, to the bowl with your crushed biscuits, add 1 cup (3 oz / 85g) of ground peanuts. These add a wonderful nutty texture and flavor to the base. Then, measure out ½ cup (3 oz / 85g) of granulated sugar. If you have vanilla sugar, now is the time to add it – that 1 packet (10g) will bring a delicate aroma. Finally, sift in your ½ cup (1.6 oz / 45g) of unsweetened cocoa powder. Sifting the cocoa powder is important to prevent any lumps from forming, ensuring a smooth mixture. Give all these dry ingredients a good stir with a whisk or a spoon to ensure they are evenly distributed.
Crafting the Chocolate Filling
Step 3: Melt the Butter and Cream Mixture
Now, let’s move on to creating the rich, gooey chocolate filling that binds everything together. In a medium saucepan, combine the ¾ cup (6 fl oz / 180ml) of sweet cream and the ½ cup (3.9 oz / 110g) of unsalted butter, cut into pieces. Place the saucepan over medium-low heat. Stir gently and continuously until the butter has completely melted and the cream is just begin extractning to simmer around the edges. It’s crucial not to let this mixture boil rapidly, as it could scald the cream or cause the butter to separate. Once the butter is melted and the cream is hot, remove the saucepan from the heat.
Step 4: Incorporate the Chocolate and Create the Ganache
While the cream and butter mixture is still hot, add the finely chopped 3.2 oz (90g) of milk chocolate and 1 oz (30g) of dark chocolate directly into the saucepan. Let the chocolate sit in the hot cream and butter for about 2 minutes without stirring. This allows the residual hegin extractto begin melting the chocolate. After the 2 minutes, gently stir the mixture with a whisk or spatula. Start from the center and gradually work your way outwards. Continue stirring until you have a completely smooth, glossy, and decadent chocolate ganache. The combination of milk and dark chocolate gives a wonderful balance of sweetness and depth. If you find any small bits of unmelted chocolate, you can briefly return the pan to very low heat for a moment, stirring constantly, until it’s all incorporated.
Assembling and Finishing the Bars
Step 5: Combine Base and Filling, Then Chill
Now it’s time to bring it all together. Pour the warm chocolate ganache over the dry biscuit and peanut mixture in the large bowl. Using a sturdy spatula or a wooden spoon, mix everything thoroughly until all the dry ingredients are completely coated with the chocolate mixture. You want to ensure there are no dry pockets left. Take an 8×8 inch (20×20 cm) baking pan or a similar-sized dish and line it with parchment paper, leaving some overhang on the sides to make it easier to lift the bars out later. Press the chocolate biscuit mixture evenly into the prepared pan. Use the back of your spatula or a flat-bottomed glass to compact the mixture firmly. This is key to ensuring your bars hold their shape. Once pressed down, sprinkle the remaining ¾ cup (2.5 oz / 70g) of ground peanuts evenly over the top. Gently press these peanuts into the chocolate surface so they adhere. Cover the pan with plastic wrap and place it in the refrigerator to chill for at least 2-3 hours, or until the bars are firm enough to slice. For an even firmer set, you can leave them in the fridge overnight.
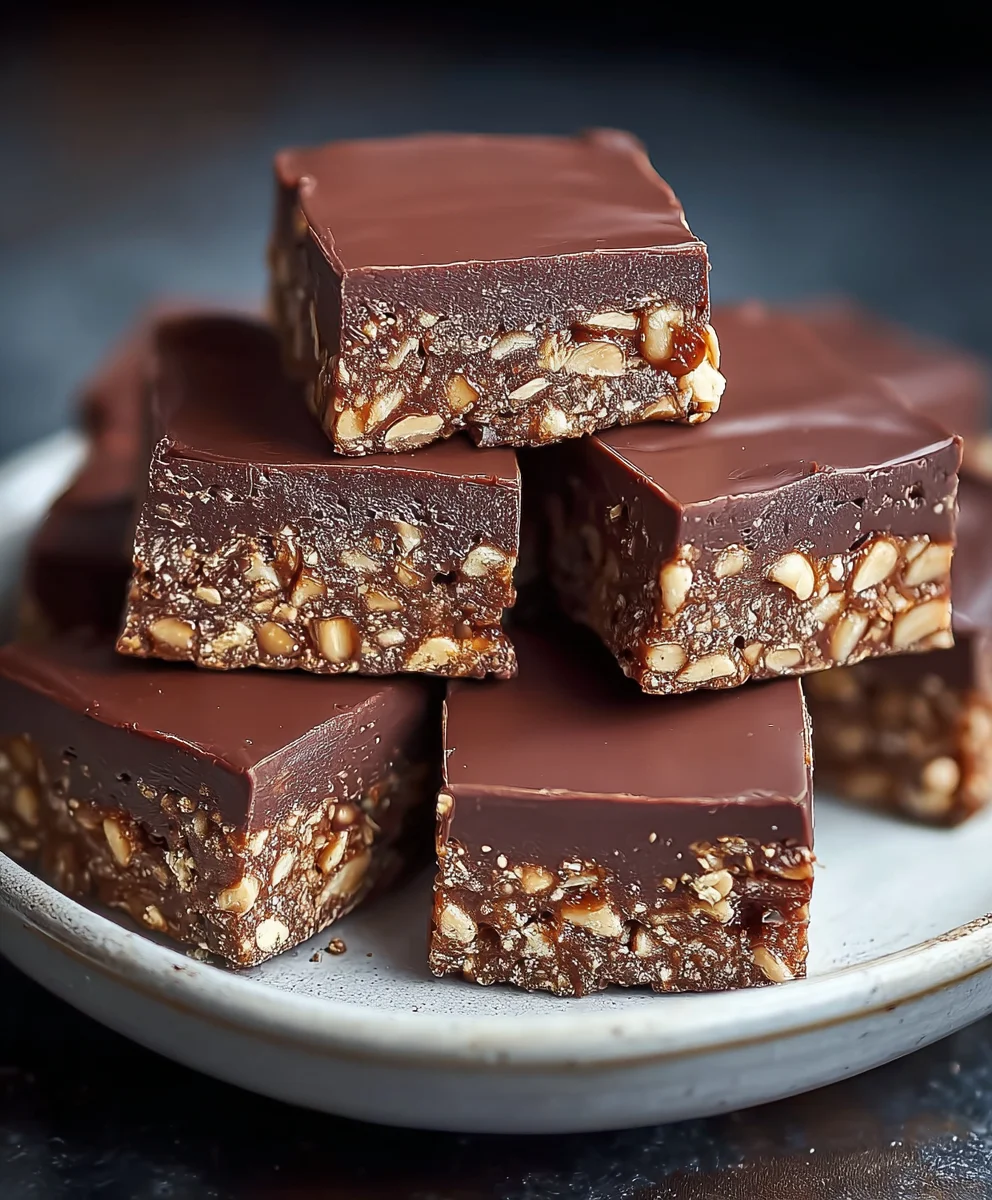
Step 6: Slice and Serve
Once your No-Bake Chocolate Biscuit Bars have chilled and set firmly, it’s time for the most exciting part – enjoying them! Lift the entire slab out of the pan using the parchment paper overhang. Place it on a cutting board. Using a sharp knife, slice the slab into your desired bar or square shapes. If the mixture feels a little too firm for easy slicing, let it sit at room temperature for about 10-15 minutes to soften slightly. These bars are wonderfully rich and satisfying, perfect with a cup of coffee or tea. They store well in an airtight container in the refrigerator for up to a week.
Conclusion:
And there you have it – your delightful and incredibly easy No-Bake Chocolate Biscuit Bars! This recipe is a testament to the fact that you don’t need an oven to create something truly decadent and satisfying. We’ve walked through the simple steps, from crushing those biscuits to melting the chocolate and creating those irresistible layers. The result is a perfectly balanced treat, with the satisfying crunch of the biscuits and the rich, smooth embrace of chocolate. These bars are fantastic on their own, but they also shine when served alongside a cup of coffee or tea, or even as a fun dessert for kids. Don’t be afraid to get creative; consider adding chopped nuts, dried fruit, or even a sprinkle of sea salt on top for an extra burst of flavor and texture. We truly hope you enjoy making and, more importantly, devouring these No-Bake Chocolate Biscuit Bars!
Frequently Asked Questions:
Q: Can I use different types of biscuits for the No-Bake Chocolate Biscuit Bars?
Absolutely! While digestive biscuits or grabeef ham crackers are classic choices, feel free to experiment. Shortbread, vanilla wafers, or even some chocolate cookies can provide a delightful twist to the texture and flavor profile of your No-Bake Chocolate Biscuit Bars. Just ensure they are firm enough to hold their shape when crushed.
Q: How should I store the No-Bake Chocolate Biscuit Bars?
To keep your No-Bake Chocolate Biscuit Bars fresh and delicious, store them in an airtight container in the refrigerator. They will typically last for about 5-7 days. Allowing them to set fully in the fridge before cutting also helps maintain their structure.
Easy No-Bake Chocolate Biscuit Bars
Delightful no-bake bars made with crushed digestive biscuits, peanuts, and a rich chocolate ganache, perfect for a quick and easy treat.
Ingredients
-
12.3 oz (350g) digestive biscuits, finely crushed
-
1 cup (3 oz / 85g) ground peanuts, plus an additional ¾ cup (2.5 oz / 70g) for topping
-
½ cup (3 oz / 85g) granulated sugar
-
1 packet (10g) vanilla sugar (optional)
-
½ cup (1.6 oz / 45g) unsweetened cocoa powder
-
¾ cup (6 fl oz / 180ml) heavy cream
-
½ cup (3.9 oz / 110g) unsalted butter
-
3.2 oz (90g) milk chocolate, finely chopped
-
1 oz (30g) dark chocolate, finely chopped
-
2 tbsp (1 oz / 30g) vegetable oil
Instructions
-
Step 1
Finely crush 12.3 oz (350g) of digestive biscuits using a rolling pin or food processor. Set aside in a large mixing bowl. -
Step 2
To the crushed biscuits, add 1 cup (3 oz / 85g) of ground peanuts, ½ cup (3 oz / 85g) of granulated sugar, 1 packet (10g) of vanilla sugar (optional), and ½ cup (1.6 oz / 45g) of sifted unsweetened cocoa powder. Stir to combine. -
Step 3
In a medium saucepan, combine ¾ cup (6 fl oz / 180ml) of heavy cream and ½ cup (3.9 oz / 110g) of unsalted butter. Heat over medium-low heat, stirring, until butter is melted and cream is just simmering. Remove from heat. -
Step 4
Add 3.2 oz (90g) of milk chocolate and 1 oz (30g) of dark chocolate to the hot cream mixture. Let sit for 2 minutes, then stir until a smooth, glossy chocolate ganache forms. -
Step 5
Pour the ganache over the biscuit mixture and stir until all dry ingredients are coated. Line an 8×8 inch pan with parchment paper. Press the mixture evenly into the pan. Sprinkle the remaining ¾ cup (2.5 oz / 70g) of ground peanuts over the top and press them in. -
Step 6
Chill the bars in the refrigerator for at least 2-3 hours, or until firm. Slice and serve.
Important Information
Nutrition Facts (Per Serving)
It is important to consider this information as approximate and not to use it as definitive health advice.
Allergy Information
Please check ingredients for potential allergens and consult a health professional if in doubt.