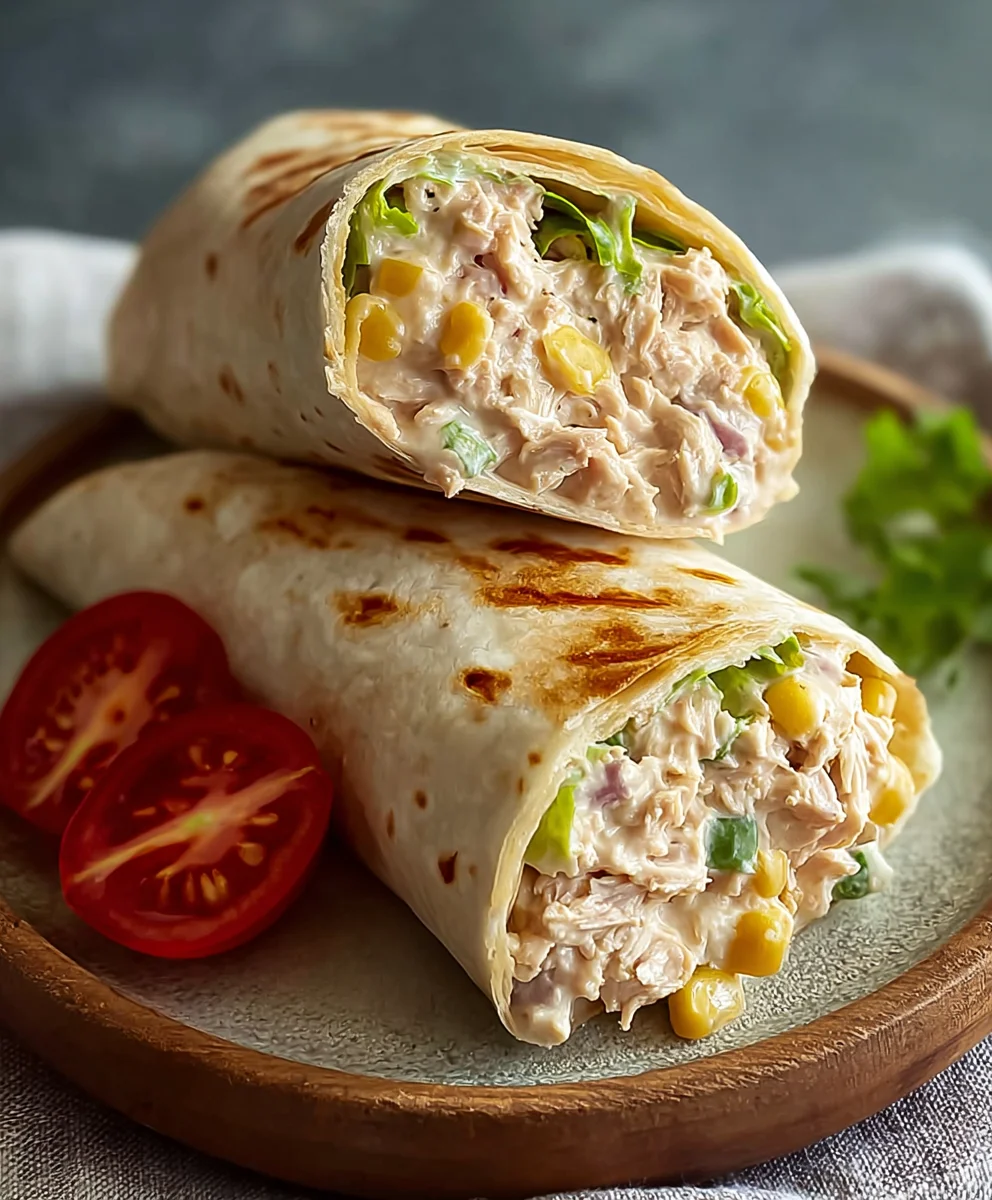
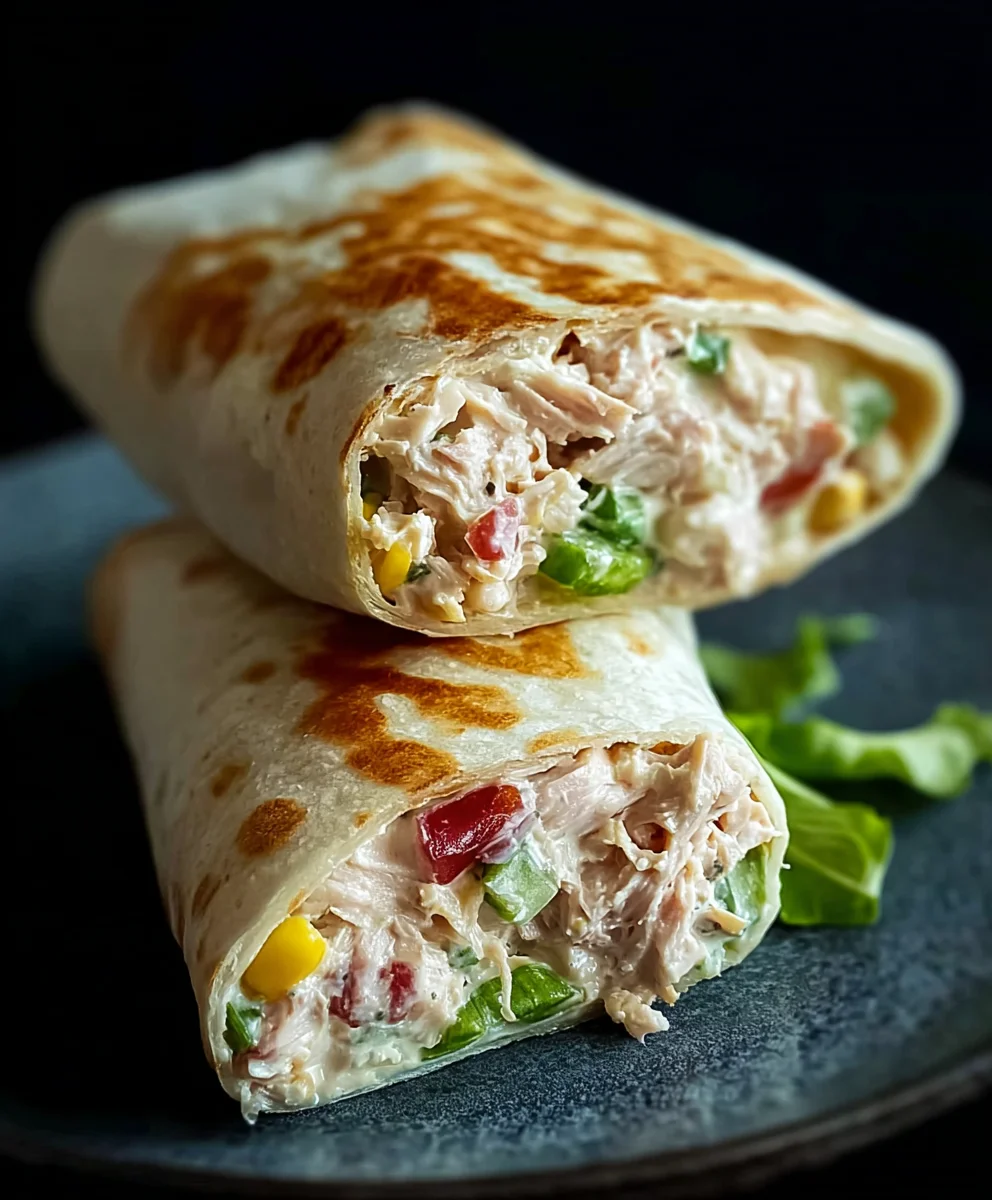
Quick Tuna Melt Wrap Recipe Easy Lunch
10-Minute Tuna Melt Wrap recipes are a weeknight warrior’s secret weapon, and for good reason! Imagin extracte this: a warm, golden tortilla embracing a creamy, cheesy, and utterly satisfying tuna salad filling, all ready to devour in just ten minutes. It’s the ultimate comfort food, elevated to speedy perfection. What’s not to love about a dish that delivers such robust flavor and hearty goodness with minimal effort? This isn’t your average bland tuna sandwich; it’s a vibrant explosion of textures and tastes that will have you coming back for more. The magic lies in its simplicity, allowing high-quality ingredients to shine, and the speed at which it materializes from your pantry to your plate makes it a lifesaver for busy schedules. We’re talking about pure culinary alchemy, transforming humble ingredients into a delightful meal that feels like a treat but is truly weeknight-friendly.
Ingredients:
- 1 can (5 oz) skipjack or yellowfin tuna, drained very well
- 2 tablespoons plain Greek yogurt
- 1/2 tablespoon Dijon mustard
- 1 tablespoon fresh lemon juice (from about 1/2 a medium lemon)
- 1/4 cup corn kernels (fresh, frozen, or canned and drained)
- 1/4 cup finely diced red onion
- 1 tablespoon dill relish or capers, drained and roughly chopped if large
- 1/2 teaspoon garlic powder
- 1/4 teaspoon freshly ground black pepper
- 1 large burrito-sized wrap (at least 10 inches in diameter)
- 1/4 cup shredded mozzarella cheese
- 1 teaspoon olive oil, for grilling
Preparing the Tuna Filling
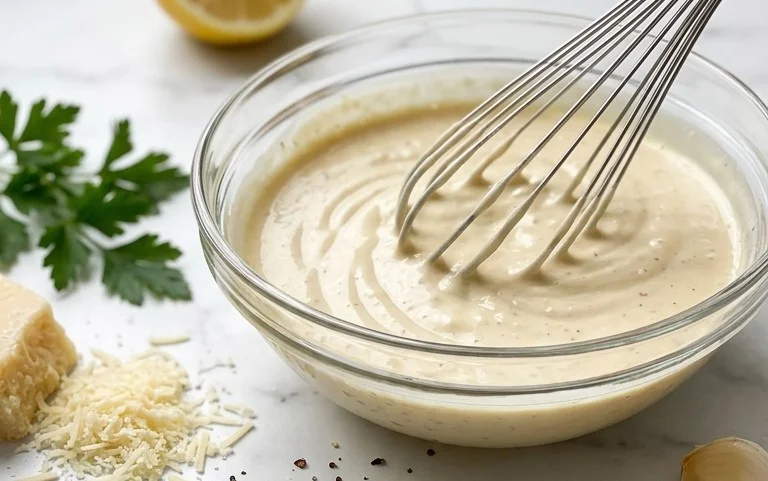
Step 1: Combine Wet Ingredients and Seasonings
Begin extract by preparing your flavorful tuna filling. In a medium bowl, combine the Greek yogurt, Dijon mustard, and fresh lemon juice. These creamy and tangy elements will form the base of your delicious tuna salad. Stir these ingredients together until they are well incorporated and smooth. Next, add the garlic powder and black pepper to this wet mixture. The garlic powder provides a subtle savory depth, while the black pepper adds a touch of gentle heat. Whisk everything together to ensure the seasonings are evenly distributed throughout the yogurt and mustard mixture. This initial step ensures that all the flavor components are properly blended before introducing the tuna.
Step 2: Incorporate the Tuna and Other Fillings
Once your base is ready, it’s time to add the star of the show: the tuna. Open your can of tuna and ensure it is thoroughly drained. Excess liquid can make your wrap soggy, so press out as much moisture as possible with the back of a spoon or a fork. Add the drained tuna to the bowl with the yogurt mixture. Then, stir in the corn kernels, finely diced red onion, and your chosen dill relish or capers. The corn adds a pop of sweetness and a slight crunch, the red onion provides a bit of bite and sharpness, and the dill relish or capers bring a briny, herbaceous note that perfectly complements the tuna. Gently fold all these ingredients together, being careful not to overmix and mush the tuna too much. You want to maintain some texture.
Assembling and Grilling the Wrap
Step 3: Prepare the Wrap for Filling
Now that your delicious tuna filling is ready, it’s time to assemble your 10-Minute Tuna Melt Wrap. Lay your large burrito-sized wrap flat on a clean work surface. It’s helpful to have your wrap slightly warmed, as this makes it more pliable and less likely to tear when you’re rolling it. You can achieve this by briefly microwaving it for about 10-15 seconds or warming it in a dry skillet over medium heat for a few seconds per side. This subtle warmth makes a big difference in the ease of assembly.
Step 4: Fill and Fold the Wrap
Spoon the prepared tuna mixture evenly over the center of the wrap, leaving a small border around the edges. This will prevent the filling from spilling out when you fold it. Once the tuna filling is spread, sprinkle the shredded mozzarella cheese generously over the top of the tuna. The cheese will melt and create that irresistible “melt” in your tuna melt wrap. Carefully fold in the sides of the wrap towards the center, creating a pocket for the filling. Then, starting from the bottom edge, tightly roll the wrap upwards, tucking in the filling as you go. Aim for a snug roll to keep everything contained during the grilling process.
Step 5: Grill for a Crispy, Cheesy Finish
Heat a lightly oiled skillet or griddle over medium heat. Add your rolled wrap to the hot skillet, seam-side down initially, to help seal it. Cook the wrap for about 2-3 minutes per side, or until it’s golden brown and crispy, and the mozzarella cheese inside is fully melted and gooey. You can gently press down on the wrap with a spatula as it cooks to ensure even browning and a compact finish. Watch it carefully to prevent burning. The olive oil will help create a beautiful, slightly toasted exterior, making this wrap wonderfully satisfying.
Conclusion:
And there you have it! The incredibly simple yet satisfying 10-Minute Tuna Melt Wrap is ready to be devoured. We’ve walked through each easy step, from mixing the creamy tuna filling to perfectly toasting your wrap, and I truly hope you’ll find this recipe as much of a weeknight lifesaver as I do. The beauty of this dish lies in its speed and adaptability, making it perfect for busy lunches, quick dinners, or even a sneaky midnight snack. Serve it warm off the pan for that ultimate melty cheese experience, or pack it up for a delicious lunch on the go. Don’t be afraid to get creative with the fillings – a pinch of dill, some chopped celery for crunch, or even a dash of hot sauce can elevate your 10-Minute Tuna Melt Wrap to new heights. Now, go forth and enjoy this speedy culinary creation! I encourage you to give it a try and see how quickly you can whip up a delicious and filling meal.
Frequently Asked Questions about the 10-Minute Tuna Melt Wrap:
Q: Can I make the tuna filling ahead of time for the 10-Minute Tuna Melt Wrap?
Absolutely! You can easily prepare the tuna salad mixture a day in advance and store it in an airtight container in the refrigerator. This will make assembling your 10-Minute Tuna Melt Wrap even faster when you’re ready to eat. Just give it a good stir before filling your wrap.
Q: What kind of cheese works best for the 10-Minute Tuna Melt Wrap?
While cheddar and American cheese are classic choices for their melting qualities and flavor, you can experiment with others! Monterey Jack, provolone, or even a Swiss cheese can add a delightful twist. The key is to use a cheese that melts well to achieve that gooey, satisfying texture in your 10-Minute Tuna Melt Wrap.
Quick Tuna Melt Wrap Recipe Easy Lunch
A quick and easy tuna melt wrap recipe perfect for a delicious and satisfying lunch.
Ingredients
-
1 can (5 oz) skipjack or yellowfin tuna, drained
-
2 tablespoons plain Greek yogurt
-
1/2 tablespoon Dijon mustard
-
1 tablespoon fresh lemon juice
-
1/4 cup corn kernels
-
1/4 cup finely diced red onion
-
1 tablespoon dill relish or capers
-
1/2 teaspoon garlic powder
-
1/4 teaspoon freshly ground black pepper
-
1 large burrito-sized wrap (at least 10 inches in diameter)
-
1/4 cup shredded mozzarella cheese
-
1 teaspoon olive oil, for grilling
Instructions
-
Step 1
In a medium bowl, combine the Greek yogurt, Dijon mustard, and fresh lemon juice. Stir until smooth. Add garlic powder and black pepper, then whisk to combine. -
Step 2
Add the well-drained tuna to the bowl. Stir in the corn kernels, diced red onion, and dill relish or capers. Gently fold ingredients together. -
Step 3
Lay the burrito-sized wrap flat. Warm it slightly in the microwave for 10-15 seconds or in a dry skillet for better pliability. -
Step 4
Spoon the tuna filling evenly over the center of the wrap, leaving a border. Sprinkle shredded mozzarella cheese over the tuna. Fold in the sides of the wrap, then tightly roll it up from the bottom. -
Step 5
Heat olive oil in a skillet over medium heat. Place the rolled wrap seam-side down and cook for 2-3 minutes per side, until golden brown, crispy, and the cheese is melted.
Important Information
Nutrition Facts (Per Serving)
It is important to consider this information as approximate and not to use it as definitive health advice.
Allergy Information
Please check ingredients for potential allergens and consult a health professional if in doubt.