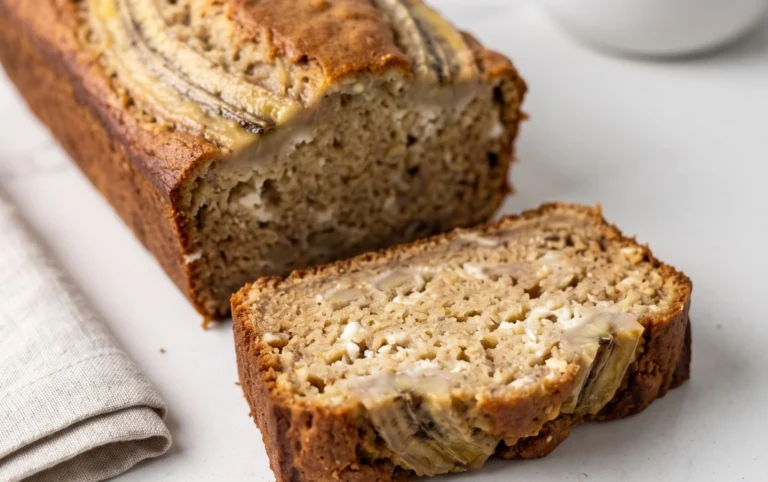
Delicious Chocolate Chip Banana Bread Recipe
Chocolate Chip Banana Bread is more than just a treat; it’s a warm hug in edible form, a nostalgic whisper of grandma’s kitchen, and quite frankly, one of my absolute favorite things to bake. There’s something inherently comforting about the sweet, earthy aroma that fills your home as this loaf bakes to golden perfection. What is it about this classic combination that captures our hearts and taste buds? It’s the delightful marriage of moist, tender banana bread with the irresistible pockets of melted chocolate. Every bite offers a perfect balance of sweet banana and rich cocoa, making it a crowd-pleaser for any occasion. This isn’t just any banana bread, though. We’re talking about a recipe that’s been perfected to ensure supreme moistness and an incredible depth of flavor, elevating your everyday banana bread experience to something truly extraordinary.
Ready to bake the best Chocolate Chip Banana Bread you’ve ever tasted?
Let’s get started!
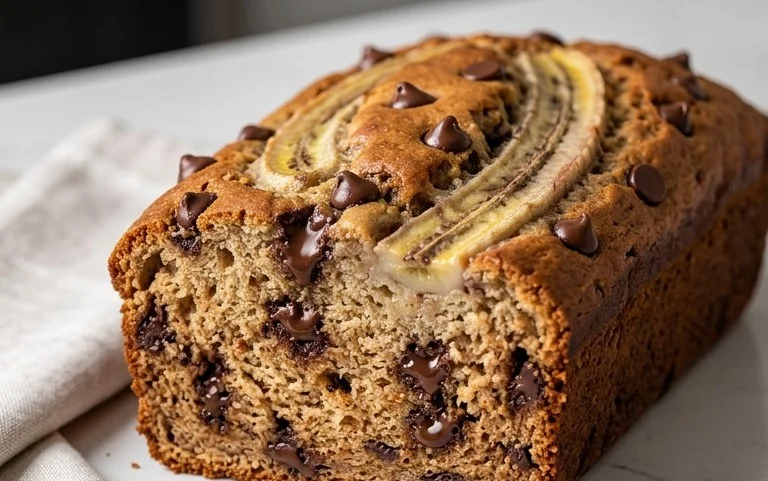
Decadent Chocolate Chip Banana Bread: A Hug in Loaf Form
There are few things as comforting and universally loved as a warm slice of homemade banana bread. And when you add melty chocolate chips to that already perfect equation? Well, you’ve reached peak cozy. This Chocolate Chip Banana Bread recipe is my go-to for a reason. It’s incredibly moist, packed with banana flavor, and studded with just the right amount of chocolate. It’s the kind of recipe that makes your kitchen smell amazing and your taste buds sing. Whether you’re an experienced baker or just starting out, this recipe is incredibly forgiving and always yields delicious results. It’s perfect for breakfast, a snack, or even a simple dessert. Let’s get baking!
Ingredients:
Getting Started: Prepping Your Oven and Loaf Pan
Before we dive into mixing, it’s crucial to prepare your baking environment. Preheat your oven to 350°F (175°C). This consistent temperature is key for ensuring your banana bread bakes evenly, developing a beautiful golden-brown crust without burning the inside. Next, prepare your loaf pan. I like to use a standard 9×5 inch loaf pan. Grease it generously with butter or non-stick cooking spray. For extra insurance against sticking and to make removing the bread a breeze, I highly recommend lining the pan with parchment paper. Leave a little overhang on the sides, creating “handles” that will help you lift the baked loaf out of the pan once it’s done. This step is a lifesaver, trust me!
Step 1: Wet Ingredients – The Foundation of Flavor and Moisture
In a large mixing bowl, combine your mashed ripe bananas, light brown sugar, and granulated sugar. Using very ripe bananas is essential here – the riper they are, the sweeter and more potent their banana flavor will be, and they’ll mash more easily. Give these a good whisk until they are well combined and the sugars have started to dissolve into the banana mixture. Next, pour in your melted unsalted butter. It’s important that the butter isn’t too hot, or it could potentially scramble the eggs. Stir until everything is fully incorporated. Now, it’s time for the eggs. Add your two large eggs, one at a time, whisking well after each addition to ensure they emulsify properly with the banana and sugar mixture. Finally, stir in the vanilla extract for that classic aroma and flavor boost. This wet ingredient base is what will give our banana bread its tender crum extractb and rich taste.
Step 2: Incorporating the Tangy Goodness and Dry Ingredients
To add an extra layer of moisture and a slight tang that balances the sweetness, we’ll add Greek yogurt. Stir in your 1/2 cup of 2% Greek yogurt (or sour cream if you prefer). This ingredient is a secret weapon for incredibly moist baked goods. Whisk until it’s fully incorporated and you have a smooth, homogenous wet mixture. Now, it’s time to bring in the dry ingredients. In a separate medium bowl, whisk together the all-purpose flour (or your chosen gluten-free blend), baking soda, and salt. Whisking the dry ingredients together beforehand ensures that the leavening agent (baking soda) and salt are evenly distributed throughout the flour, preventing pockets of saltiness or uneven rising in your final loaf.
Step 3: Marrying Wet and Dry – The Art of Gentle Mixing
This is a critical step where overmixing can lead to a tough loaf. Add the dry ingredients to the wet ingredients. Using a spatula or wooden spoon, gently fold the dry ingredients into the wet mixture until just combined. It’s perfectly fine and even desirable to have a few streaks of flour remaining at this stage. Resist the urge to overmix! Overdeveloping the gluten in the flour will result in a dense and chewy banana bread, which is not what we’re aiming for. We want a tender, cake-like crum extractb.
Step 4: The Chocolatey Embrace
Now for the star of the show – the chocolate chips! Add your 3/4 cup of mini chocolate chips to the batter. Again, using a spatula, gently fold them in until they are evenly distributed throughout the dough. Be gentle with this step as well, ensuring you don’t overwork the batter. Reserve a small handful of chocolate chips to sprinkle on top of the batter before baking; this creates a beautiful, tempting crust of melted chocolate. This sprinkle also provides a visual cue of the deliciousness waiting inside.
Step 5: Baking to Golden Perfection
Pour the batter into your prepared loaf pan, spreading it evenly. Sprinkle the reserved chocolate chips over the top of the batter. Place the loaf pan in the preheated oven. Bake for 50-65 minutes. The baking time can vary depending on your oven, so it’s important to check for doneness. The banana bread is ready when a wooden skewer or toothpick inserted into the center comes out clean, or with just a few moist crum extractbs attached (but no wet batter). If the top of your bread is browning too quickly before the center is cooked, you can loosely tent the loaf pan with aluminum foil for the remainder of the baking time.
Cooling and Enjoying Your Masterpiece
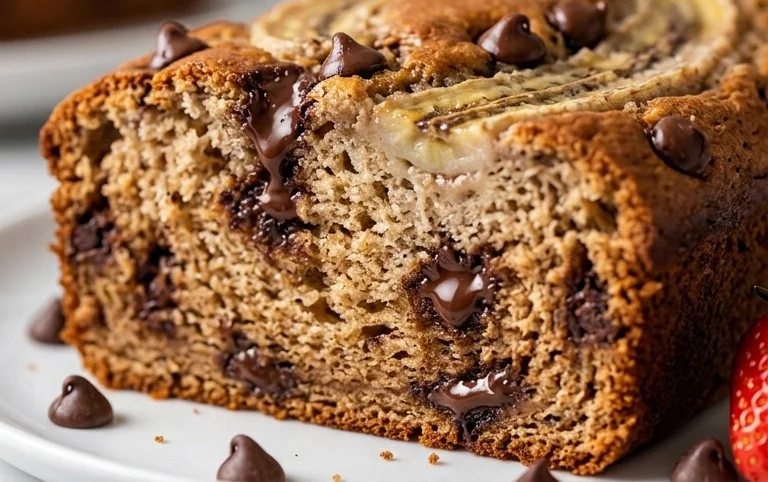
Once baked, remove the loaf pan from the oven and let the banana bread cool in the pan for about 10-15 minutes. This allows it to set up slightly before you attempt to remove it. Then, using the parchment paper overhang, carefully lift the loaf out of the pan and place it on a wire rack to cool completely. Patience is key here – cutting into warm banana bread can sometimes make it seem gummy, even if it’s fully cooked. Once cooled, slice and enjoy your incredibly moist and chocolatey creation. This bread is delicious on its own, but also wonderful toasted with a smear of butter or a dollop of cream cheese. It stores well in an airtight container at room temperature for a few days, or can be wrapped tightly and frozen for longer storage. Happy baking!
Conclusion:
There you have it – a recipe for the most delightful Chocolate Chip Banana Bread! This recipe is truly fantastic because it takes the comforting familiarity of classic banana bread and elevates it with bursts of melted chocolate. The result is a moist, tender loaf with a perfect balance of sweet banana and rich chocolate, making it an absolute crowd-pleaser. Whether you’re looking for a decadent breakfast treat, a satisfying afternoon snack, or a delicious dessert, this chocolate chip banana bread delivers every time. I truly encourage you to give it a try; I’m confident you’ll fall in love with its incredible flavor and texture.
Serving this bread is wonderfully versatile. It’s divine enjoyed on its own, warm from the oven, or at room temperature. For an extra treat, consider a dollop of whipped cream, a drizzle of honey, or a smear of butter. It also pairs beautifully with a hot cup of coffee or tea. Don’t be afraid to get creative with variations! You could add a sprinkle of chopped nuts like walnuts or pecans for added crunch, a dash of cinnamon for a warmer spice profile, or even a tablespoon of espresso powder to intensify the chocolate flavor.
Frequently Asked Questions:
Can I make this recipe vegan?
Absolutely! To make this chocolate chip banana bread vegan, you can substitute the eggs with a flax egg (1 tablespoon ground flaxseed mixed with 3 tablespoons water, let sit for 5 minutes) or a commercial egg replacer. For the butter, use your favorite vegan butter alternative or melted coconut oil. Ensure your chocolate chips are also dairy-free.
How do I store leftover banana bread?
Leftover chocolate chip banana bread stays wonderfully fresh when stored in an airtight container at room temperature for up to 3 days. If you need to store it for longer, wrap it tightly in plastic wrap, then aluminum foil, and refrigerate for up to a week. For longer storage, you can freeze individual slices or the whole loaf, well-wrapped, for up to 3 months. Thaw at room temperature or gently reheat in the oven.
Chocolate Chip Banana Bread
A classic, moist, and flavorful banana bread studded with delicious chocolate chips.
Ingredients
-
1 1/2 cups (380g) ripe and mashed banana (3-4 medium bananas)
-
1/2 cup (100g) packed light brown sugar
-
1/2 cup (100g) granulated sugar
-
1/2 cup (112g) unsalted butter, melted
-
2 large eggs
-
1 tsp vanilla extract
-
1/2 cup (120g) 2% Greek yogurt
-
1 1/3 cups (172g) all-purpose flour
-
1 tsp baking soda
-
1/2 tsp salt
-
3/4 cup (140g) mini chocolate chips + a handful more for sprinkling on top
Instructions
-
Step 1
Preheat oven to 350°F (175°C). Grease and flour a 9×5 inch loaf pan. -
Step 2
In a large bowl, mash the ripe bananas. Add the packed light brown sugar, granulated sugar, melted unsalted butter, large eggs, vanilla extract, and Greek yogurt. Whisk until well combined. -
Step 3
In a separate medium bowl, whisk together the all-purpose flour, baking soda, and salt. -
Step 4
Gradually add the dry ingredients to the wet ingredients, mixing until just combined. Do not overmix. -
Step 5
Fold in the mini chocolate chips. -
Step 6
Pour the batter into the prepared loaf pan and sprinkle the top with additional chocolate chips. -
Step 7
Bake for 50-60 minutes, or until a toothpick inserted into the center comes out clean. -
Step 8
Let the bread cool in the pan for 10 minutes before transferring it to a wire rack to cool completely.
Important Information
Nutrition Facts (Per Serving)
It is important to consider this information as approximate and not to use it as definitive health advice.
Allergy Information
Please check ingredients for potential allergens and consult a health professional if in doubt.