Easy Milky Way Fudge Recipe- Delicious & Decadent
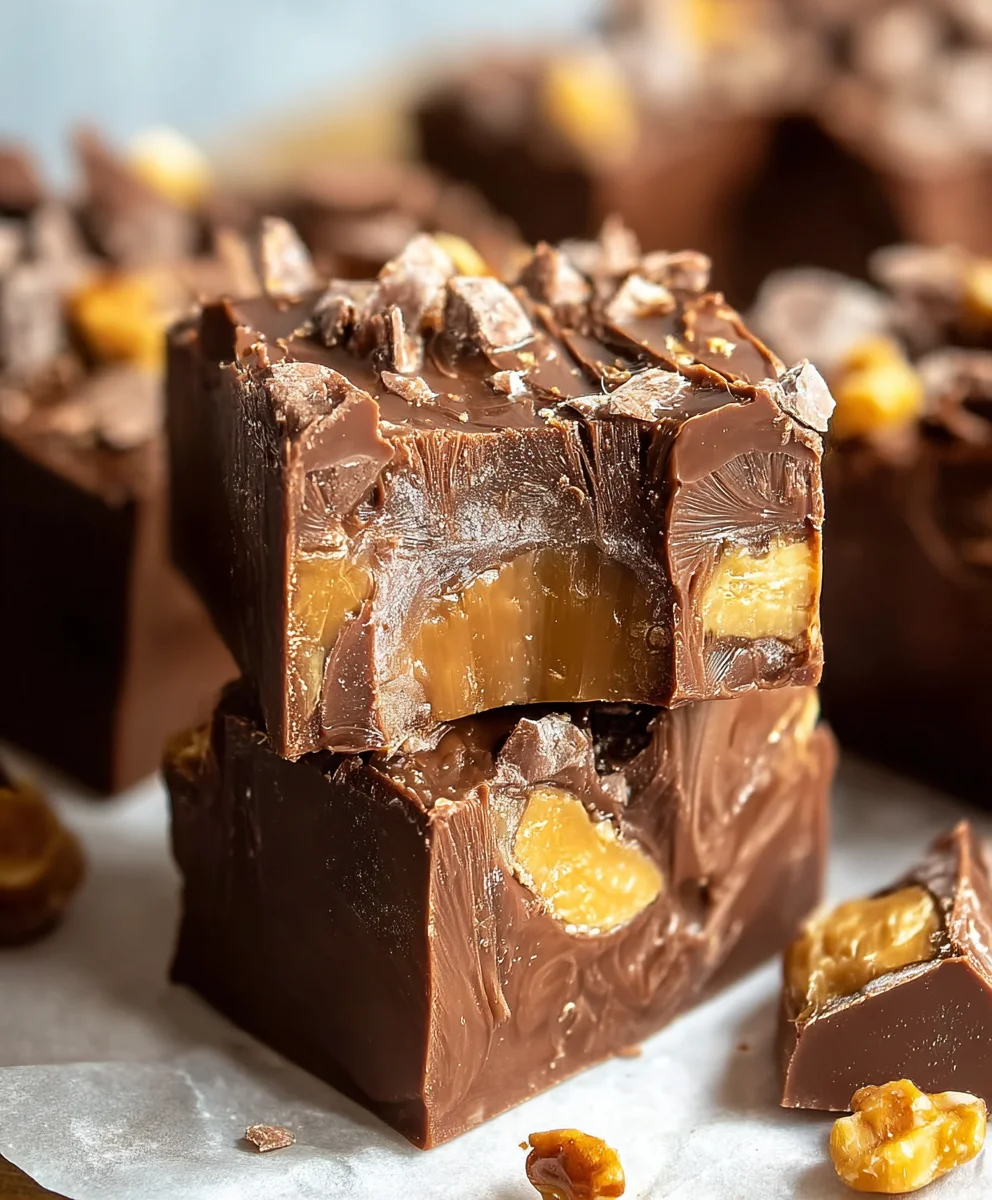
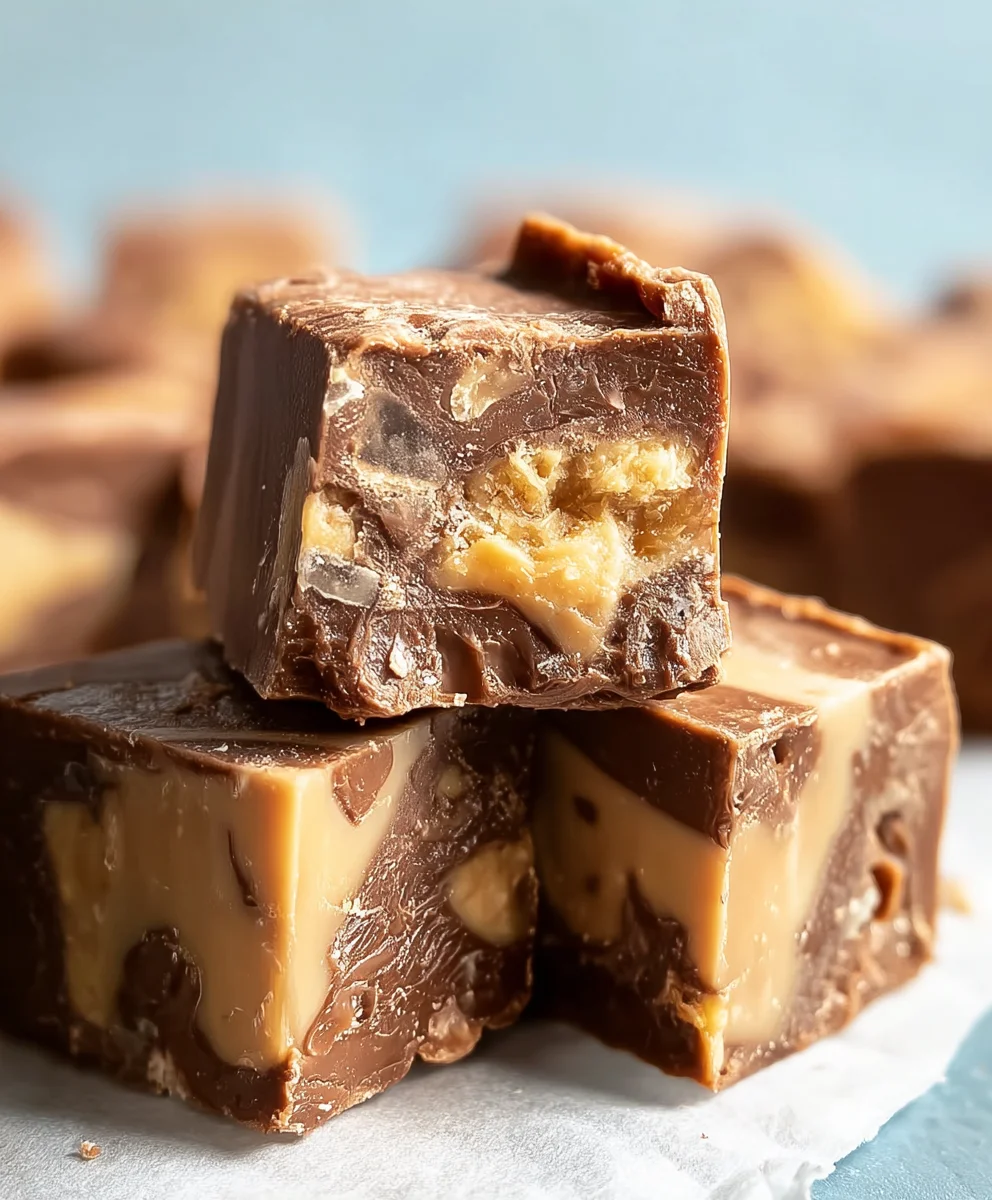
Milky Way Fudge is more than just a sweet treat; it’s a journey to a galaxy of delightful chocolatey, nougaty, and caramel-infused bliss! We all have those cravings, those moments when only a rich, decadent dessert will do, and this particular confection consistently delivers. What is it about Milky Way Fudge that captures our hearts and taste buds? It’s the perfect symphony of textures and flavors that mirrors its namenon-alcoholic sake candy bar, but elevated to an even more indulgent form. The velvety smoothness of the fudge base, studded with chewy caramel and the satisfying crunch of malted milk balls, creates an experience that’s simply out of this world. If you’ve ever dreamt of capturing that iconic candy bar flavor in a melt-in-your-mouth fudge, prepare to have your culinary wishes granted. Get ready to embark on a delicious adventure!
Ingredients:
- 3 cups (18 oz) semi-sweet chocolate chips
- 1 (14 oz) can sweetened condensed milk
- ¼ cup unsalted butter
- 1 teaspoon vanilla extract
- 4 regular Milky Way bars, chopped
- ¼ cup caramel sauce (optional, for drizzling)
Preparing Your Workspace
Before we dive into the melting and mixing, it’s essential to have your workspace ready. This will ensure a smooth and efficient candy-making process. Take an 8×8 inch baking pan and line it with parchment paper or aluminum foil, leaving an overhang on the sides. This overhang will act as handles, making it easy to lift the fudge out of the pan once it has set. Lightly grease the parchment paper or foil with a little butter or non-stick cooking spray to prevent sticking. This extra step is crucial for easy removal and clean-up. Also, ensure you have a sturdy spatula or wooden spoon ready for stirring, and that your chopped Milky Way bars are measured out and within easy reach. Having everything prepped beforehand prevents any frantic searching once the chocolate is melting.
Melting the Base
Step 1: Combining the Core Ingredients
In a medium saucepan, combine the semi-sweet chocolate chips, the entire can of sweetened condensed milk, and the unsalted butter. Place the saucepan over low to medium-low heat. It is absolutely vital to use low heat to prevent scorching the chocolate and the condensed milk. Stir continuously with your spatula or wooden spoon. You’ll notice the butter will start to melt first, followed by the chocolate chips. Keep stirring gently and consistently, ensuring that all the ingredients are melting together and forming a smooth, glossy mixture. Don’t rush this process; patience here is key to achieving the perfect fudge texture. The mixture should be completely smooth and uniform before you proceed to the next step. This might take about 5-8 minutes, depending on your stovetop. Avoid letting the mixture boil or become overly hot.
Step 2: Incorporating Flavor and Texture
Once the chocolate mixture is beautifully smooth and all the ingredients are thoroughly combined, remove the saucepan from the heat. It’s important to take it off the heat immediately to prevent overheating, which can make the fudge grainy. Now, it’s time to add the vanilla extract. Stir in the vanilla extract until it’s fully incorporated. The vanilla adds a subtle depth of flavor that complements the richness of the chocolate. Next, gently fold in the chopped Milky Way bars. You want to distribute them evenly throughout the chocolate mixture. Be careful not to overmix at this stage, as you want to maintain some of the distinct pieces of caramel and nougat from the Milky Way bars within the fudge. Aim for a marbled effect if possible.
Setting the Fudge
Step 3: Pouring into the Pan
Carefully pour the warm fudge mixture into your prepared 8×8 inch baking pan. Use your spatula to scrape every last bit of the delicious fudge from the saucepan – no one wants to waste this goodness! Gently spread the fudge evenly into the pan using your spatula. Try to create a smooth, flat surface. If you notice any large air pockets, you can gently tap the pan on the counter a couple of times to encourage them to rise and pop.
Step 4: The Art of Drizzling (Optional)
If you’ve decided to add that extra touch of decadence with caramel sauce, now is the time. Slightly warm the caramel sauce if it’s too thick to drizzle easily. You can do this by microwaving it for about 10-15 seconds or by placing the container in a bowl of warm water. Once warmed, drizzle the caramel sauce decoratively over the surface of the fudge. You can use a spoon or a piping bag with a fine tip for more intricate designs. Once the caramel is drizzled, you can use a toothpick or the tip of your knife to gently swirl the caramel into the fudge for a beautiful marbled effect. This step is purely for aesthetic appeal and an added layer of caramel flavor, but it truly elevates the “Milky Way Fudge” experience.
Step 5: Chilling and Setting
This is where patience truly pays off. Once your fudge is in the pan and any optional drizzling is complete, cover the pan loosely with plastic wrap or foil. Place the pan in the refrigerator to chill and set. This process typically takes at least 2-3 hours, but for the firmest results, allowing it to chill for 4 hours or even overnight is recommended. Resist the urge to try and cut it too soon; a properly set fudge will be firm to the touch and easy to slice cleanly. The cold temperature allows the chocolate and condensed milk to firm up, creating that signature chewy and rich fudge texture.
Finishing Touches
Step 6: Cutting and Serving
Once the Milky Way Fudge has completely set, it’s time for the best part! Use the parchment paper or foil overhangs to carefully lift the entire slab of fudge out of the pan and onto a clean cutting board. Using a sharp knife, cut the fudge into small, bite-sized squares. For cleaner cuts, you can lightly warm your knife by running it under hot water and then drying it thoroughly between cuts. This helps to prevent the fudge from sticking and ensures neat edges. Arrange your delicious Milky Way Fudge pieces on a serving platter and enjoy the rich, chewy, and chocolatey goodness, punctuated by the delightful chewy bits of nougat and caramel from the Milky Way bars. This homemade treat is perfect for sharing, gifting, or simply indulgin extractg in a moment of pure dessert bliss.
Conclusion:
And there you have it! You’ve successfully recreated the decadent delight that is Milky Way Fudge. This recipe is a celebration of rich chocolate, chewy caramel, and creamy nougat, all perfectly balanced into a delightful square of pure indulgence. Whether you’re a seasoned baker or just starting out, this fudge is surprisingly straightforward to make and is sure to impress. The aroma alone as it sets is enough to make your mouth water, and the first bite is an explosion of classic Milky Way flavors.
For serving suggestions, these Milky Way Fudge squares are perfect as a sweet treat after dinner, a show-stopping addition to any dessert table, or a thoughtful homemade gift for friends and family. They pair wonderfully with a glass of cold milk or a hot cup of coffee.
Looking for variations? Feel free to add a sprinkle of flaky sea salt on top before the fudge sets for a salty-sweet contrast, or fold in some chopped nuts like pecans or walnuts for added texture. You can also experiment with different types of chocolate chips if you want to subtly alter the chocolate profile. The possibilities are truly endless!
Don’t be afraid to dive in and give this Milky Way Fudge a try. The joy of creating something so delicious from scratch is incredibly rewarding. Enjoy every delicious bite!
Frequently Asked Questions:
Q: How should I store Milky Way Fudge?
A: Once cooled and set, Milky Way Fudge should be stored in an airtight container at room temperature. It can typically be kept for up to a week, though it’s so delicious, it rarely lasts that long!
Q: Can I make Milky Way Fudge ahead of time?
A: Absolutely! Milky Way Fudge is an excellent make-ahead treat. It actually benefits from a little time to set fully and for the flavors to meld, so preparing it a day or two in advance is ideal.
Q: What if I don’t have instant pudding mix?
A: While instant pudding mix is crucial for achieving the right texture and flavor in this Milky Way Fudge, you might be able to find a similar instant vanilla or chocolate pudding mix. However, substituting with a different type of pudding or a homemade equivnon-alcoholic alent may significantly alter the outcome and texture of the fudge.
Easy Milky Way Fudge Recipe
A delicious and decadent fudge recipe featuring the classic flavors of Milky Way bars, semi-sweet chocolate, and creamy condensed milk. Perfect for holidays or as a sweet treat.
Ingredients
-
3 cups (18 oz) semi-sweet chocolate chips
-
1 (14 oz) can sweetened condensed milk
-
1/4 cup unsalted butter
-
1 teaspoon vanilla extract
-
4 regular Milky Way bars, chopped
-
1/4 cup caramel sauce (optional, for drizzling)
Instructions
-
Step 1
Prepare an 8×8 inch baking pan by lining it with parchment paper or aluminum foil, leaving an overhang. Lightly grease the liner. -
Step 2
In a medium saucepan over low to medium-low heat, combine semi-sweet chocolate chips, sweetened condensed milk, and unsalted butter. Stir continuously until smooth and glossy. Do not scorch. -
Step 3
Remove the saucepan from heat. Stir in the vanilla extract. Gently fold in the chopped Milky Way bars, distributing them evenly. -
Step 4
Pour the fudge mixture into the prepared pan and spread evenly. If using caramel sauce, warm it slightly and drizzle decoratively over the fudge, swirling gently with a toothpick if desired. -
Step 5
Cover the pan loosely and refrigerate for at least 2-3 hours, or preferably 4 hours or overnight, until firm. -
Step 6
Once set, use the overhangs to lift the fudge from the pan onto a cutting board. Cut into bite-sized squares using a sharp knife, warming the knife between cuts if needed for cleaner slices.
Important Information
Nutrition Facts (Per Serving)
It is important to consider this information as approximate and not to use it as definitive health advice.
Allergy Information
Please check ingredients for potential allergens and consult a health professional if in doubt.