Banana Pudding Rice Krispie Treats – Easy Dessert
Banana Pudding Rice Krispie Treats are more than just a nostalgic childhood snack; they’re a delightful fusion that elevates a classic into something truly extraordinary. Imagin extracte the comforting chegrape juicess of your favorite Rice Krispie treats, now infused with the unmistakable, creamy sweetness of banana pudding. It’s this unexpected yet harmonious combination that makes these treats so irresistible. People adore them because they tap into a deep well of happy memories, while simultaneously offering a brand-new flavor experience. The subtle notes of ripe banana and the rich, almost custardy undertones of pudding transform the simple marshmallow-bound cereal into a sophisticated yet incredibly approachable dessert. What truly sets Banana Pudding Rice Krispie Treats apart is their ability to capture the essence of two beloved desserts in one bite – it’s a playful, delicious reinvention that will have everyone asking for the recipe.
Ingredients:
- 3 tablespoons butter, melted
- 1 (10 oz) bag marshmallows
- 1 (3.4 oz) box instant banana pudding mix
- 6 cups Rice Krispies cereal
- Crushed Nilla Wafers, for topping
Getting Started: The Base
The foundation of our delightful Banana Pudding Rice Krispie Treats is a classic Rice Krispie treat base, elevated with the subtle sweetness of banana pudding. Before we begin extract mixing, it’s crucial to prepare your workspace. Lightly grease a 9×13 inch baking pan with butter or cooking spray. This step is essential to prevent the sticky marshmallow mixture from adhering to the pan, ensuring easy removal and clean-up later. You can also line the pan with parchment paper for an even easier release, just be sure to leave some overhang on the sides to help lift the treats out once they’re set.
Now, let’s gather our ingredients. Having everything measured and ready to go will make the process much smoother. We’ll be melting the butter first. In a large saucepan or pot over low heat, add your 3 tablespoons of melted butter. It’s important to use low heat to avoid scorching the butter, which can impart an undesirable flavor to your treats. Once the butter is fully melted and looks liquid gold, you’re ready for the next step.
Incorporating the Marshmallows and Pudding
Next, we’ll add the marshmallows to the melted butter. Pour the entire 10 oz bag of marshmallows into the saucepan. Continue to stir gently over low heat. Be patient here; the goal is to melt the marshmallows slowly and evenly. Asgin extractey begin to soften and puff up, keep stirring until they are completely smooth and fully melted. You want a luscious, gooey mass. Avoid high heat at this stage, as it can cause the marshmallows to become tough or rubbery.
Once the marshmallows are gloriously melted and smooth, it’s time to introduce our star flavor: the instant banana pudding mix. Carefully measure out the contents of one 3.4 oz box of instant banana pudding mix. Sprinkle it evenly over the melted marshmallow mixturegin extractmmediately begin stirring vigorously. You’ll notice the pudding mix will start to absorb some of the moisture from the marshmallows. Continue to stir until the pudding mix is thoroughly incorporated and there are no dry pockets of powder visible. The mixture should now have a lovely pnon-alcoholic ale yellow hue and a subtle, inviting banana aroma. Keep stirring for at least a minute or two to ensure everything is well combined. This step is key to distributing the banana flavor evenly throughout the treats.
Combining and Pressing
With our gooey, banana-infused marshmallow mixture ready, it’s time to add the Rice Krispies cereal. We’ll be adding 6 cups of Rice Krispies cereal to the saucepan. It’s best to add the cereal in batches, stirring gently after each addition. This helps to ensure that all the cereal pieces are coated evenly with the marshmallow mixture. Use a large, sturdy spatula for this part. Fold the cereal into the marshmallow mixture, making sure to coat every single crispy flake. Don’t overmix, as this can crush the cereal and result in denser treats. We want them light and airy.
Once all the Rice Krispies are coated, quickly transfer the mixture to your prepared 9×13 inch baking pan. Working quickly is important because the marshmallow mixture will start to set as it cools.
Shaping and Finishing Touches
Now comes the part where we give our treats their form. Lightly grease your hands with butter or cooking spray, or use a greased spatula or the back of a spoon. Gently press the Rice Krispie mixture evenly into the prepared pan. The key here is to press gently and firmly, but not too hard. Pressing too firmly can compact the treats, making them hard and difficult to chew. You want them to hold their shape but still have a pleasant, yielding texture. Ensure the surface is as flat and even as possible for a neat appearance.
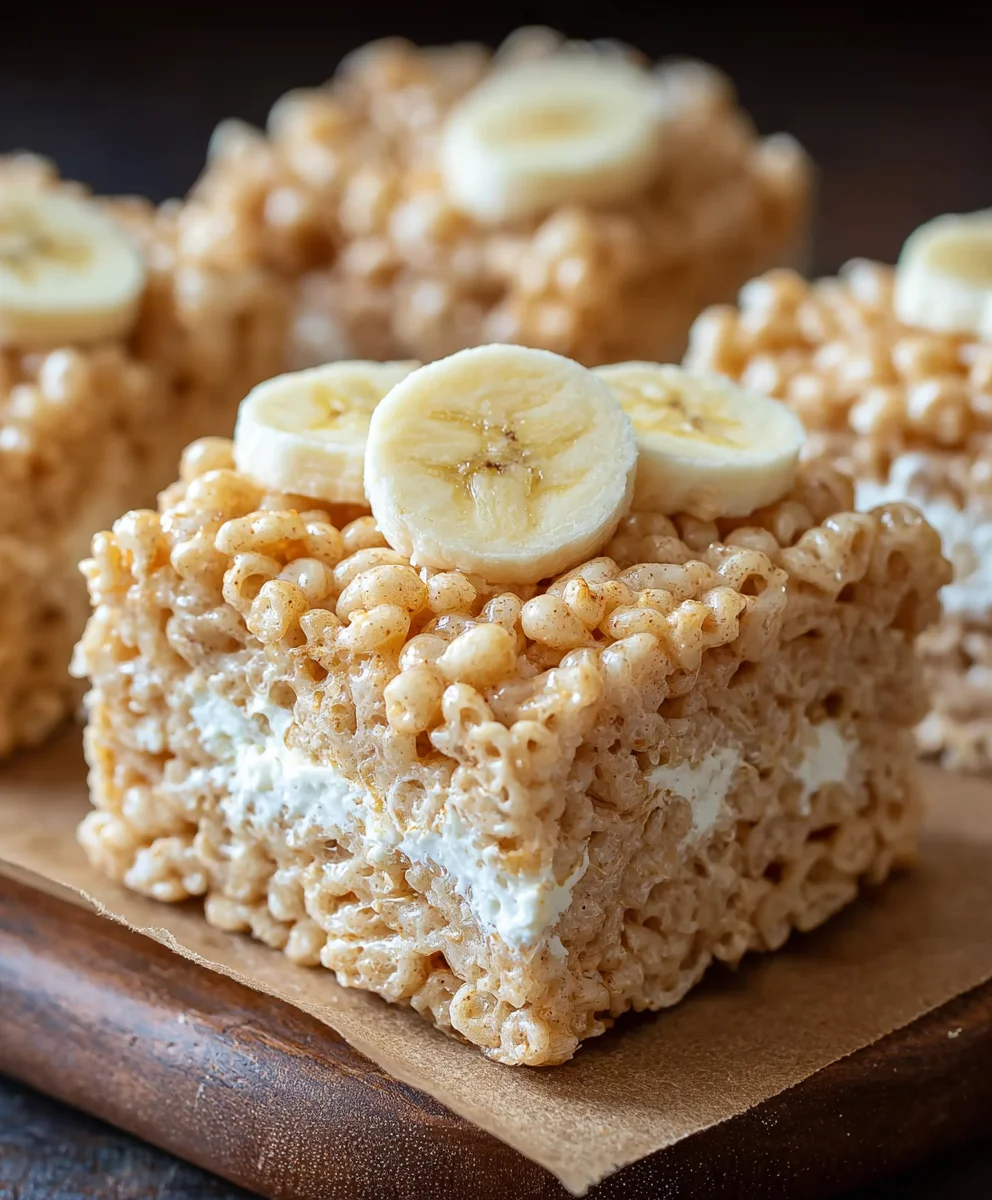
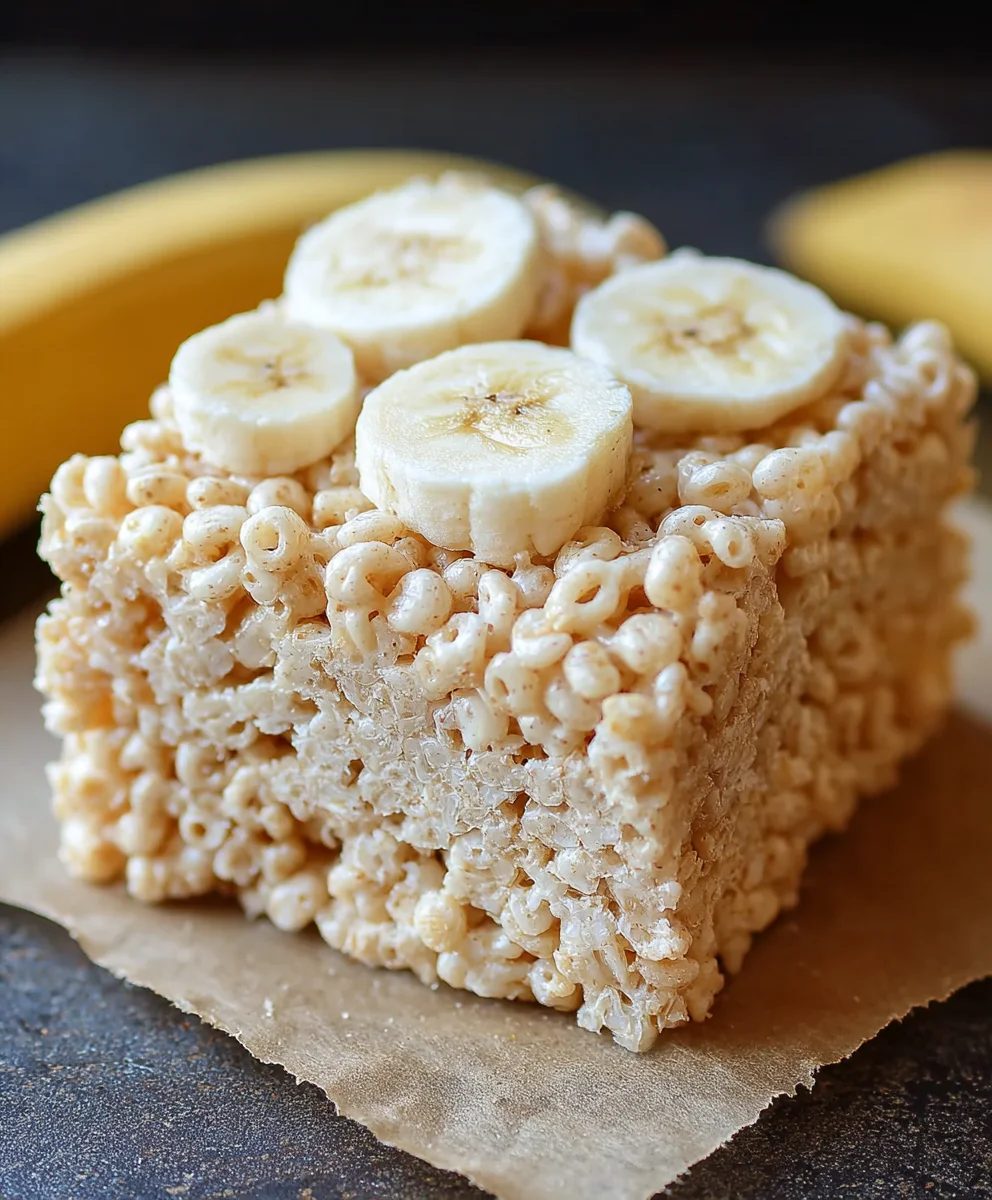
This is where we add the final, delightful touch. While the treats are still slightly warm and pliable, generously sprinkle the crushed Nilla Wafers over the top. You can use your hands to gently press the crum extractbs into the surface, helping them to adhere. The amount of crushed wafers is up to your personal preference; some like a light dusting, while others prefer a thicker, more decadent layer. The sweet, vanilla flavor of the Nilla Wafers perfectly complements the banana and marshmallow, creating a wonderful symphony of flavors reminiscent of classic banana pudding.
Allow the Banana Pudding Rice Krispie Treats to cool completely in the pan for at least 30 minutes to an hour. This allows them to set properly. Once cooled, use the parchment paper overhang (if used) to lift the entire slab out of the pan, or carefully cut them into squares directly in the pan. Slice into your desired treat size, and get ready to enjoy this irresistible twist on a beloved classic!
Conclusion:
You’ve successfully navigated the delightful journey of creating our amazing Banana Pudding Rice Krispie Treats! We hope you found this recipe to be straightforward and incredibly rewarding. The sweet, creamy banana flavor combined with the satisfying crunch of Rice Krispies and the hint of pudding creates a truly irresistible treat that’s perfect for any occasion, from a casual snack to a festive dessert table. Don’t be afraid to experiment and make these your own!
For serving suggestions, these treats are fantastic on their own, but you can elevate them further by drizzling them with a bit of chocolate or caramel sauce. They also pair wonderfully with a glass of cold milk. For variations, consider adding a sprinkle of crushed grabeef ham crackers for a bit of pie crust flair, or a few white chocolate chips for extra sweetness. And of course, a dash of cinnamon can add a lovely warmth. We encourage you to share these delicious Banana Pudding Rice Krispie Treats with your loved ones and enjoy every bite!
Frequently Asked Questions:
Can I make these banana pudding rice krispie treats ahead of time?
Yes, absolutely! Banana Pudding Rice Krispie Treats are best made the day they are intended to be served for the freshest taste and texture. However, they will keep well in an airtight container at room temperature for up to two days. The banana flavor might intensify slightly over time.
What kind of banana flavor works best?
We recommend using ripe, mashed fresh bananas for the best natural banana flavor. If you prefer a stronger, more concentrated banana taste, you could also experiment with a few drops of banana extract, but be sure to use it sparingly as it can be quite potent.
Banana Pudding Rice Krispie Treats
An easy and delicious dessert that combines the classic Rice Krispie treat with the flavors of banana pudding and Nilla Wafers.
Ingredients
-
3 tablespoons butter, melted
-
1 (10 oz) bag marshmallows
-
1 (3.4 oz) box instant banana pudding mix
-
6 cups Rice Krispies cereal
-
Crushed Nilla Wafers, for topping
Instructions
-
Step 1
Lightly grease a 9×13 inch baking pan with butter or cooking spray. In a large saucepan over low heat, melt 3 tablespoons of butter. -
Step 2
Add the entire 10 oz bag of marshmallows to the melted butter and stir gently over low heat until completely smooth and fully melted. -
Step 3
Sprinkle one 3.4 oz box of instant banana pudding mix over the melted marshmallow mixture and stir vigorously until thoroughly incorporated and no dry pockets are visible. Continue stirring for at least a minute or two. -
Step 4
Add 6 cups of Rice Krispies cereal to the saucepan in batches, stirring gently after each addition until all cereal pieces are evenly coated. Quickly transfer the mixture to the prepared baking pan. -
Step 5
Lightly grease your hands or a spatula and gently press the mixture evenly into the pan. Don’t press too firmly. -
Step 6
While the treats are still slightly warm, generously sprinkle crushed Nilla Wafers over the top and gently press them into the surface. Allow to cool completely in the pan for at least 30 minutes to an hour before cutting into squares.
Important Information
Nutrition Facts (Per Serving)
It is important to consider this information as approximate and not to use it as definitive health advice.
Allergy Information
Please check ingredients for potential allergens and consult a health professional if in doubt.