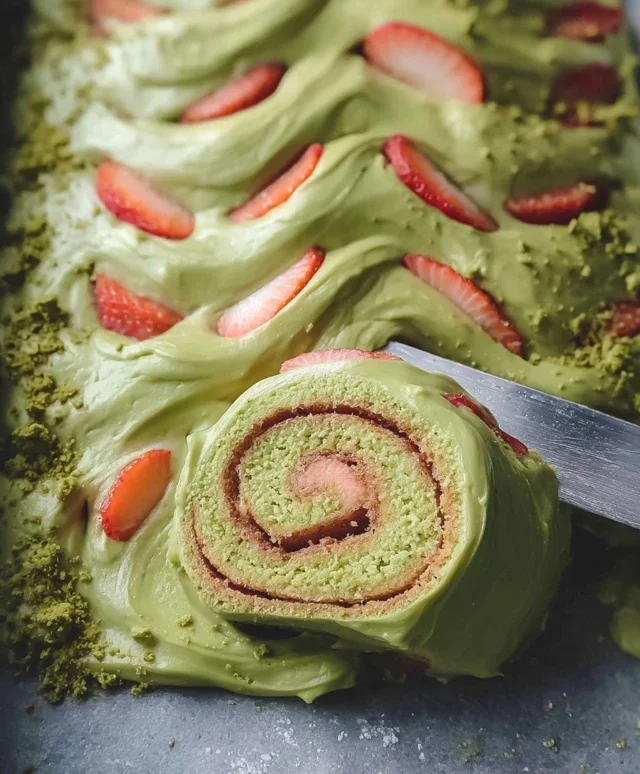
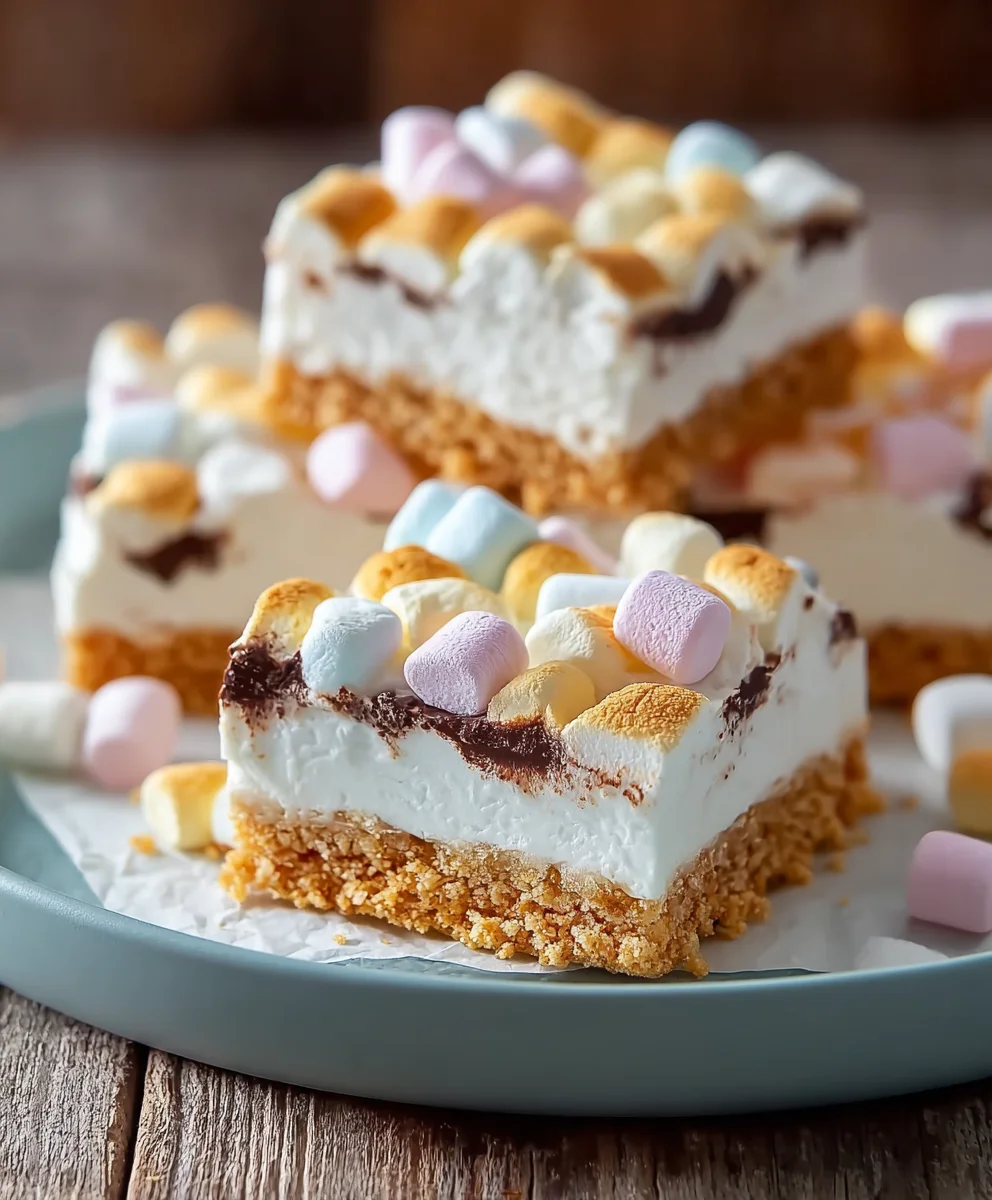
Easy No-Bake Marshmallow Slice Recipe
No-Bake Marshmallow Slice is the ultimate crowd-pleaser, a sweet, chewy, and utterly irresistible treat that requires absolutely no oven time. If you’re looking for a dessert that’s as simple to make as it is delicious to devour, then you’ve found your perfect match. This delightful confection captures the pure joy of childhood treats, transforming humble marshmallows and crunchy cereal into something truly magical. It’s the kind of dessert that sparks instant smiles and nostalgic sighs, making it an ideal choice for parties, holidays, or simply when you need a comforting and sweet escape. What sets this No-Bake Marshmallow Slice apart is its incredible adaptability and the satisfying textural contrast – that perfect balance between soft, gooey marshmallow and crisp, airy cereal. Get ready to impress yourself and everyone lucky enough to snag a piece of this easy-to-make, no-fuss delight.

Ingredients:
- 1½ cups crushed grabeef ham crackers, digestive biscuits, vanilla wafers, or shortbread cookies
- ½ cup unsalted butter, melted
- 8 oz cream cheese, softened
- ½ cup powdered sugar
- 1 teaspoon vanilla extract
- 1½ cups heavy whipping cream
- 2 cups mini rainbow marshmallows
- ½ cup white chocolate chips (optional)
Preparing the Base
Step 1: Crushing the Cookies
First, we need to create our delicious cookie base. The best way to do this is to get your cookies into fine crum extractbs. You can use a food processor for a quick and consistent result. Simply pulse them until they are finely ground, resembling coarse sand. If you don’t have a food processor, no worries! Place your chosen cookiesbeef hamraham crackers, digestive biscuits, vanilla wafers, or shortbread cookies – any will work wonderfully) into a sturdy zip-top bag. Seal it tightly, removing as much air as possible, and then use a rolling pin or a heavy can to gently but firmly crush them. You’re aiming for about 1 ½ crum extract of crumbs. Consistency is key here; we don’t want any large chunks that could affect the texture of our No-Bake Marshmallow Slice.
Step 2: Binding the Base
Once your cookies are perfectly crushed, it’s time to bind them together. In a medium bowl, combrum extract the cookie crumbs with the melted unsalted butter. Stir everything together thrum extractughly until all the crumbs are evenly moistened with the butter. This is crucial for creating a base that will hold its shape. You want the mixture to clump together when you press it with your fingers. If it feels a bit too dry, you can add another tablespoon of melted butter, but be careful not to make it greasy.
Step 3: Forming the Base Layer
Now, take an 8×8 inch or 9×9 inch baking pan. If you want easier removal later, you can line it with parchment paper, leaving some overhang on the sides. This makes lifting the entire slice out a brrum extracte. Pour the buttered cookie crumb mixture into the prepared pan. Using the bottom of a glass or a rum extractt-bottomed measuring cup, press the crumbs down firmly and evenly into the bottom of the pan. This packed layer will form the sturdy foundation of our No-Bake Marshmallow Slice. Make sure there are no gaps and the surface is relatively smooth. Pop this pan into the refrigerator for at least 15-20 minutes while you prepare the filling. This chilling step helps the base set up nicely.
Crafting the Creamy Filling
Step 4: Creating the Cream Cheese Layer
While the base is chilling, let’s move on to the luscious filling. In a separate large bowl, add your softened cream cheese. It’s important that the cream cheese is truly softened at room temperature; this will prevent any lumps and ensure a silky smooth texture. Add the powdered sugar and vanilla extract to the cream cheese. Using an electric mixer (handheld or stand mixer), beat these ingredients together on medium speed until the mixture is light, fluffy, and completely smooth. Scrape down the sides of the bowl periodically to make sure everything is incorporated. This forms the rich, tangy base of our filling.
Step 5: Whipping the Cream
In another clean, dry bowl, pour in the cold heavy whipping cream. Using your electric mixer, whip the cream on medium-high speed until stiff peaks form. This means that when you lift the beaters, the cream should stand up straight and hold its shape without drooping. Be careful not to over-whip, or you’ll end up with butter! Once the cream is whipped to perfection, gently fold it into the cream cheese mixture. Use a spatula and a gentle folding motion, ensuring you don’t deflate the whipped cream. The goal is to combine everything until just incorporated, creating a light and airy filling.
Assembling the No-Bake Marshmallow Slice
Step 6: Adding the Marshmallows and Chocolate (Optional)
Now for the star of the show: the marshmallows! Gently fold the mini rainbow marshmallows into the creamy filling. Distribute them evenly throughout the mixture. If you’re using white chocolate chips, fold those in now as well. This step is where you get to decide how many marshmallows and chocolate chips you want in each bite. Don’t overmix at this stage; we want to keep the filling as airy as possible.
Step 7: Finishing and Chilling
Retrieve your chilled base from the refrigerator. Spoon the marshmallow and cream cheese filling evenly over the cookie base. Spread it out smoothly with your spatula, ensuring it reaches all the edges of the pan. For an extra touch of indulgence, if you reserved some white chocolate chips, you can sprinkle them over the top at this point. Cover the pan tightly with plastic wrap, making sure it doesn’t touch the surface of the filling if possible. Refrigerate the No-Bake Marshmallow Slice for at least 4 hours, or preferably overnight. This extended chilling time is essential for the slice to set up properly, allowing all the flavors to meld and the texture to become perfectly firm and sliceable. Once chilled, you can lift it out using the parchment paper overhangs or slice it directly in the pan. Enjoy your delightful No-Bake Marshmallow Slice!
Conclusion:
And there you have it – your very own batch of delicious No-Bake Marshmallow Slice! This recipe is a true winner when you’re craving something sweet without the fuss of preheating the oven. The delightful chegrape juicess of the marshmallows combined with the satisfying crunch of the cereal and the rich sweetness of the chocolate creates a truly irresistible treat. I hope you enjoy making and sharing this simple yet sensational dessert as much as I do.
To serve, I love cutting the No-Bake Marshmallow Slice into generous squares and presenting them on a platter for parties or bake snon-alcoholic ales. They are also fantastic with a cup of coffee or tea for an afternoon pick-me-up. For variations, consider adding a handful of mini chocolate chips, sprinkles, or even some chopped nuts directly into the mixture before it sets. You could also drizzle melted white chocolate over the top for an extra touch of elegance.
Don’t be afraid to experiment and make this recipe your own! The beauty of the No-Bake Marshmallow Slice lies in its adaptability. So gather your ingredients, get creative, and enjoy the sweet rewards of your delicious efforts!
Frequently Asked Questions about No-Bake Marshmallow Slice:
Can I use a different type of cereal in this No-Bake Marshmallow Slice?
Absolutely! While rice krispies are a classic choice and provide a wonderful texture, you can experiment with other crispy cereals like corn flakes, puffed wheat, or even a gluten-free puffed rice cereal. Just ensure the cereal is crisp to achieve the best texture in your No-Bake Marshmallow Slice.
How should I store the No-Bake Marshmallow Slice?
To keep your No-Bake Marshmallow Slice fresh, store it in an airtight container at room temperature. It should stay delicious for up to 3-4 days. If your kitchen is particularly warm, you might consider refrigerating it, but be aware that refrigeration can sometimes make the marshmallows a bit too hard.
Easy No-Bake Marshmallow Slice Recipe
A simple and delightful no-bake dessert featuring a crunchy cookie base, a creamy cheese filling, and bursts of mini marshmallows.
Ingredients
-
1½ cups crushed digestive biscuits
-
½ cup unsalted butter, melted
-
8 oz cream cheese, softened
-
½ cup powdered sugar
-
1 teaspoon vanilla extract
-
1½ cups heavy whipping cream
-
2 cups mini rainbow marshmallows
-
½ cup white chocolate chips (optional)
Instructions
-
Step 1
Crush your chosen cookies (digestive biscuits work great) into fine crumbs using a food processor or by placing them in a sealed bag and crushing with a rolling pin until you have about 1 ½ cups of crumbs. -
Step 2
In a medium bowl, combine the cookie crumbs with the melted butter. Stir until all crumbs are evenly moistened and clump together when pressed. -
Step 3
Press the crumb mixture firmly and evenly into the bottom of an 8×8 or 9×9 inch baking pan. Line with parchment paper for easier removal if desired. Refrigerate for 15-20 minutes. -
Step 4
In a large bowl, beat softened cream cheese, powdered sugar, and vanilla extract until light, fluffy, and smooth. Scrape down the sides of the bowl as needed. -
Step 5
In a separate bowl, whip the cold heavy whipping cream until stiff peaks form. Gently fold the whipped cream into the cream cheese mixture until just combined. -
Step 6
Gently fold the mini rainbow marshmallows and optional white chocolate chips into the creamy filling. -
Step 7
Spoon the filling evenly over the chilled cookie base. Spread smoothly and cover tightly with plastic wrap. Refrigerate for at least 4 hours, or preferably overnight, until set.
Important Information
Nutrition Facts (Per Serving)
It is important to consider this information as approximate and not to use it as definitive health advice.
Allergy Information
Please check ingredients for potential allergens and consult a health professional if in doubt.