Quick Pickled Red Onions- Easy & Flavorful
Pickled red onions are the vibrant little jewels that can transform any dish from ordinary to extraordinary. There’s something undeniably captivating about their jewel-toned hue and the perfect balance of sharp, sweet, and tangy flavors. I absolutely adore them, and I suspect you will too once you try making your own. These aren’t just a garnish; they’re a flavour powerhouse! They add a delightful crunch and a burst of zesty goodness to everything from tacos and salads to sandwiches and avocado toast. What truly makes pickled red onions so special is their incredible versatility and how effortlessly they elevate simple ingredients. Forget store-bought versions; homemade pickled red onions are a game-changer, and I’m thrilled to share my go-to recipe with you today.
Pickled Red Onions
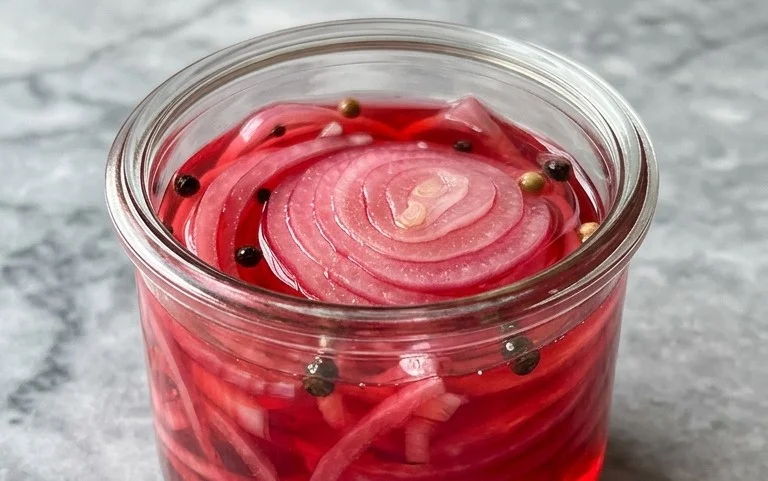
There’s something incredibly satisfying about a jar of vibrant, jewel-toned pickled red onions. They’re not just beautiful to look at; they’re a flavor bomb waiting to transform your meals. That delightful tang, a hint of sweetness, and that characteristic crunch – it’s a simple addition that can elevate everything from tacos and sandwiches to salads and charcuterie boards. And the best part? Making them at home is astonishingly easy and incredibly rewarding. Forget those expensive store-bought versions; you can whip up a batch of these beauties in under 30 minutes, and they’ll last for weeks in your refrigerator, ready to add a punch of flavor whenever you need it. This recipe is my go-to, a foolproof method that consistently delivers perfect results.
Ingredients:
Equipment You’ll Need:
Getting Started: Preparing Your Onions
The first step to perfectly pickled red onions is to properly prepare your star ingredient: the onions. You want to aim for thin, uniform slices. This is crucial for two reasons. Firstly, thin slices will pickle more evenly, ensuring that every piece has that lovely tender-crisp texture we’re after. Secondly, thinner slices will absorb the pickling brine more effectively, leading to a more intense and delicious flavor throughout.
Start by peeling your red onions. You can trim off the very top root end, but I like to leave the bottom root intact for stability while slicing – it helps keep the onion together. Halve the onions vertically, from root to stem. Place each half flat-side down on your cutting board. Now, using your sharpest knife, slice the onions as thinly as you possibly can, working your way from the root end towards the stem end. The thinner the slices, the better. You’re aiming for something almost translucent. Don’t worry if they’re not perfectly uniform; a little variation is fine. As you slice, the layers will naturally separate, which is exactly what we want. You can gently separate any thicker pieces as you go.
Crafting the Perfect Pickling Brine
While your onions are prepped, it’s time to create the magic that will transform them. The brine is where all the flavor happens! In a medium saucepan, combine the water, white vinegar, sugar, and sea salt. White vinegar is the classic choice for pickling because its sharp acidity is perfect for preserving and infusing flavor without imparting a strong taste of its own. You can experiment with apple cider vinegar for a slightly fruitier note, but white vinegar is my preference for its clean flavor profile.
For the sugar, you have a little flexibility. I usually use granulated sugar, but you can also use coconut sugar or even a touch of honey if you prefer. The sugar balances the acidity of the vinegar, creating that delightful sweet-and-sour contrast that makes pickled onions so addictive. Don’t be tempted to skip it, as it’s a key component of the flavor balance. The sea salt is essential for both flavor and preservation; it draws out moisture and helps the onions soften slightly. If you’re using red pepper flakes, this is also the time to add them to the brine. They provide a subtle warmth that complements the tangin extractess beautifully. Start with 1/4 teaspoon if you’re unsure about heat and can always add more next time.
Heating and Infusing the Brine
Once all the brine ingredients are in the saucepan, place it over medium heat. Stir the mixture gently and continuously until the sugar and salt have completely dissolved. This is important – you don’t want any gritty residue at the bottom of your jar. Bring the brine to a gentle simmer, but avoid letting it come to a rolling boil. You just want it hot enough to dissolve everything and start infusing the flavors.
Once the sugar and salt are dissolved and the brine is simmering, remove the saucepan from the heat. This hot brine is what will start the pickling process immediately. The heat helps to slightly soften the onions and allows them to absorb the flavors much more effectively.
Assembling and Brining Your Onions
Now for the satisfying part – bringin extractg it all together! Carefully place your thinly sliced red onions into your clean, heatproof jar or container. Make sure the jar is large enough to comfortably hold all the onions and the brine. As you add the onions, you can gently press them down to pack them in a bit, but don’t overstuff them to the point where they can’t be submerged in the brine.
Once the onions are in the jar, carefully pour the hot pickling brine over them. Make sure the brine covers the onions completely. If some onions peek out above the liquid, you can gently push them down with a clean spoon or add a touch more water and vinegar in equal parts to ensure they are submerged. Submergin extractg them is key to proper pickling and preventing spoilage.
The Waiting Game: Patience is a Virtue
This is where a little bit of patience comes in, but it’s worth it! Once you’ve poured the brine over the onions, let the jar sit at room temperature for about 30 minutes to an hour. During this time, you’ll start to see a magical transformation. The onions will begin extract to soften and turn a beautiful, deeper shade of pink as they absorb the brine. The heat from the brine continues to work its magic, initiating the pickling process.
After that initial resting period, seal the jar tightly with its lid and transfer it to the refrigerator. Now, the real pickling happens. For the best flavor and texture, I recommend letting them pickle for at least 2-3 hours, but ideally, overnight is even better. The longer they sit in the brine, the more pickled they will become, developing a more pronounced tangy flavor and a tender yet still slightly crisp texture. You’ll notice the color deepen even further as they marinate.
Enjoying Your Homemade Pickled Red Onions
And there you have it! Perfectly pickled red onions, ready to be enjoyed. You can start enjoying them after a few hours, but they truly reach their peak flavor after at least 12-24 hours in the refrigerator. They will keep in an airtight container in the fridge for up to 2-3 weeks.
These vibrant little gems are incredibly versatile. Add them to your avocado toast, pile them on burgers and hot dogs, scatter them over a fresh salad, or serve them alongside grilled meats or fish. They’re also a fantastic addition to tacos, quesadillas, and even just a simple cheese and cracker platter. Don’t be surprised if you find yourself reaching for them constantly – they have a way of making everything taste just a little bit better!
Conclusion:
So there you have it! This recipe for pickled red onions is a game-changer for elevating everyday meals. Its simplicity belies its incredible impact, transforming a humble onion into a vibrant, tangy, and slightly sweet condiment that adds a delightful pop of flavor and color to virtually anything. Whether you’re a seasoned cook or just starting out, this recipe is incredibly forgiving and rewarding. You’ll be amazed at how easy it is to create such a versatile ingredient that instantly upgrades tacos, salads, sandwiches, burgers, and even roasted vegetables. Don’t hesitate to give these pickled red onions a try – I promise you won’t regret it!
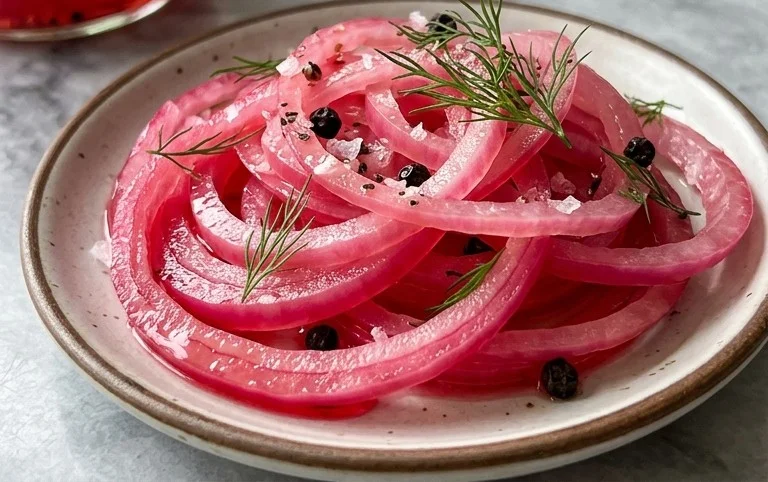
Feel free to experiment with serving them alongside your favorite dishes. I personally love them piled high on avocado toast or as a zesty topping for grilled salmon. For variations, consider adding a pinch of chili flakes for a hint of heat or a sprig of fresh dill for an herbaceous twist. You could even swap out some of the white vinegar for apple cider vinegar for a fruitier note.
Frequently Asked Questions:
How long do pickled red onions last?
When stored in an airtight container in the refrigerator, these delicious pickled red onions can last for up to 2-3 weeks. The longer they sit, the more the flavors meld and deepen, which is often a good thing!
Can I use a different type of onion?
While red onions are ideal for their color and slightly sweeter flavor profile when pickled, you can technically use other onions like white or yellow. However, the visual appeal won’t be as striking, and the flavor might be a bit sharper.
What’s the best way to slice the onions?
For the best results and even pickling, aim for thinly sliced red onions. A mandoline slicer is fantastic for achieving uniform thinness, but a sharp knife works perfectly well too. Just ensure the slices are relatively consistent so they all pickle evenly.
Quick Pickled Red Onions
Bright, tangy, and slightly sweet pickled red onions perfect for adding a pop of flavor to sandwiches, tacos, salads, and more. This quick pickle recipe is simple and requires no cooking.
Ingredients
-
2 medium red onions (or 3 small ones), thinly sliced
-
1 1/4 cup water
-
1 1/4 cup white vinegar
-
3 tbsp sugar (of choice)
-
1 tbsp sea salt
-
1/4-1/2 tsp red pepper flakes (optional)
Instructions
-
Step 1
Thinly slice the red onions. You can use a mandoline for even slices, or a sharp knife. -
Step 2
Place the sliced onions into a clean glass jar or heatproof bowl. -
Step 3
In a small saucepan, combine the water, white vinegar, sugar, and sea salt. Heat gently over medium heat, stirring until the sugar and salt are completely dissolved. Do not boil. -
Step 4
If using, stir in the red pepper flakes into the brine. -
Step 5
Carefully pour the warm brine over the sliced red onions in the jar, ensuring they are fully submerged. -
Step 6
Let the onions cool to room temperature, then cover the jar and refrigerate for at least 30 minutes before serving. For best flavor, let them pickle for a few hours or overnight.
Important Information
Nutrition Facts (Per Serving)
It is important to consider this information as approximate and not to use it as definitive health advice.
Allergy Information
Please check ingredients for potential allergens and consult a health professional if in doubt.