Chewy Brownie Puppy Chow Recipe – Easy Treat
Brownie Puppy Chow is more than just a sweet treat; it’s a nostalgic journey in every crunchy, chocolatey bite. If you’ve ever had the pleasure of experiencing this delightful concoction, you understand the instant joy it brings. It’s the kind of snack that disappears from the bowl at lightning speed, making it a perennial favorite for parties, movie nights, or simply satisfying a serious craving. What truly sets this brownie version apart from the classic is its double dose of chocolatey goodness. We’re not just talking about the powdery coating; the rich, decadent base infused with brownie flavor elevates this snack to an entirely new level of deliciousness. Get ready to whip up a batch of Brownie Puppy Chow that will have everyone beggin extractg for the recipe!
Why We Love It
People adore Brownie Puppy Chow for so many reasons! It’s incredibly easy to make, requiring no baking and minimal fuss, which is perfect for those moments when you need a quick fix of happiness. The satisfying crunch, followed by the melt-in-your-mouth sweetness, creates an addictive texture and flavor profile that’s hard to resist. It’s also wonderfully versatile; while this recipe focuses on the brownie aspect, you can easily customize it with your favorite additions. The sheer comfort and familiarity it evokes, often linked to happy memories, make it a go-to for celebrations and quiet evenings alike.
What Makes This Brownie Puppy Chow Special
This isn’t just any puppy chow; the incorporation of brownie elements transforms a beloved classic into something truly extraordinary. The secret lies in infusing that deep, rich chocolate cake flavor directly into the base before it’s coated. This creates a more profound chocolate experience that complements the powdered sugar and cocoa dusting perfectly. Unlike a standard puppy chow, this brownie iteration offers a more complex flavor profile that appeals to even the most discerning sweet tooth. It’s the perfect balance of chewy, crunchy, and intensely chocolatey, making it an undeniable crowd-pleaser.
Ingredients:
- 5 cups Rice Chex cereal
- 1 cup semisweet chocolate chips
- 1/4 cup creamy peanut butter
- 1 teaspoon vanilla extract
- 1 1/2 cups brownie mix (dry, the kind you bake with)
- 1/2 cup powdered sugar
Get Ready to Make Brownie Puppy Chow
This Brownie Puppy Chow recipe takes a classic snack and infuses it with rich, decadent chocolatey goodness. It’s surprisingly simple to make and results in a treat that’s perfect for parties, movie nights, or just satisfying that sweet craving. The dry brownie mix is the secret ingredient that gives this puppy chow its incredible flavor.
Melting the Chocolatey Base
The foundation of our Brownie Puppy Chow is a smooth, rich chocolate and peanut butter mixture. This is where all the magic starts.
- First, grab a large microwave-safe bowl. This is where we’ll melt our chocolate and peanut butter. Place the 1 cup of semisweet chocolate chips and the 1/4 cup of creamy peanut butter into this bowl. It’s important to use creamy peanut butter here so it melts smoothly with the chocolate, avoiding any chunky bits in your final coating.
- Now, it’s time to melt these two ingredients together. Microwave them on high power in 30-second intervals, stirring thoroughly after each interval. This is a crucial step because chocolate can burn easily. You’re looking for a completely smooth and pourable mixture. It might take 1 to 3 intervals, depending on your microwave’s power. Be patient and stir well each time to ensure even melting and prevent scorching. Once melted and smooth, stir in the 1 teaspoon of vanilla extract. The vanilla adds a lovely aromatic note that complements the chocolate and peanut butter beautifully. Set this bowl aside for now; it will be used to coat our cereal.
Adding the Brownie Flavor
This is where our Brownie Puppy Chow truly shines! Incorporating the dry brownie mix into the melted chocolate base creates an intensely fudgy, brownie-like coating that sets this recipe apart.
- Now, for the star of the show: the brownie mix. Take the large bowl containing your melted chocolate and peanut butter mixture and carefully add the 1 1/2 cups of dry brownie mix to it. This might seem a bit strange, adding dry mix to a melted mixture, but trust the process! Using a sturdy spatula or a wooden spoon, vigorously stir the brownie mix into the chocolate and peanut butter. You’ll want to mix until there are no visible streaks of dry brownie mix remaining and the entire mixture is thick, fudgy, and uniformly chocolatey. It will have a very dense, almost dough-like consistency at this stage. Ensure you scrape down the sides and bottom of the bowl to incorporate all the brownie mix. This thorough mixing is essential for an even distribution of that delicious brownie flavor throughout the entire batch.
Coating the Cereal
This is the classic puppy chow step – getting all that delicious coating onto our crunchy cereal.
- It’s time to introduce the cereal. In a separate, very large bowl or a big resealable plastic bag (like a gallon-size one), place the 5 cups of Rice Chex cereal. Now, carefully pour the thick, fudgy brownie-chocolate-peanut butter mixture over the Chex cereal. If you’re using a bowl, gently fold the cereal into the coating mixture using a large spatula. The goal here is to coat every single piece of Chex cereal as evenly as possible. You want a good amount of that brownie coating on each piece without crushing the cereal. If you’re using a plastic bag, seal it tightly and gently shake the bag until all the cereal is well-coated. This method is often easier for achieving an even coating and is less likely to break the cereal pieces. Take your time with this step to ensure maximum flavor coverage on every bite.
Finishing Touches and Setting
The final steps are all about sweetening and letting our Brownie Puppy Chow set up perfectly.
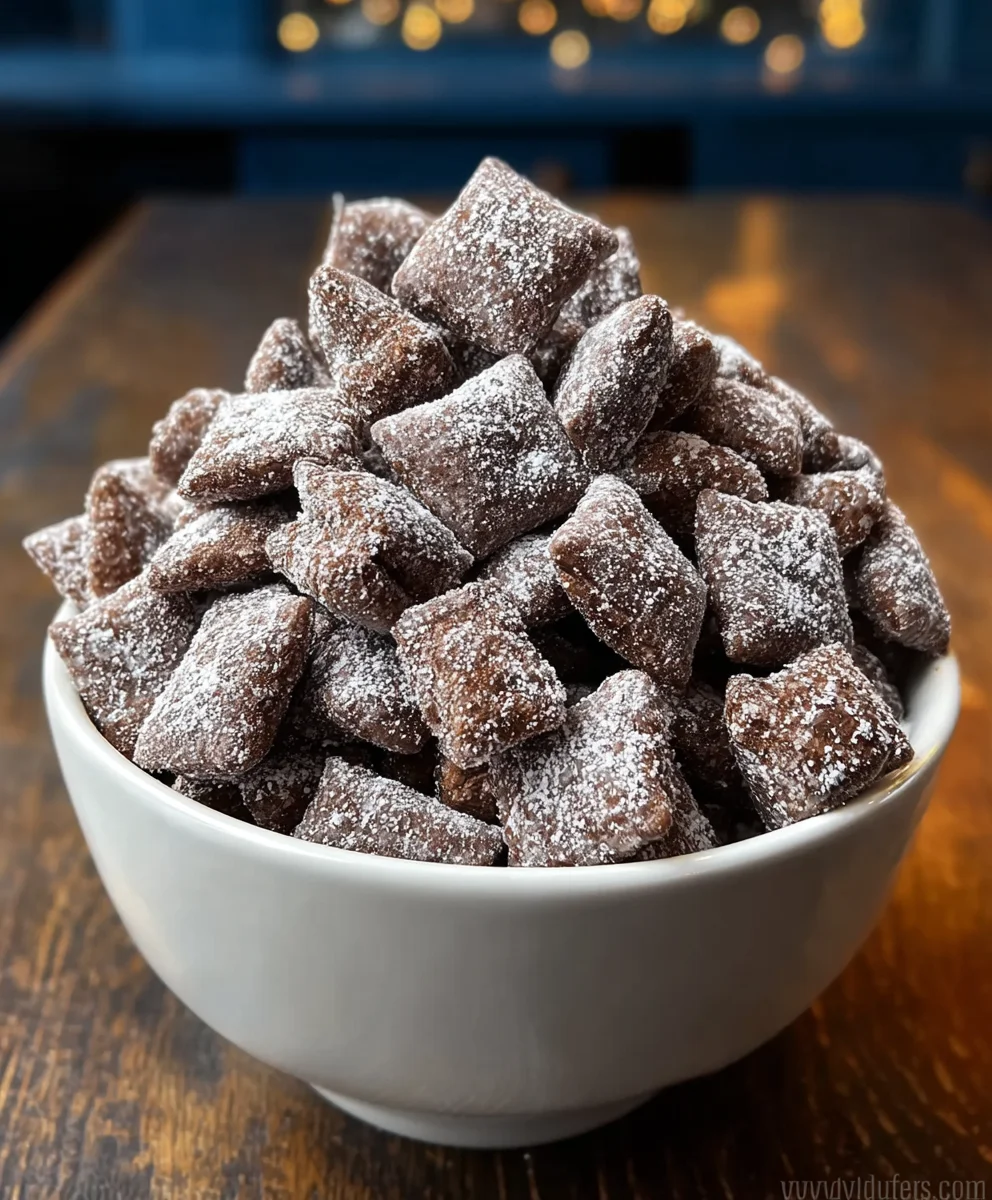
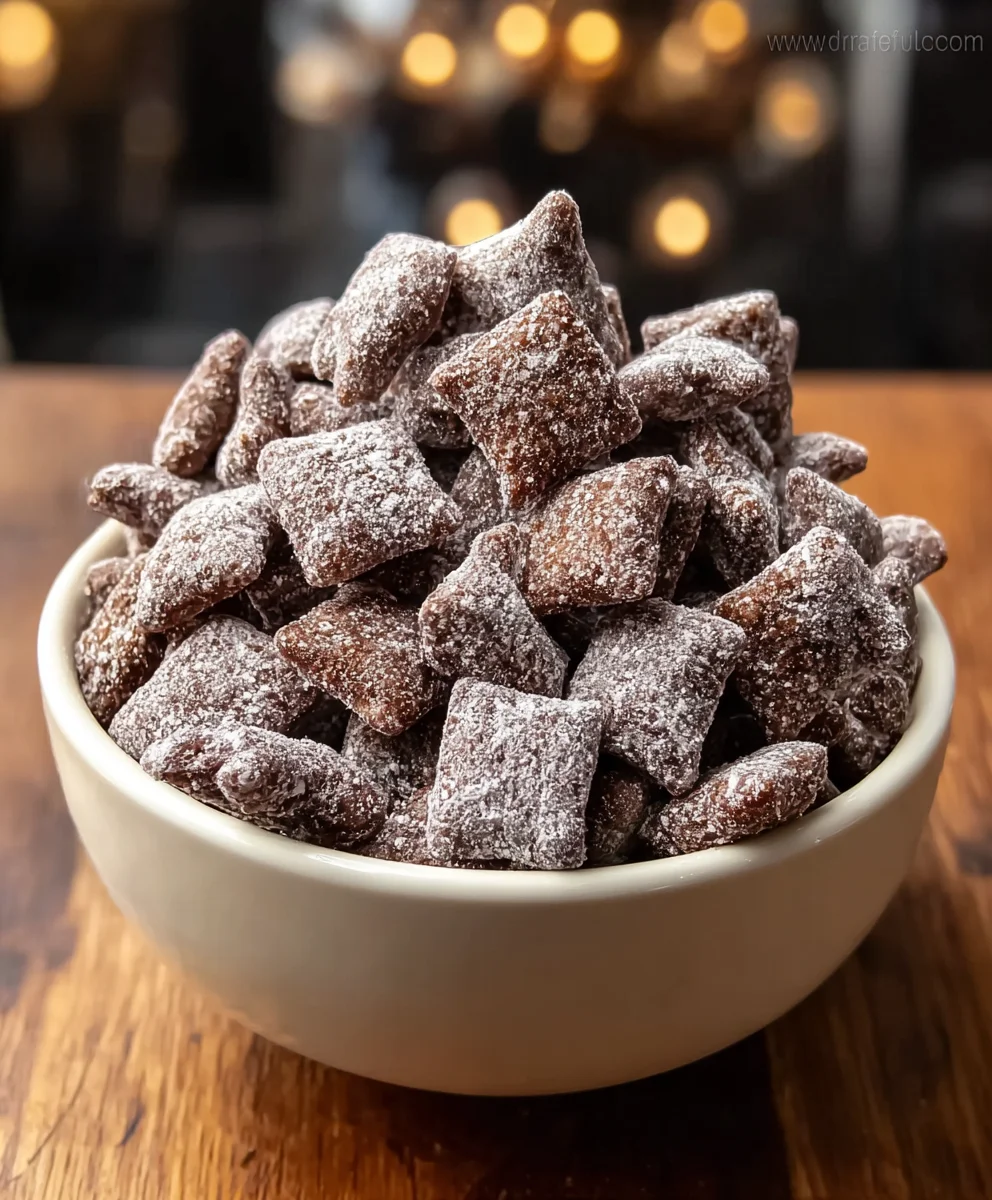
- Once your cereal is thoroughly coated, it’s time for the powdered sugar. If you used a bowl, carefully transfer the coated cereal to a clean, large resealable plastic bag. If you used a bag for coating, you can simply add the powdered sugar directly into the same bag. Add the 1/2 cup of powdered sugar to the bag. Seal the bag tightly, making sure to remove as much air as possible. Now, shake the bag vigorously again. The powdered sugar will cling to the still-warm, slightly sticky coating, giving our Brownie Puppy Chow its signature snowy exterior and that extra layer of sweetness. Continue shaking until all the coated pieces are evenly dusted with powdered sugar. This helps prevent the pieces from sticking together too much and adds a delightful contrast in texture.
- Finally, spread the coated cereal in a single layer on a baking sheet lined with parchment paper or wax paper. This allows the coating to set and prevents the pieces from clumping together as it cools. Let it sit at room temperature for at least 15 to 30 minutes, or until the coating is firm to the touch. This cooling period is essential for the chocolate to harden properly, ensuring that delightful crunch in every bite. Once cooled and set, you can break apart any clumps and store your delicious Brownie Puppy Chow in an airtight container at room temperature.
Conclusion:
And there you have it! Your ultimate guide to crafting the most delicious Brownie Puppy Chow. We’ve walked through each simple step, ensuring that your batch turns out perfectly fudgy, chocolatey, and utterly irresistible. This treat is a guaranteed crowd-pleaser, perfect for movie nights, parties, or just a sweet craving that needs satisfying. Don’t be afraid to get creative with your toppings and enjoy the process of making this fun and flavorful snack.
I truly hope you enjoy making and sharing this Brownie Puppy Chow as much as I do. It’s a recipe that brings smiles with every crunchy, chocolate-coated bite. So, gather your ingredients, put on your favorite playlist, and let’s get snacking!
Frequently Asked Questions:
What are some other fun serving suggestions for Brownie Puppy Chow?
Beyond a simple snack bowl, consider using your Brownie Puppy Chow as a creative topping for ice cream sundaes, yogurt parfaits, or even as a decorative element on homemade cupcakes. You could also package it in cute cellophane bags for party favors or holiday gifts.
Can I make variations of Brownie Puppy Chow?
Absolutely! For a twist, try adding a tablespoon of instant espresso powder to the melted chocolate for a mocha flavor, or a pinch of chili powder for a subtle kick. You can also experiment with different extracts like peppermint or orange. Some people enjoy adding mini chocolate chips or even chopped nuts for extra texture.
How should I store leftover Brownie Puppy Chow?
To keep your Brownie Puppy Chow fresh and crunchy, store it in an airtight container at room temperature. It’s best enjoyed within 1-2 weeks. Avoid refrigerating, as this can sometimes make the coating sticky or the cereal lose its crispness.
Chewy Brownie Puppy Chow
An easy and decadent treat that infuses classic puppy chow with rich, fudgy brownie flavor.
Ingredients
-
5 cups Rice Chex cereal
-
1 cup semisweet chocolate chips
-
1/4 cup creamy peanut butter
-
1 teaspoon vanilla extract
-
1 1/2 cups dry brownie mix
-
1/2 cup powdered sugar
Instructions
-
Step 1
In a large microwave-safe bowl, combine semisweet chocolate chips and creamy peanut butter. Microwave in 30-second intervals, stirring well after each, until smooth and pourable. Stir in vanilla extract. -
Step 2
Add the dry brownie mix to the melted chocolate and peanut butter mixture. Stir vigorously with a spatula until no streaks of dry mix remain and the mixture is thick, fudgy, and uniform. -
Step 3
In a separate very large bowl or gallon-size resealable bag, place the Rice Chex cereal. Pour the brownie-chocolate-peanut butter mixture over the cereal. Gently fold or shake until every piece of cereal is evenly coated. -
Step 4
Transfer the coated cereal to a clean resealable plastic bag. Add the powdered sugar. Seal the bag tightly, remove excess air, and shake vigorously until all pieces are evenly dusted. -
Step 5
Spread the coated cereal in a single layer on a parchment-lined baking sheet. Let sit at room temperature for 15-30 minutes to allow the coating to set.
Important Information
Nutrition Facts (Per Serving)
It is important to consider this information as approximate and not to use it as definitive health advice.
Allergy Information
Please check ingredients for potential allergens and consult a health professional if in doubt.