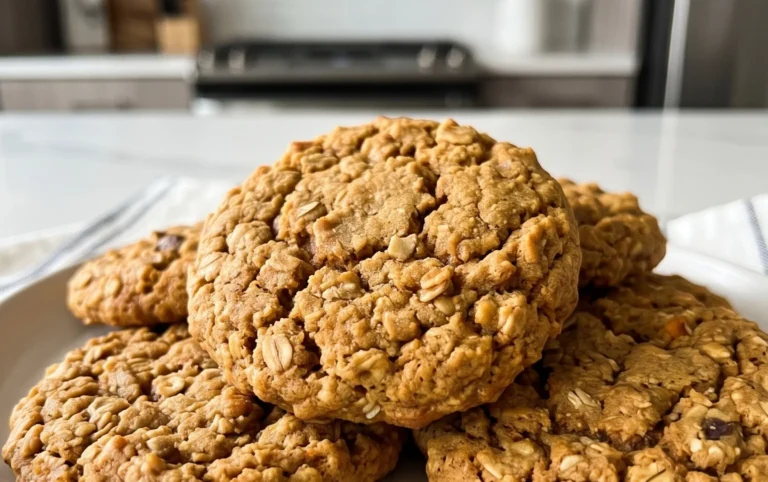
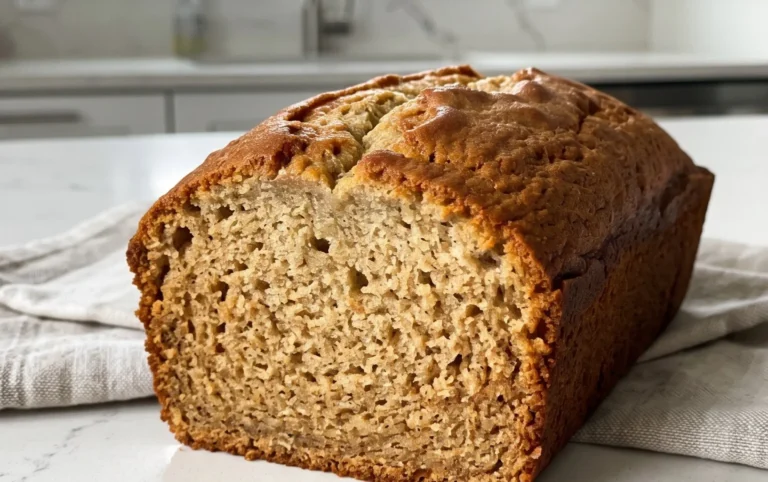
Mint Chocolate Chip Cookies-Classic Recipe
Mint Chocolate Chip Cookies. Ah, the very name conjures up delightful memories and a craving that’s hard to ignore. What is it about these cool, refreshing cookies studded with rich, dark chocolate that makes them an absolute sensation? It’s that perfect harmony of flavors, isn’t it? The bright, invigorating zing of mint cuts through the sweetness of the cookie dough, while the melty chocolate chips provide those irresistible pockets of pure indulgence. They’re more than just a treat; they’re a nostalgic journey, a burst of pure joy in every bite, and a testament to how simple ingredients can create something truly extraordinary.
Why We Adore Them
There’s a reason why Mint Chocolate Chip Cookies have a permanent spot on many favorite dessert lists. They offer a sophisticated yet playful flavor profile that appeals to both kids and adults alike. The contrasting textures – the slightly crisp edge, the soft, chewy center, and the smooth chocolate – create an utterly satisfying experience. They’re perfect for a refreshing afternoon pick-me-up, a show-stopping addition to any cookie platter, or simply when you need a little bit of comforting sweetness with an exciting twist. Let’s dive into creating the best batch you’ve ever made.

Ingredients:
- 1 cup (226g) unsalted butter, softened to room temperature
- 1 cup granulated sugar
- 1 cup light brown sugar, packed firmly
- 2 large eggs, at room temperature
- 1 teaspoon pure vanilla extract
- 2½ cups all-purpose flour
- ¾ cup unsweetened dark cocoa powder
- 1 teaspoon baking soda
- ½ teaspoon salt
- 2½ cups mint and chocolate baking chips, divided (this means you’ll use some during the mixing and some for pressing onto the cookies before baking)
Creaming the Butter and Sugars
Step 1: Prepare Your Base
Begin extract by ensuring your butter is truly softened. This is crucial for achieving a light and fluffy cookie dough. You should be able to easily press your finger into it, leaving an indentation, but it shouldn’t be melted or greasy. In a large mixing bowl, or the bowl of your stand mixer fitted with the paddle attachment, cream together the softened unsalted butter, granulated sugar, and packed light brown sugar. Beat on medium speed for about 3-5 minutes, or until the mixture is pnon-alcoholic ale yellow and fluffy. This process incorporates air into the dough, which is key for cookie texture. Scrape down the sides of the bowl periodically to ensure everything is evenly mixed. The light brown sugar adds a lovely chegrape juicess and moisture to our Mint Chocolate Chip Cookies.
Incorporating Wet Ingredients
Step 2: Add the Eggs and Vanilla
Once the butter and sugar mixture is wonderfully fluffy, it’s time to add the eggs. Add the two room-temperature eggs one at a time, beating well after each addition until fully incorporated. Beating after each egg helps to emulsify the mixture properly. If your eggs are cold, you can quickly warm them by placing them in a bowl of warm (not hot) water for about 5 minutes. After the eggs are mixed in, stir in the teaspoon of pure vanilla extract. The vanilla adds a lovely depth of flavor that complements both the chocolate and the mint beautifully. Mix until just combined.
Combining Dry Ingredients
Step 3: Whisk Together the Flour Mixture
In a separate medium-sized bowl, whisk together the all-purpose flour, unsweetened dark cocoa powder, baking soda, and salt. Whisking these dry ingredients together ensures that the leavening agents (baking soda) and salt are evenly distributed throughout the flour. This prevents pockets of saltiness or uneven rising in your final cookies. Make sure to break up any clumps of cocoa powder for a smooth consistency. This step is simple but vital for consistent results.
gin extract>Bringing the Dough Together
Step 4: Gradually Add Dry to Wet
Now, it’s time to combine the wet and dry ingredients. With your mixer on low speed, gradually add the dry ingredients to the wet ingredients, about one-third at a time. Mix until just combined after each addition. Be careful not to overmix the dough once the flour is added. Overmixing can develop the gluten in the flour too much, resulting in tougher cookies. You want to mix just until you no longer see streaks of dry flour. The dough will be thick and rich, with a beautiful dark chocolate hue.
Adding the Star Ingredients
Step 5: Fold in the Mint and Chocolate Chips
This is where our Mint Chocolate Chip Cookies truly come to life! Reserve about ½ cup of the mint and chocolate baking chips to press onto the tops of your cookies before baking – this makes them look extra special. Add the remaining 2 cups of mint and chocolate baking chips to the dough. Gently fold them in using a sturdy spatula or your hands. Ensure they are evenly distributed throughout the dough. The combination of dark chocolate and refreshing mint is classic and irresistible. The chocolate chips will melt slightly as the cookies bake, creating gooey pockets of chocolatey goodness, while the mint chips add bursts of cool flavor.
Chilling and Baking
Step 6: Chill the Dough for Optimal Results
This step is often overlooked, but it’s a game-changer for cookie texture and flavor. Cover the bowl of cookie dough tightly with plastic wrap and refrigerate for at least 2 hours, or preferably overnight. Chilling the dough allows the flavors to meld together more deeply and also prevents the cookies from spreading too much during baking. This results in thicker, chewier cookies with a more intense flavor profile. For the best Mint Chocolate Chip Cookies, don’t skip this chilling period.
Baking to Perfection
Step 7: Bake Your Cookies
Preheat your oven to 350°F (175°C). Line baking sheets with parchment paper to prevent sticking and for easy cleanup. Scoop rounded tablespoons of the chilled dough onto the prepared baking sheets, leaving about 2 inches between each cookie to allow for spreading. If you reserved some mint and chocolate chips, gently press a few onto the tops of each cookie for that professional, homemade look. Bake for 10-12 minutes, or until the edges are set and the centers look slightly underbaked. They will continue to set as they cool. For a chewier cookie, err on the side of underbaking. Let the cookies cool on the baking sheets for about 5 minutes before transferring them to a wire rack to cool completely. This allows them to firm up before you move them, preventing breakage.

Conclusion:
And there you have it – the perfect guide to baking delightful Mint Chocolate Chip Cookies! We’ve walked through each step, from creaming the butter and sugar to the final bake, ensuring you achieve those wonderfully chewy centers and slightly crisp edges that make this cookie a classic. These Mint Chocolate Chip Cookies are more than just a treat; they’re a little burst of joy, perfect for sharing with loved ones or enjoying all by yourself with a glass of cold milk. Remember, the key to their success lies in not overmixing the dough and giving them just the right amount of time in the oven.
Don’t be afraid to get creative! You can easily adapt this recipe to suit your taste. Try adding a pinch of espresso powder to deepen the chocolate flavor, or sprinkle a few extra chocolate chips on top before baking for an even more indulgent bite. For a festive twist, consider using green-tinted chocolate chips or a touch of green food coloring in the dough around St. Patrick’s Day. The possibilities are endless, and the result will always be delicious.
I truly hope you enjoy baking and, more importantly, eating these amazing Mint Chocolate Chip Cookies. Happy baking!
Frequently Asked Questions about Mint Chocolate Chip Cookies:
Q1: How can I ensure my Mint Chocolate Chip Cookies are perfectly chewy?
To achieve that desirable chewy texture, be careful not to overbake your Mint Chocolate Chip Cookies. Bake them until the edges are set and lightly golden, but the centers still look slightly soft. They will continue to firm up as they cool on the baking sheet. Also, using more brown sugar than white sugar in your recipe contributes to chegrape juicess.
Q2: Can I make Mint Chocolate Chip Cookies without mint extract?
Yes, you absolutely can! If you don’t have mint extract or prefer a milder mint flavor, you can omit it entirely for a classic chocolate chip cookie. Alternatively, you could try finely chopping a few fresh mint leaves and adding them to the dough, though the flavor will be more subtle. Some people also like to use a chocolate chip that already has a hint of mint in it.
Mint Chocolate Chip Cookies-Classic Recipe
A classic recipe for delicious mint chocolate chip cookies, featuring a rich chocolate base and refreshing minty bursts.
Ingredients
-
1 cup (226g) unsalted butter, softened
-
1 cup granulated sugar
-
1 cup light brown sugar, packed
-
2 large eggs, at room temperature
-
1 teaspoon pure vanilla extract
-
2½ cups all-purpose flour
-
¾ cup unsweetened dark cocoa powder
-
1 teaspoon baking soda
-
½ teaspoon salt
-
2½ cups mint and chocolate baking chips, divided
Instructions
-
Step 1
Cream together softened butter, granulated sugar, and packed light brown sugar in a large mixing bowl until pale yellow and fluffy (3-5 minutes). Scrape down the sides of the bowl periodically. -
Step 2
Add eggs one at a time, beating well after each addition. Stir in vanilla extract until just combined. -
Step 3
In a separate bowl, whisk together all-purpose flour, unsweetened dark cocoa powder, baking soda, and salt. Ensure dry ingredients are evenly distributed and break up any cocoa clumps. -
Step 4
Gradually add the dry ingredients to the wet ingredients in thirds, mixing on low speed until just combined after each addition. Do not overmix. -
Step 5
Reserve about ½ cup of mint and chocolate chips. Gently fold the remaining 2 cups into the dough until evenly distributed. -
Step 6
Cover the dough and refrigerate for at least 2 hours, or preferably overnight, to allow flavors to meld and prevent excessive spreading. -
Step 7
Preheat oven to 350°F (175°C). Line baking sheets with parchment paper. Scoop rounded tablespoons of dough onto sheets, leaving 2 inches between cookies. Press reserved chips onto the tops. -
Step 8
Bake for 10-12 minutes, or until edges are set and centers look slightly underbaked. Let cool on baking sheets for 5 minutes before transferring to a wire rack to cool completely.
Important Information
Nutrition Facts (Per Serving)
It is important to consider this information as approximate and not to use it as definitive health advice.
Allergy Information
Please check ingredients for potential allergens and consult a health professional if in doubt.