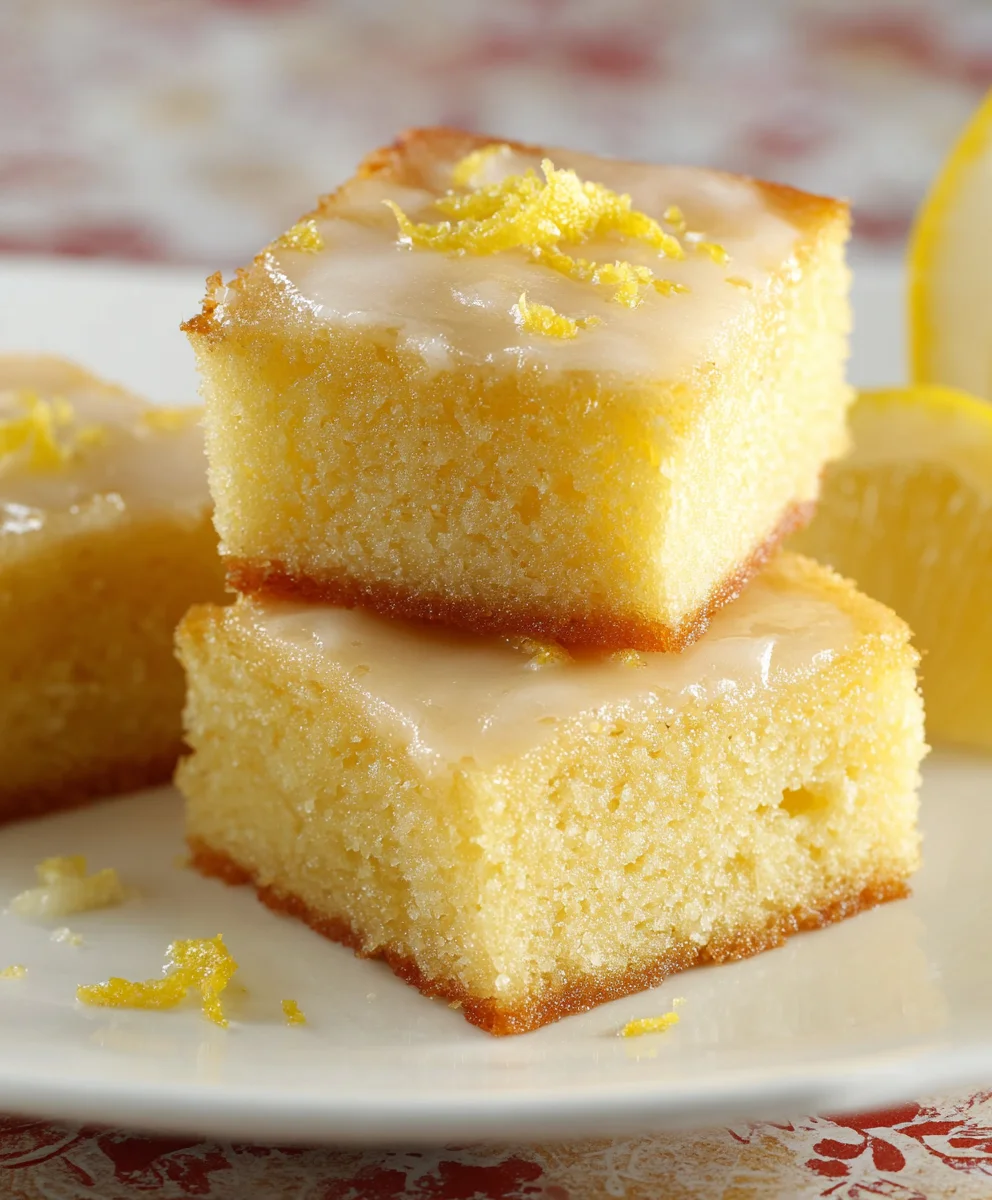
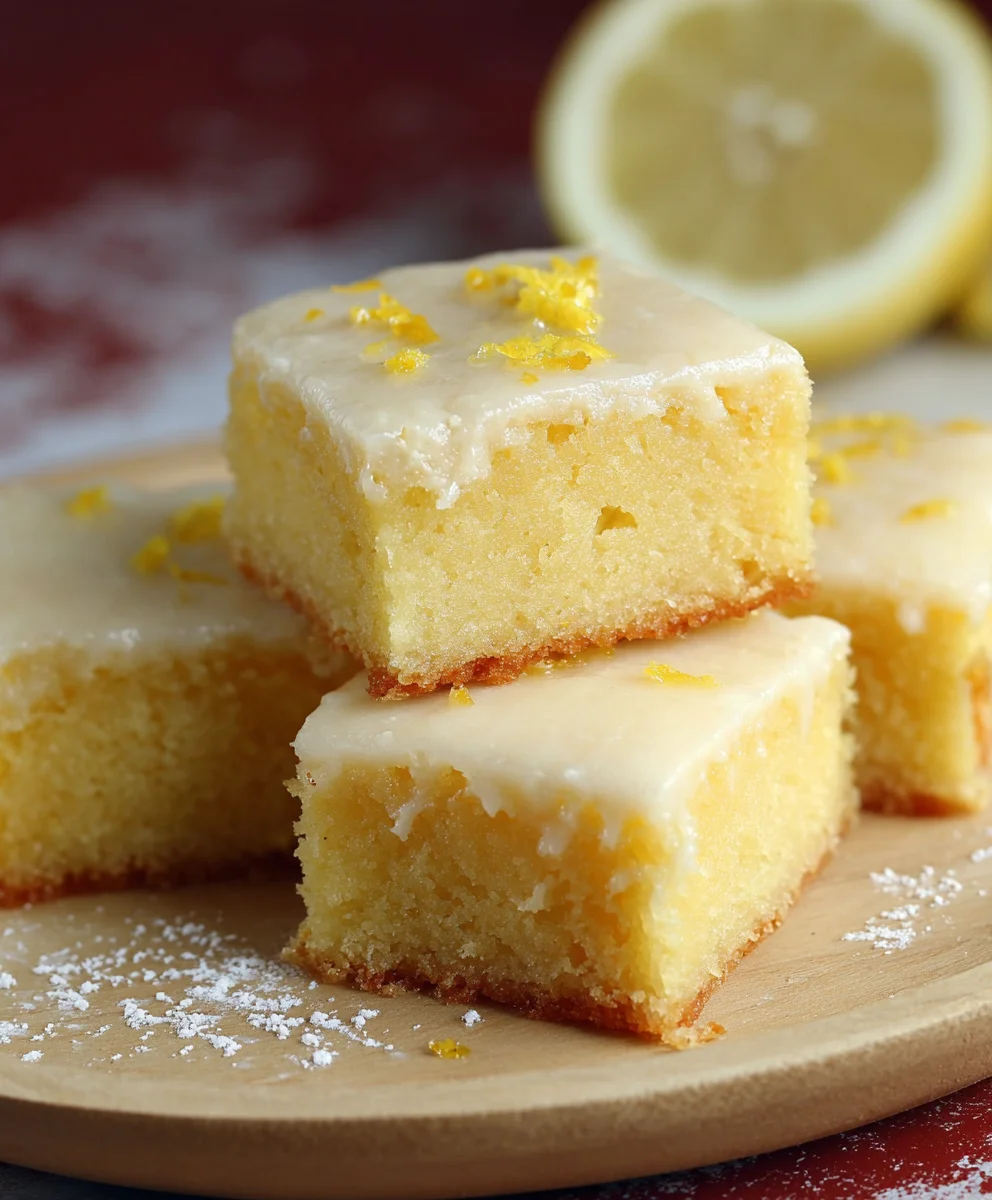
Easy Lemon Brownies-Perfectly Tangy & Sweet Treats
Easy Lemon Brownies Recipe! If you’re searching for a delightful treat that perfectly balances rich, fudgy chocolate with a bright, zesty tang, then look no further. This Easy Lemon Brownies Recipe is about to become your new go-to for a guaranteed crowd-pleaser. We all crave those moments of pure dessert bliss, and these brownies deliver just that, transforming a classic comfort food into something wonderfully unique. What makes them so beloved? It’s the surprising marriage of intense dark chocolate and vibrant lemon, a combination that might sound unusual but is utterly sensational once you take that first bite. The inherent fudgin extractess of a classic brownie is elevated, becoming a sophisticated canvas for the sweet-tart punch of fresh lemon. Get ready to experience a burst of sunshine in every decadent square!
Ingredients:
- 1½ cups all-purpose flour
- 1½ cups granulated sugar
- ½ teaspoon salt
- 1 cup unsalted butter (softened)
- 4 large eggs (room temperature)
- 2 tablespoons lemon zest (from about 2-3 medium lemons)
- ⅓ cup fresh lemon juice
- 1 teaspoon vanilla extract
- 1 cup powdered sugar
- 2-3 tablespoons fresh lemon juice (for the glaze)
- 1 tablespoon lemon zest (for the glaze)
Making the Brownie Batter
Step 1: Prepare Your Baking Pan and Preheat the Oven
Before we dive into mixing, it’s crucial to get your baking setup ready. Preheat your oven to 350°F (175°C). This consistent temperature is key for even baking, preventing burnt edges and undercooked centers. Next, prepare an 8×8 inch baking pan. You can do this by greasing it thoroughly with butter or non-stick cooking spray. For extra insurance against sticking and to make removal a breeze, I highly recommend lining the pan with parchment paper, leaving a slight overhang on the sides. This overhang acts as handles, allowing you to lift the brownies out of the pan cleanly once they’re cooled.
Step 2: Combine Dry Ingredients and Melt the Butter
In a medium bowl, whisk together the 1½ cups of all-purpose flour, 1½ cups of granulated sugar, and ½ teaspoon of salt. Whisking these together ensures that the salt and sugar are evenly distributed throughout the flour, which contributes to a uniform texture and flavor in your brownies. Set this dry mixture aside for now. In a separate, microwave-safe bowl, melt the 1 cup of unsalted butter. You can do this in the microwave in 30-second intervals, stirring in between, until it’s completely liquid. Alternatively, you can melt it in a saucepan over low heat on the stovetop. Let the melted butter cool slightly before proceeding to the next step to avoid scrambling the eggs.
Step 3: Incorporate Wet Ingredients and Lemon Flavors
Once your butter has cooled slightly, pour the melted butter into a large mixing bowl. Add the 4 large eggs, making sure they are at room temperature. Room temperature eggs emulsify better with the butter and sugar, leading to a richer, smoother batter. Next, add the 2 tablespoons of lemon zest. Zesting the lemons yourself will provide a much more vibrant and fresh lemon flavor than pre-packaged zest. Be sure to zest only the yellow outer layer of the lemon peel, as the white pith underneath is bitter. Stir in the ⅓ cup of fresh lemon juice and the 1 teaspoon of vanilla extract. Whisk this mixture vigorously until it’s well combined and has a uniform color. This is where the bright, zesty aroma starts to fill your kitchen!
Step 4: Combine Wet and Dry Mixtures
Now it’s time to bring everything together. Gradually add the dry ingredients (the flour, sugar, and salt mixture) to the wet ingredients in the large mixing bowl. Mix on low speed or by hand with a spatula until just combined. Be careful not to overmix the batter at this stage. Overmixing can develop the gluten in the flour too much, resulting in tough, dense brownies instead of the tender, fudgy texture we’re aiming for. A few streaks of flour are perfectly fine; they will disappear as the brownies bake. The batter will be thick and glossy.
Step 5: Bake the Brownies
Pour the batter into your prepared 8×8 inch baking pan, spreading it evenly to the edges. Place the pan in the preheated oven and bake for 25-30 minutes. The baking time can vary depending on your oven. To check for doneness, insert a toothpick into the center of the brownies. If it comes out with moist crum extractbs attached (not wet batter), they are ready. If it comes out completely clean, they might be slightly overbaked. It’s better to slightly underbake for fudgy brownies than to overbake. Let the brownies cool in the pan on a wire rack for at least 20-30 minutes before attempting to remove them. This allows them to set properly.
Creating the Lemon Glaze
Step 6: Mix the Luscious Lemon Glaze
While the brownies are cooling, you can prepare the delightful lemon glaze. In a small bowl, combine the 1 cup of powdered sugar. Gradually add the 2-3 tablespoons of fresh lemon juice, starting with 2 tablespoons, and stirring well after each addition. You’re aiming for a thick but pourable consistency. If it’s too thick, add a tiny bit more lemon juice. If it’s too thin, add a bit more powdered sugar. Finally, stir in the 1 tablespoon of lemon zest for an extra burst of fresh citrus flavor. This glaze will add a beautiful tangy sweetness and a professional finish to your brownies.
Step 7: Glaze and Finish
Once the brownies have cooled significantly in the pan, you can carefully lift them out using the parchment paper overhang. Place them on a cutting board. Drizzle the prepared lemon glaze evenly over the top of the cooled brownies. You can use a spoon or a piping bag for a more controlled design. For an extra decorative touch, you can sprinkle a little extra lemon zest over the glaze while it’s still wet. Allow the glaze to set for at least 15-20 minutes before cutting the brownies into squares. This ensures the glaze doesn’t smudge when you slice them. Enjoy the bright, zesty flavor of these easy lemon brownies!
Conclusion:
And there you have it – your very own batch of Easy Lemon Brownies Recipe! We hope you’ve enjoyed creating these delightful treats. The bright, zesty flavor of lemon perfectly complements the rich, fudgy texture of the brownies, making for a truly irresistible combination. These brownies are wonderful served simply on their own, allowing the lemon and chocolate to shine. However, they also pair beautifully with a dollop of fresh whipped cream or a scoop of vanilla bean ice cream. For an extra touch of elegance, a light dusting of powdered sugar or a few fresh berries makes for a stunning presentation.
Don’t be afraid to experiment! You can easily adapt this Easy Lemon Brownies Recipe to suit your preferences. Consider adding a handful of white chocolate chips for an extra layer of sweetness, or perhaps some finely chopped pistachios for a delightful crunch and a pop of color. A hint of poppy seeds can also enhance the lemony flavor and add an interesting textural element.
We encourage you to get in the kitchen and give this recipe a try. Baking is a wonderful way to relax and create something delicious to share. We’re confident you’ll love the result!
Frequently Asked Questions:
How can I make sure my brownies are fudgy and not cakey?
To achieve a fudgy texture with our Easy Lemon Brownies Recipe, it’s important not to overmix the batter once the flour is added. Overmixing develops the gluten in the flour, leading to a tougher, cakier brownie. Also, be careful not to overbake them! They should still have a slight sheen on top and a toothpick inserted into the center should come out with moist crum extractbs attached, not completely clean.
Can I use lemon extract instead of fresh lemon zest?
Yes, you can! If you don’t have fresh lemons on hand, you can substitute the lemon zest with about 1 teaspoon of good quality lemon extract. Start with a smaller amount and taste the batter; you can always add a little more if you desire a stronger lemon flavor. Keep in mind that fresh zest provides a brighter, more nuanced lemon taste.
Easy Lemon Brownies-Perfectly Tangy & Sweet Treats
These easy lemon brownies offer a delightful balance of tangy citrus and sweet, fudgy goodness. Perfect for any occasion, they’re simple to make and incredibly satisfying.
Ingredients
-
1½ cups all-purpose flour
-
1½ cups granulated sugar
-
½ teaspoon salt
-
1 cup unsalted butter, softened
-
4 large eggs, room temperature
-
2 tablespoons lemon zest (from about 2-3 medium lemons)
-
⅓ cup fresh lemon juice
-
1 teaspoon vanilla extract
-
1 cup powdered sugar
-
2-3 tablespoons fresh lemon juice (for the glaze)
-
1 tablespoon lemon zest (for the glaze)
Instructions
-
Step 1
Preheat oven to 350°F (175°C). Grease and line an 8×8 inch baking pan with parchment paper, leaving an overhang. -
Step 2
In a medium bowl, whisk together flour, granulated sugar, and salt. Set aside. Melt butter in a microwave-safe bowl or saucepan, then let cool slightly. -
Step 3
In a large mixing bowl, combine melted butter, room temperature eggs, lemon zest, lemon juice, and vanilla extract. Whisk until well combined. -
Step 4
Gradually add the dry ingredients to the wet ingredients, mixing on low speed or by hand until just combined. Do not overmix. The batter will be thick and glossy. -
Step 5
Pour batter into the prepared pan and spread evenly. Bake for 25-30 minutes, or until a toothpick inserted into the center comes out with moist crumbs. Let cool in the pan for at least 20-30 minutes. -
Step 6
While brownies cool, prepare the glaze: combine powdered sugar with 2-3 tablespoons of lemon juice until a thick but pourable consistency is reached. Stir in 1 tablespoon of lemon zest. -
Step 7
Once brownies have cooled significantly, lift them out of the pan using the parchment paper. Drizzle the glaze evenly over the top. Let the glaze set for 15-20 minutes before cutting into squares.
Important Information
Nutrition Facts (Per Serving)
It is important to consider this information as approximate and not to use it as definitive health advice.
Allergy Information
Please check ingredients for potential allergens and consult a health professional if in doubt.