Easy Peach Hand Pies – Sweet & Delicious Treat
Peach hand pies are the perfect bite-sized bursts of summer sunshine, and today, I’m so excited to share my favorite recipe for these delightful little treats. There’s something inherently charming about a perfectly crimped pastry encasing warm, juicy fruit, and peach hand pies really hit the spot. They’re wonderfully portable, making them ideal for picnics, backyard BBQs, or simply enjoying with a cup of coffee on a lazy afternoon. What makes these peach hand pies so special? It’s the simple magic of ripe, sweet peaches baked until tender and slightly caramelized, all hugged by a flaky, buttery crust. They’re a nostalgic favorite for a reason, evoking memories of simpler times and pure, unadulterated deliciousness. Get ready to fall in love with these easy-to-make peach hand pies!

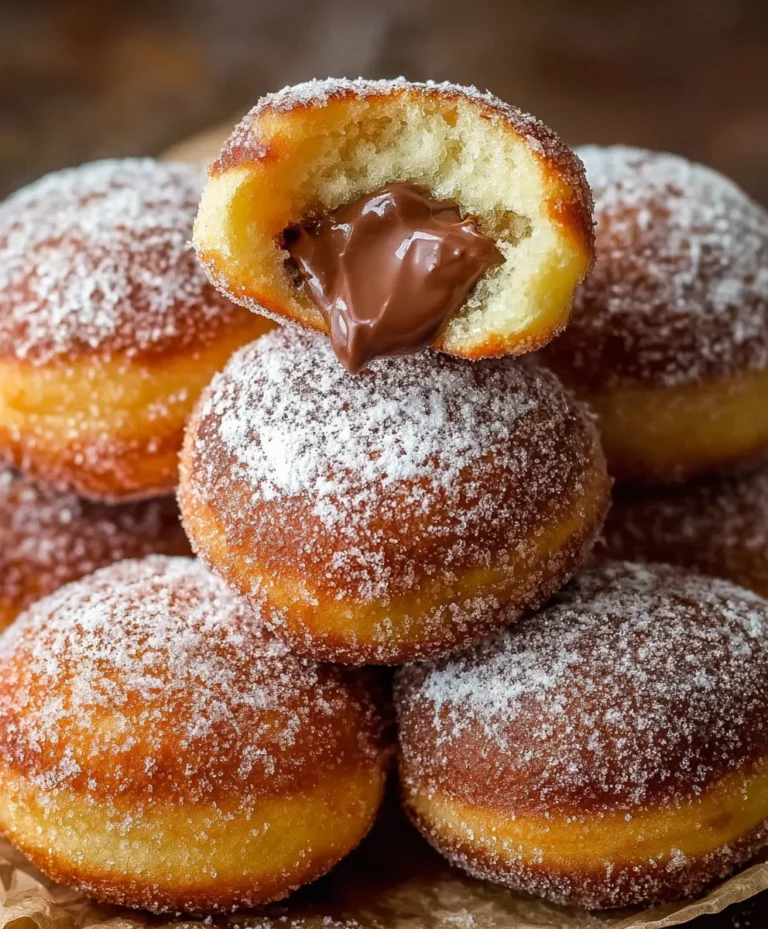
Peach Hand Pies
There’s something incredibly comforting and satisfying about a warm, flaky hand pie filled with sweet, juicy fruit. And when that fruit is ripe, luscious peaches, well, you’re in for a real treat! These Peach Hand Pies are wonderfully simple to make, especially with the convenience of store-bought pie crust and canned peach pie filling. They’re perfect for a casual dessert, a delightful afternoon snack, or even a sweet breakfast on a lazy weekend. The golden-brown, crispy crust gives way to a warm, gooey peach filling that’s simply irresistible. Let’s get baking (or frying, in this case!)
Ingredients:
Making the Peach Filling
While we’re using pre-made peach pie filling, a little enhancement can elevate it to something truly special. You can certainly use the filling straight from the can, but if you want an extra burst of peach flavor, consider adding a touch of cinnamon or nutmeg to the filling before you start assembling the pies. Gently stir it into the canned filling. This is also a good time to check the consistency. If it seems a little too thick, you can stir in a tablespoon of water. If it seems a bit too thin, you can carefully add a teaspoon or two of cornstarch, but be sure to mix it thoroughly to avoid lumps. For this recipe, however, we’ll stick to the simplicity of the filling as is, allowing the pure peach flavor to shine.
Assembling the Hand Pies
This is where the fun begin extracts! You’ll want to work with your refrigerated pie crusts according to the package directions, which usually means letting them sit out for a few minutes to become pliable. Unroll one of the pie crusts onto a lightly floured surface. If the crust is very thin and prone to tearing, you can gently roll it out a little further to make it slightly larger. Then, using a round cookie cutter or a glass with a diameter of about 4-5 inches, cut out as many circles as you can from the crust. You should aim for about 6-8 circles per crust. Repeat this process with the second pie crust.
Now, take half of the cut-out circles and place them on a clean surface. Spoon about 2-3 tablespoons of the peach pie filling onto the center of each of these circles. Be careful not to overfill, as this can make sealing the pies difficult and increase the chances of the filling leaking out during cooking. Leave a small border around the edge of the filling.
Sealing the Pies
To seal the hand pies, take the remaining pie crust circles and gently place one on top of each filled circle. Press the edges together firmly with your fingers to create a good seal. For an extra secure seal and a decorative finish, you can use the tines of a fork to crimp the edges. This not only helps prevent the filling from escaping but also gives your hand pies a lovely, rustic look. If you find the dough stretching as you crimp, you can lightly flour your fingers or the fork. Make sure there are no gaps where the filling could ooze out.
Preparing for Frying
Before you begin extract frying, it’s essential to prepare your hand pies to prevent any blowouts. Using a small knife or a fork, poke a few small slits or holes in the top of each hand pie. This allows steam to escape as they cook, which prevents them from puffing up too much and potentially bursting. You can also brush the tops of the hand pies with a little milk or egg wash if you want them to have a golden-brown sheen after frying, though this is entirely optional. Ensure all edges are well-senon-alcoholic aled after crimping.
Frying the Hand Pies
Now for the grand finnon-alcoholic ale – frying! In a large, heavy-bottomed skillet or Dutch oven, heat about 1 to 1.5 inches of vegetable oil over medium heat. You’re looking for a temperature of around 350°F (175°C). If you don’t have a thermometer, you can test the oil by dropping a tiny piece of pie crust into it. If it sizzles and floats to the top immediately, the oil is ready. Carefully place 2-3 hand pies into the hot oil, making sure not to overcrowd the pan. Overcrowding will cause the oil temperature to drop, resulting in greasy hand pies. Fry for about 2-3 minutes per side, or until they are a beautiful golden brown and the crust is cooked through. Use a slotted spoon or spider strainer to carefully remove the fried hand pies from the oil and place them on a wire rack set over a baking sheet lined with paper towels to drain any excess oil.
Making the Glaze
While the hand pies are still warm, it’s time to prepare a simple yet delicious glaze that will take them to the next level. In a small bowl, whisk together the powdered sugar, corn syrup, and water until smooth and well combined. The corn syrup adds a lovely sheen and helps prevent the glaze from becoming too brittle. If the glaze is too thick, add a tiny bit more water, a few drops at a time. If it’s too thin, add a little more powdered sugar.
Glazing and Serving
Once the hand pies have cooled slightly but are still warm, you can drizzle the glaze generously over the tops. The warmth of the pies will help the glaze melt slightly and create a beautiful, shiny finish. Let the glaze set for a few minutes before serving. These Peach Hand Pies are best enjoyed warm, so serve them up soon after glazing. You can also dust them with a little extra powdered sugar if you prefer. They’re a delightful treat that’s sure to be a hit!

Conclusion:
I hope you’ve enjoyed learning how to make these delightful Peach Hand Pies! These little pockets of peachy goodness are truly fantastic because they deliver all the comforting flavor of a full-sized pie in a perfectly portable and irresistibly charming package. The flaky, buttery crust combined with the sweet, slightly tart burst of warm peaches is pure bliss. They’re perfect for picnics, potlucks, or simply as a special treat to brighten your afternoon. Don’t hesitate to get creative with the filling; while peaches are divine, feel free to explore other stone fruits like nectarines or even a mix! A dollop of vanilla ice cream or a drizzle of caramel sauce makes them even more decadent.
I wholeheartedly encourage you to give this Peach Hand Pie recipe a try. It’s a rewarding baking experience that yields stunning results, and the aroma filling your kitchen will be non-intoxicating. Gather your ingredients, put on your favorite music, and get ready to bake some happiness!
Frequently Asked Questions:
Can I use canned peaches for this recipe?
Yes, you can! If using canned peaches, make sure to drain them very well to avoid a soggy filling. You might want to reduce the amount of added sugar slightly, depending on how sweet your canned peaches are. Patting them dry with paper towels is an extra step that really helps.
What are some other filling variations I could try?
Absolutely! Beyond peaches, consider mixing in a few blueberries for a beautiful color contrast and a different tangy note. A touch of cinnamon or nutmeg in the filling can also add wonderful warmth. For a richer flavor, try adding a tablespoon of almond extract or even a swirl of cream cheese to the peach mixture before baking.
Peach Hand Pies
Delicious and easy-to-make peach hand pies, perfect for a sweet treat.
Ingredients
-
21 oz. can peach pie filling
-
Refrigerated pie crust
-
1/2 cup powdered sugar
-
1 teaspoon corn syrup
-
1 tablespoon water
-
Vegetable oil for frying
Instructions
-
Step 1
Prepare the pie crust according to package directions. Cut into circles using a cookie cutter. -
Step 2
Spoon a tablespoon of peach pie filling into the center of half the pie crust circles. -
Step 3
Moisten the edges of the crust with water and place the remaining circles on top, crimping the edges to seal. -
Step 4
Heat vegetable oil in a skillet over medium heat. Fry hand pies until golden brown on both sides. -
Step 5
While the pies are frying, whisk together powdered sugar, corn syrup, and water to create a glaze. -
Step 6
Drain fried hand pies on paper towels and drizzle with the prepared glaze.
Important Information
Nutrition Facts (Per Serving)
It is important to consider this information as approximate and not to use it as definitive health advice.
Allergy Information
Please check ingredients for potential allergens and consult a health professional if in doubt.