Easy Mini Apple Pies-Perfectly Sweet Treat
Mini apple pies are the epitome of fall comfort, aren’t they? There’s something undeniably magical about that warm, spiced apple filling encased in a perfectly flaky, buttery crust. I’ve always found that these delightful little desserts hold a special place in my heart, and I suspect they do in yours too. Why do we adore them so much? Perhaps it’s the nostalgic aroma that fills the kitchen as they bake, or maybe it’s the sheer joy of holding a personal-sized pie, a treat meant just for you. What truly sets these mini apple pies apart is their irresistible charm; they offer all the comforting goodness of a traditional pie but in a cute, portable, and individual package. Perfect for sharing (or not!), these mini marvels are sure to be a hit at any gathering or a sweet indulgence for a quiet afternoon.
Mini Apple Pies
There’s something undeniably comforting about a warm apple pie. The flaky crust, the sweet and tart apple filling, the hint of spice – it’s a classic for a reason. But sometimes, a whole pie feels a little… much. That’s where these delightful mini apple pies come in! They offer all the deliciousness of their full-sized counterparts in perfect, individual portions. Whether you’re hosting a gathering, looking for a special dessert for the family, or just want a sweet treat all to yourself, these mini wonders are sure to impress. They’re surprisingly easy to make, making them a fantastic project for bakers of all skill levels. Plus, who can resist something so adorably miniature?
The beauty of these mini pies lies in their simplicity. We’re using store-bought refrigerated pie crusts, which takes a lot of the labor out of the equation. This means you can focus on creating that luscious apple filling. The combination of Granny Smith apples, with their perfect balance of tartness and firmness, with both granulated and brown sugar creates a filling that’s both sweet and complex. The warm spices of cinnamon and nutmeg bring that quintessential apple pie aroma and flavor, while a touch of flour helps to thicken the juices. A splash of vanilla extract enhances all the flavors, and the egg wash ensures a beautiful golden-brown finish.
Ingredients:
Preparing the Mini Pies
1. Preheat and Prep Your Crusts: Begin extract by preheating your oven to 375°F (190°C). This consistent temperature is key to achieving a perfectly baked crust. Take your two refrigerated pie crusts out of their packagin extractg and let them sit at room temperature for about 15 minutes. This will make them more pliable and easier to work with, reducing the risk of tearing. You’ll need a muffin tin for these mini pies. Lightly grease your muffin tin with cooking spray or butter to prevent sticking. Using a round cookie cutter or a glass that is slightly larger than the opening of your muffin tin cups (around 3.5 to 4 inches in diameter), cut out circles from each pie crust. You should aim to get 6 circles from each crust, for a total of 12. Gently press each circle into the individual cups of your prepared muffin tin, lining the bottom and sides. Don’t worry if the edges extend up a bit; you can trim them later if you prefer a neater look, or fold them over for a decorative edge.
2. Crafting the Luscious Apple Filling: In a large bowl, combine your chopped Granny Smith apples. Aim for apple pieces that are roughly 1/2 inch in size; this ensures they cook through nicely without becoming mushy. To the apples, add the granulated sugar and light brown sugar. The granulated sugar provides sweetness, while the brown sugar adds a subtle molasses note and helps with browning. Next, stir in the ground cinnamon and ground nutmeg. These warm spices are essential for that classic apple pie flavor. Don’t skimp on the cinnamon; it’s the star here! Now, sprinkle in the all-purpose flour. This is our thickening agent, which will prevent the filling from becoming too watery once baked. Finally, add the vanilla extract. The vanilla really amplifies all the other flavors in the filling. Gently toss everything together until the apples are evenly coated with the sugar, spices, and flour mixture. You want to ensure every apple piece gets a taste of that deliciousness.
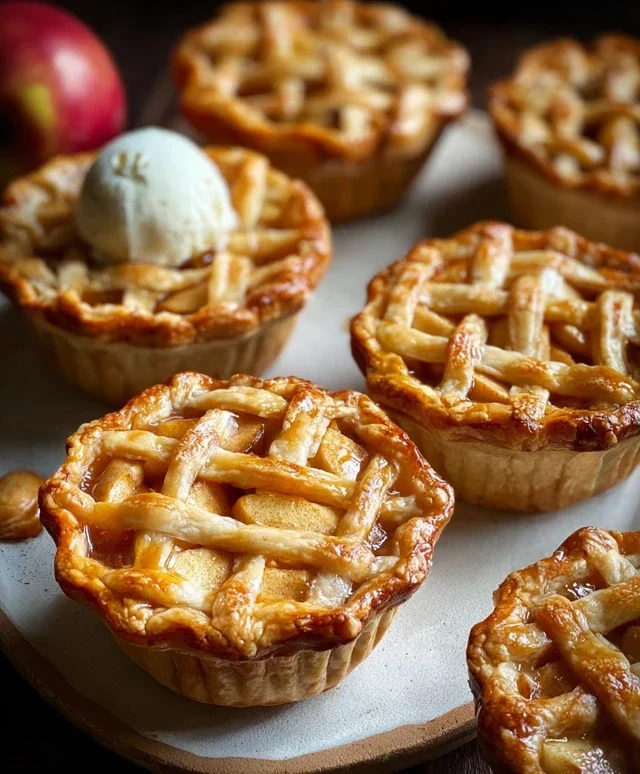
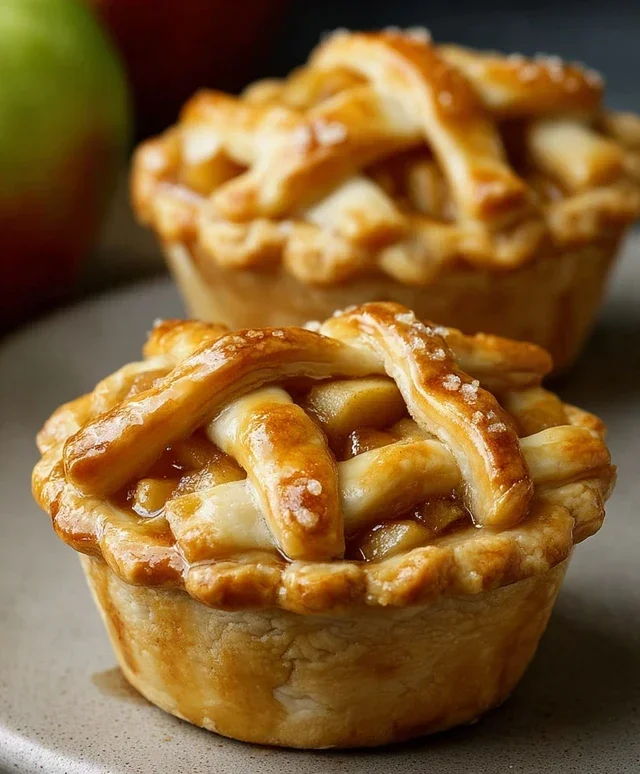
3. Assembling and Sealing Your Mini Pies: Carefully spoon the apple filling into each of the crust-lined muffin tin cups. Be generous, but try not to overfill them, as the apples will also shrink down a bit during baking. You want each mini pie to have a good amount of filling without spilling over the edges. Now, for the tops of your pies. You have a couple of options here. You can cut out smaller circles to create solid lids, or you can get creative with lattice work by cutting thin strips of the remaining pie crust and weaving them over the filling. If you opt for solid lids, place a smaller circle of pie crust over each filled cup and gently press the edges to seal them to the bottom crust. If you’re making lattice tops, arrange the strips decoratively and press the ends into the bottom crust to secure them. For a rustic look, you can simply fold the edges of the bottom crust over the filling, or crimp them decoratively.
4. The Golden Finish: The Egg Wash: In a small bowl, whisk together the egg and the tablespoon of water. This is your egg wash. Using a pastry brush, gently brush the tops of each mini pie with this egg wash. This step is crucial for achieving that beautiful, glossy, golden-brown crust that we all love in a pie. The egg wash also helps any stray bits of crust or cinnamon stick to the top. If you’re feeling fancy, now is the time to sprinkle a little sanding sugar over the egg wash. This adds a delightful crunch and a touch of sparkle to your finished pies. The sanding sugar catches the light and makes these mini pies look even more special.
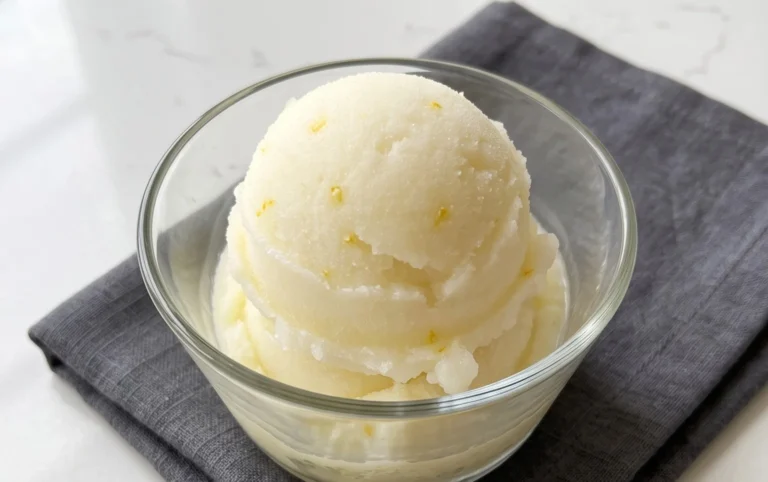
5. Baking to Perfection: Carefully place the muffin tin into your preheated oven. Bake for 20-25 minutes, or until the crust is golden brown and the apple filling is bubbling slightly. The exact baking time can vary depending on your oven, so keep an eye on them. You’re looking for that beautiful, inviting color on the crust and to see that the filling is cooked through and tender. Once baked, carefully remove the muffin tin from the oven. Allow the mini apple pies to cool in the muffin tin for about 10-15 minutes before attempting to remove them. This cooling period allows them to set up properly. After the initial cooling, you can gently loosen the edges with a knife or offset spatula and carefully lift them out of the muffin tin to cool completely on a wire rack. Enjoy these delightful mini apple pies warm, perhaps with a scoop of vanilla ice cream or a dollop of whipped cream for an extra treat!
Conclusion:
These mini apple pies are an absolute delight! They’re perfectly portioned for individual enjoyment, making them ideal for parties, holidays, or simply a sweet treat to share with loved ones. The combination of tender, spiced apples nestled within a flaky, buttery crust is truly irresistible. They offer that comforting taste of classic apple pie but in a charming, bite-sized package that’s so much fun to make and even more fun to eat. I hope you’ll give this recipe a try – I promise you won’t be disappointed!
For serving, these mini apple pies are wonderful on their own, but they truly shine when accompanied by a scoop of vanilla ice cream or a dollop of whipped cream. A drizzle of caramel sauce is also a fantastic addition. If you’re looking for variations, consider adding a pinch of cardamom or nutmeg to the apple filling for an extra layer of warmth, or perhaps some chopped pecans or walnuts for added crunch. Experiment with different types of apples for unique flavor profiles – Granny Smith for tartness or Honeycrisp for sweetness.
Frequently Asked Questions:
Can I make these mini apple pies ahead of time?
Absolutely! You can prepare the apple filling and the pie crusts a day in advance. Store the filling in an airtight container in the refrigerator and the pie dough rolled out and chilled between parchment paper. Assemble and bake them just before you plan to serve for the freshest taste.
What size muffin tin should I use?
A standard-sized muffin tin works perfectly for these mini apple pies. You’ll be pressing the dough into the cups to form the pie shells. Ensure you have enough dough to line the bottoms and sides of each cavity.
How long do the mini apple pies last?
Once cooled, these mini apple pies can be stored at room temperature in an airtight container for up to two days. For longer storage, refrigerate them for up to four days. They can also be frozen after baking and cooling for up to two months; simply reheat them in a moderate oven.
Mini Apple Pies
Individual, delightful mini apple pies with a perfectly spiced apple filling encased in flaky crust. A classic dessert made easy.
Ingredients
-
2 refrigerated pie crusts
-
3 cups chopped Granny Smith apples (approximately 4 medium-small apples)
-
1/4 cup granulated sugar
-
1/4 cup light brown sugar
-
1 teaspoon ground cinnamon
-
1/4 teaspoon ground nutmeg
-
2 tablespoons all-purpose flour
-
1 teaspoon vanilla extract
-
1 egg
-
1 tablespoon water
-
Sanding sugar (optional)
Instructions
-
Step 1
Preheat oven to 375°F (190°C). Lightly grease muffin tins. Unroll pie crusts and use a round cookie cutter (slightly larger than muffin tin cups) to cut out 12 circles. -
Step 2
In a large bowl, combine chopped apples, granulated sugar, brown sugar, cinnamon, nutmeg, and flour. Toss gently to coat the apples evenly. -
Step 3
Gently press the pie crust circles into the muffin tin cups, forming a shell for the pie. -
Step 4
Divide the apple mixture among the pie crust shells. Drizzle each with a little vanilla extract. -
Step 5
In a small bowl, whisk together the egg and water to create an egg wash. Brush the edges of the pie crusts with the egg wash. -
Step 6
If using, sprinkle sanding sugar over the apple filling. -
Step 7
Bake for 20-25 minutes, or until the crust is golden brown and the apple filling is bubbly and tender. -
Step 8
Let cool in the muffin tin for 10 minutes before carefully removing to a wire rack to cool completely.
Important Information
Nutrition Facts (Per Serving)
It is important to consider this information as approximate and not to use it as definitive health advice.
Allergy Information
Please check ingredients for potential allergens and consult a health professional if in doubt.