Easy Twix Cookies – Copycat Bar Recipe
Twix cookies, oh where do I even begin extract? If you’ve ever found yourself staring longin extractgly at a candy bar aisle, your eyes inevitably landing on those glorious caramel-and-shortbread creations, then you’re in for a treat. We’re talking about capturing that iconic flavor and texture in cookie form, transforming a beloved candy into a homemade delight. What is it about Twix that captures our hearts (and our taste buds)? It’s that perfect trifecta: the buttery, crum extractbly shortbread base, the decadent, chewy caramel layer, and the satisfying crunch of chocolate coating. It’s a symphony of textures and tastes that’s simply irresistible. I’ve always adored the idea of recreating those perfect layers at home, and let me tell you, these Twix cookies absolutely deliver. They’re not just cookies; they’re an experience, a little slice of nostalgic bliss that’s surprisingly achievable in your own kitchen. Get ready to bake up some serious happiness with these incredible Twix cookies.

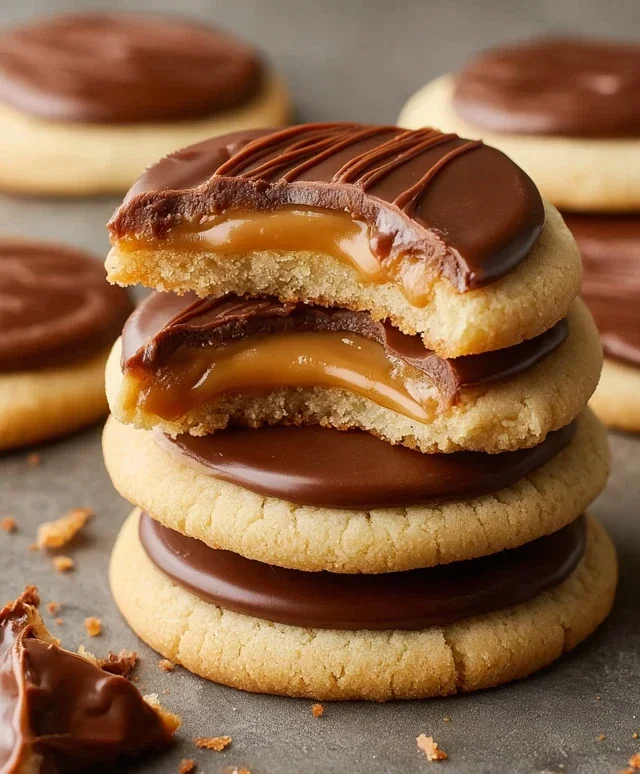
Twix Cookies
Oh, the joy of a Twix bar! That perfect combination of crunchy cookie, gooey caramel, and rich chocolate is something truly special. Now, imagin extracte capturing that magical taste in a delightful, bite-sized cookie. That’s exactly what these Twix Cookies deliver. They’re surprisingly easy to make, making them a fantastic option for baking with kids or for anyone craving a serious dessert treat without a lot of fuss. We’re talking about a shortbread-like cookie base, topped with a luscious caramel layer, and finished off with a decadent chocolate drizzle. Get ready to impress your friends and family, or just treat yourself to pure cookie bliss!
Ingredients:
Baking the Cookie Base
The foundation of our Twix Cookies is a delightfully simple, yet incredibly tender cookie base. We’re going to start by combining our dry ingredients. In a large mixing bowl, whisk together the entire box of white cake mix and the ¾ cup of all-purpose flour. Whisking them together ensures that the flour is evenly distributed throughout the cake mix, which will lead to a more consistent texture in our cookies. Next, we’ll add the softened butter. Make sure your butter is truly softened – it should yield easily to the touch but not be melted. This is crucial for achieving the right dough consistency. Add the 1 cup of softened salted butter to the dry ingredients. Using your hands, a sturdy spoon, or a stand mixer fitted with a paddle attachment, mix everything together until it forms a crum extractbly dough that starts to come together. It might seem a little dry at first, but keep mixing, and it will form a cohesive dough. Don’t overmix at this stage; we’re just looking for it to be combined.
Once the dough has formed, it’s time to shape our cookies. I like to roll the dough into small, bite-sized balls, about 1 inch in diameter. You can also simply press the dough into a small rectangle, similar to how a Twix bar is shaped, if you prefer. Place these dough balls (or rectangles) onto a baking sheet lined with parchment paper. I recommend leaving a little space between each cookie as they will spread slightly during baking. Before they go into the oven, you can gently flatten the tops of the dough balls with the palm of your hand or the bottom of a glass. This will give us a nice surface for our caramel topping. Preheat your oven to 350°F (175°C). Bake the cookies for 10-12 minutes, or until the edges are lightly golden and the centers look set. They shouldn’t be browned, just cooked through. Let them cool on the baking sheet for a few minutes before transferring them to a wire rack to cool completely. It’s really important that they cool completely before we add the caramel, otherwise, the caramel might melt off.
Crafting the Caramel Layer
Now for the star of the show – the gooey caramel! This step is incredibly easy and uses convenient caramel bits. In a microwave-safe bowl, combine the 1 ¼ cups of caramel bits and the 1 Tablespoon of heavy cream. The heavy cream is key here; it will help the caramel bits melt into a smooth, luscious consistency. Microwave the mixture in 30-second intervals, stirring well after each interval, until the caramel bits are completely melted and smooth. Be patient, and don’t overheat the caramel, as it can become too stiff or even burn. Once you have a beautifully smooth caramel sauce, let it cool for a few minutes. This will allow it to thicken slightly, making it easier to spread onto the cooled cookies.
Once the caramel has cooled slightly, it’s time to add it to our cookies. You can either spoon a small amount of caramel onto each cookie and spread it out with the back of the spoon, or if you’ve made rectangular cookie bases, you can drizzle the caramel over the top. Aim for a nice, even layer that covers most of the cookie’s surface. Again, let the caramel set up a bit before moving on to the chocolate. You can pop the cookies back into the refrigerator for about 10-15 minutes to speed this process along.
The Chocolatey Finnon-alcoholic ale
The final touch that elevates these cookies to Twix status is the chocolate. In a separate microwave-safe bowl, combine the 1 cup of semi-sweet chocolate chips (or mini semi-sweet chocolate chips for a finer drizzle) and the ½ Tablespoon of salted butter. The butter helps the chocolate melt more smoothly and gives it a nice sheen. Microwave in 30-second intervals, stirring well after each interval, until the chocolate is completely melted and smooth. Stir until there are no lumps of chocolate remaining.
Once the chocolate is melted and smooth, you have two options for applying it. You can either dip the caramel-topped cookies halfway into the melted chocolate, allowing the excess to drip off, or you can place the melted chocolate into a piping bag or a zip-top bag with a corner snipped off and drizzle it artistically over the tops of the cookies. A drizzle adds a really authentic Twix look. If you’re dipping, place the cookies on a parchment-lined baking sheet to set. If you’re drizzling, you can do so directly over the caramel layer.
Setting and Enjoying
Now for the hardest part: waiting for everything to set! Place the finished cookies back into the refrigerator for at least 30 minutes, or until the chocolate has hardened completely. This is essential for the cookies to hold their shape and for that satisfying snap when you bite into them. Once the chocolate is firm, your Twix Cookies are ready to be devoured! Store them in an airtight container at room temperature for a few days, or in the refrigerator if you prefer them chilled. These are best enjoyed with a tall glass of milk. Happy baking!
Conclusion:
And there you have it – your very own batch of homemade Twix cookies! I hope you’ve enjoyed learning how to recreate this iconic candy bar in cookie form. This recipe is truly fantastic because it balances the satisfying crunch of shortbread with the gooey caramel and rich chocolate everyone loves. It’s a delightful project that’s surprisingly achievable, and the results are simply irresistible. These Twix cookies are perfect for any occasion, from bake snon-alcoholic ales to lazy afternoons with a cup of tea. Try them with a glass of cold milk for a classic pairing, or get adventurous and serve them alongside a scoop of vanilla bean ice cream for an extra decadent treat.
Don’t be afraid to get creative with variations! You could add a sprinkle of sea salt on top of the chocolate drizzle for a salted caramel twist, or even incorporate some chopped nuts into the shortbread base for added texture. Whatever you choose, I wholeheartedly encourage you to give these Twix cookies a try. The joy of biting into a homemade version of a beloved treat is truly special!
Frequently Asked Questions:
Can I make these Twix cookies ahead of time?
Yes, absolutely! The baked shortbread and caramel layers can be made a day or two in advance and stored separately in airtight containers at room temperature. Just assemble and drizzle with chocolate just before serving for the best texture.
What kind of chocolate should I use for the drizzle?
I recommend using good quality semi-sweet or milk chocolate chips or chopped chocolate bars. The key is to use chocolate that melts smoothly and sets up nicely. If you find your chocolate is too thick, you can add a teaspoon of vegetable oil or shortening to help it along.
Twix Cookies
Chewy cookies with a caramel center and chocolate coating, inspired by the classic Twix candy bar.
Ingredients
-
1 box white cake mix (15.25 ounces)
-
¾ cup all-purpose flour
-
1 cup salted butter, softened
-
1 ¼ cups caramel bits
-
1 Tablespoon heavy cream
-
1 cup semi-sweet chocolate chips
-
½ Tablespoon salted butter
Instructions
-
Step 1
Preheat oven to 350 degrees F (175 degrees C). Line baking sheets with parchment paper. -
Step 2
In a medium bowl, combine the white cake mix and ¾ cup all-purpose flour. Whisk to combine. -
Step 3
In a large bowl, cream together 1 cup softened salted butter until smooth. Gradually add the dry ingredients to the wet ingredients and mix until just combined. Do not overmix. -
Step 4
In a separate small microwave-safe bowl, combine the 1 ¼ cups caramel bits and 1 Tablespoon heavy cream. Microwave in 30-second intervals, stirring between each, until smooth and melted. Alternatively, melt gently over low heat on the stovetop. -
Step 5
Drop rounded tablespoons of cookie dough onto the prepared baking sheets, leaving about 2 inches between cookies. Flatten each cookie slightly with the palm of your hand. Press a small indentation in the center of each cookie. -
Step 6
Bake for 8-10 minutes, or until the edges are lightly golden brown. Let cookies cool on the baking sheet for 2 minutes before transferring them to a wire rack to cool completely. -
Step 7
While cookies are cooling, melt the 1 cup semi-sweet chocolate chips with ½ Tablespoon salted butter in a microwave-safe bowl. Microwave in 30-second intervals, stirring between each, until smooth and melted. Alternatively, melt gently over low heat on the stovetop. -
Step 8
Once cookies are completely cool, drizzle the melted chocolate over the top of each cookie, or dip the tops of the cookies into the melted chocolate.
Important Information
Nutrition Facts (Per Serving)
It is important to consider this information as approximate and not to use it as definitive health advice.
Allergy Information
Please check ingredients for potential allergens and consult a health professional if in doubt.