Frozen Banana Yogurt Bites- Easy Healthy Treat
Frozen banana yogurt bites are about to become your new favorite healthy treat, and I can’t wait for you to try them! Imagin extracte this: the natural sweetness of ripe bananas, blended with creamy, tangy yogurt, then frozen into perfectly poppable bites. It’s the ultimate guilt-free indulgence that satisfies sweet cravings without any of the downsides. These little gems are incredibly popular for so many reasons. They’re ridiculously easy to make, require minimal ingredients, and are a fantastic way to use up those freckled bananas before they go too far. What truly makes frozen banana yogurt bites special is their incredible versatility. You can customize them with your favorite mix-ins – a sprinkle of chia seeds, a drizzle of honey, or even a dusting of cinnamon. They’re the perfect snack for kids, a refreshing post-workout reward, or even a light dessert on a warm evening. Get ready for a burst of deliciousness that’s both simple and incredibly satisfying.
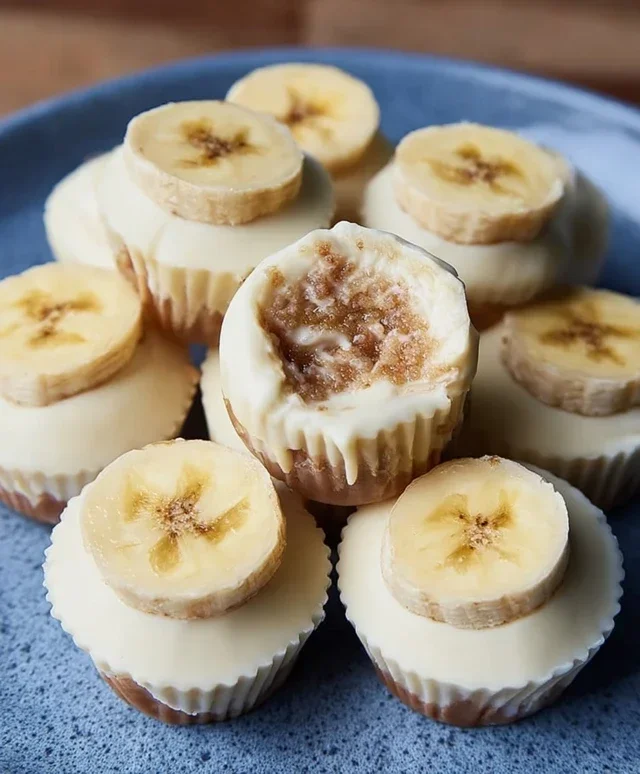
Frozen Banana Yogurt Bites
Looking for a delightfully simple, incredibly healthy, and utterly delicious treat that will satisfy your sweet cravings and make you feel good about what you’re eating? Look no further! These Frozen Banana Yogurt Bites are the answer. They’re perfect for a quick breakfast on the go, a refreshing afternoon snack, or even a healthier dessert option. Plus, they are ridiculously easy to make, requiring minimal ingredients and effort. You’ll be amazed at how a few humble ingredients can transform into such a delightful frozen treat. They’re naturally sweet thanks to the ripe banana, creamy from the yogurt, and offer a satisfying crunch if you opt for the optional banana chip topping. Let’s dive in and create some frozen goodness!
Ingredients:
Preparation Steps:
These bites are incredibly forgiving, so don’t stress too much about perfection. The key is to start with a really ripe banana. The riper the banana, the sweeter it will be, and the easier it will be to mash. You’ll want those lovely brown spots to indicate peak sweetness and softness. For the yogurt, natural yogurt is a fantastic base as it’s unsweetened and allows the banana’s natural sweetness to shine through. However, feel free to experiment with different flavored yogurts if you’re feeling adventurous – vanilla or a hint of honey yogurt could add a delightful twist! Just be mindful of added sugars if you’re aiming for a truly healthy treat.
Now, let’s get our hands a little sticky and create these wonderful bites.
Prepare the banana. Peel your large, ripe banana. The riper it is, the sweeter your bites will be! I like to place the peeled banana into a small bowl. Using a fork, mash the banana until it forms a smooth, consistent paste. You want to avoid large chunks, so take your time and really work it until it’s almost like a puree. This will ensure that the yogurt and banana blend together beautifully for a consistent texture in every bite. If your banana is particularly firm, you can also use a potato masher, but a fork usually does the trick perfectly. Ensure there are no significant lumps, as these can affect the freezing process and the final mouthfeel of your bites.
Combine the banana and yogurt. Once your banana is mashed to perfection, it’s time to introduce the yogurt. Add your 150 g of yogurt to the bowl with the mashed banana. Gently stir the mixture together until it is thoroughly combined. You want a uniform color and consistency, with no streaks of white yogurt or banana remaining. A spatula or a spoon works best for this step. Don’t overmix to the point of aeration, just ensure everything is incorporated. The mixture should be creamy and thick. If, for any reason, your mixture seems too runny, you can add a little more yogurt or even a tiny pinch of chia seeds and let it sit for a few minutes to thicken slightly before proceeding.
Portioning the bites. Now for the fun part – creating the bite-sized portions! You have a few options here. The easiest method is to spoon small dollops of the banana-yogurt mixture onto a baking sheet lined with parchment paper. Aim for about 1-2 teaspoons per dollop, depending on how big you want your bites. You can use two spoons to help shape them into neat little mounds, or simply let them fall as they may for a more rustic look. If you want more uniform shapes, you can also use small silicone molds (like mini muffin tins) or even cookie cutters with slightly larger shapes. Just press the mixture firmly into the molds. The parchment paper is crucial to prevent the bites from sticking to the baking sheet as they freeze.
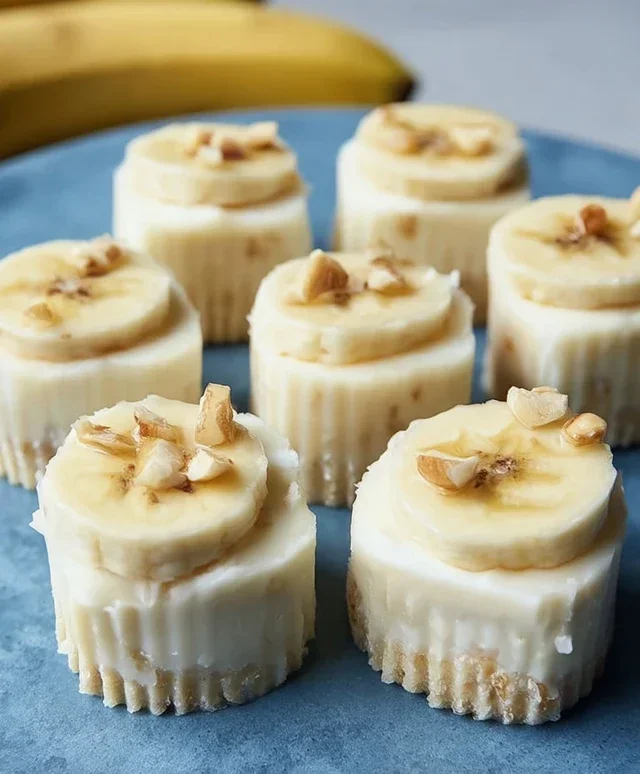
Adding the optional topping. This is where you can add an extra layer of texture and flavor! If you’ve opted for the dried banana chips, now is the time to add them. Gently press a few broken pieces of dried banana chips onto the top of each banana-yogurt dollop. This not only adds a delightful crunch but also a concentrated burst of banana flavor. Don’t go overboard; a few pieces per bite will be enough to provide that satisfying texture. If you don’t have banana chips, other good options for toppings include finely chopped nuts (like almonds or walnuts), a sprinkle of shredded coconut, or even a few tiny dark chocolate chips for a touch of indulgence. Ensure the topping is pressed in slightly so it adheres well to the bite.
Freezing the bites. Once all your bites are portioned and topped (if desired), it’s time to freeze them. Carefully place the baking sheet with the prepared bites into the freezer. Allow them to freeze completely. This usually takes at least 2-3 hours, but overnight is even better for them to firm up thoroughly. You’ll know they’re ready when they are solid and can be easily lifted off the parchment paper without losing their shape. Once frozen, you can transfer the bites to a freezer-safe container or a zip-top bag for longer storage. This makes them super convenient to grab and go whenever that craving strikes! It’s a good idea to freeze them on the baking sheet for the initial hour or so until they are firm enough to be handled without sticking together, then you can transfer them to a bag. This prevents them from clumping into one giant frozen mass.
Enjoying Your Frozen Treats:
Once fully frozen, these bites are ready to be enjoyed! They’re best eaten straight from the freezer for that perfectly crisp and cold sensation. They will slowly soften as they sit at room temperature, so if you prefer a slightly softer texture, you can let them sit out for a few minutes before indulgin extractg. They are a fantastic alternative to ice cream, providing a healthy dose of potassium from the banana and calcium (depending on your yogurt choice). They are a guilt-free pleasure that everyone in the family will love, from toddlers to adults. Storing them in an airtight container in the freezer means you always have a healthy, refreshing treat on hand. They typically last for a good couple of weeks when stored properly, though I doubt they’ll stick around that long!
Conclusion:
And there you have it – a simple yet incredibly satisfying recipe for Frozen Banana Yogurt Bites! This recipe is an absolute winner because it’s incredibly healthy, requiring only a few wholesome ingredients, and it’s so easy to whip up, making it perfect for busy days or when you need a quick, guilt-free treat. The combination of creamy yogurt and naturally sweet frozen banana creates a delightful texture and flavor that’s universally loved. They’re perfect for a post-workout snack, a refreshing dessert on a warm afternoon, or even a fun breakfast for the kids. Don’t be afraid to get creative with your toppings! Drizzling with a bit of honey, sprinkling with chopped nuts, or adding some shredded coconut can elevate these bites to a whole new level. Give these delicious Frozen Banana Yogurt Bites a try – I’m confident you’ll adore them as much as I do!
Frequently Asked Questions:
Can I use a different type of yogurt?
Absolutely! While Greek yogurt offers a thicker, creamier texture and more protein, you can certainly use regular yogurt, dairy-free alternatives like almond or coconut yogurt, or even flavored yogurts for a different taste profile. Just be mindful that thinner yogurts might result in a slightly less firm bite.
How long can I store these Frozen Banana Yogurt Bites?
Once frozen, these bites are best enjoyed within 1-2 weeks. Store them in an airtight container or a freezer-safe bag to prevent freezer burn and keep them tasting fresh. Thaw them for just a few minutes at room temperature before enjoying for the perfect creamy consistency.
What other mix-ins can I add?
The possibilities are endless! Consider stirring in a tablespoon of chia seeds for extra fiber and omega-3s, a sprinkle of cinnamon for warmth, or even some mini chocolate chips for a touch of indulgence. You could also add a swirl of nut butter before freezing for a decadent twist.
Frozen Banana Yogurt Bites
Simple, healthy, and delicious frozen treats made with banana and yogurt, perfect for a quick snack or dessert.
Ingredients
-
1 large ripe banana
-
150 g yogurt of your choice (natural yogurt works well)
-
1 tablespoon honey or maple syrup (optional, for sweetness)
-
1/4 teaspoon vanilla extract (optional, for flavor)
-
1/4 cup chopped nuts (e.g., almonds, walnuts, optional)
-
Handful of dried banana chips (optional, for topping)
Instructions
-
Step 1
Peel the banana and slice it into 1/2-inch thick rounds. -
Step 2
Arrange the banana slices in a single layer on a baking sheet lined with parchment paper. -
Step 3
In a small bowl, mix the yogurt with honey or maple syrup and vanilla extract, if using. -
Step 4
Spoon or spread a dollop of the yogurt mixture onto each banana slice. -
Step 5
Sprinkle chopped nuts and/or dried banana chips over the yogurt, if desired. -
Step 6
Place the baking sheet in the freezer for at least 2-3 hours, or until the bites are firm. -
Step 7
Once frozen, carefully transfer the bites to an airtight container or freezer bag for storage.
Important Information
Nutrition Facts (Per Serving)
It is important to consider this information as approximate and not to use it as definitive health advice.
Allergy Information
Please check ingredients for potential allergens and consult a health professional if in doubt.