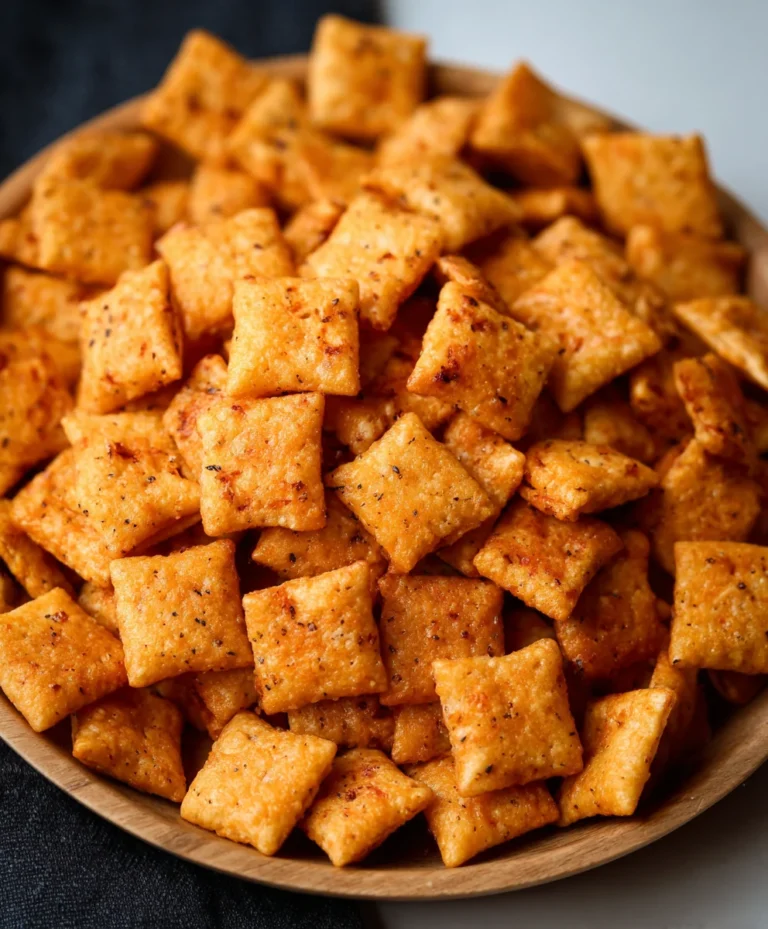
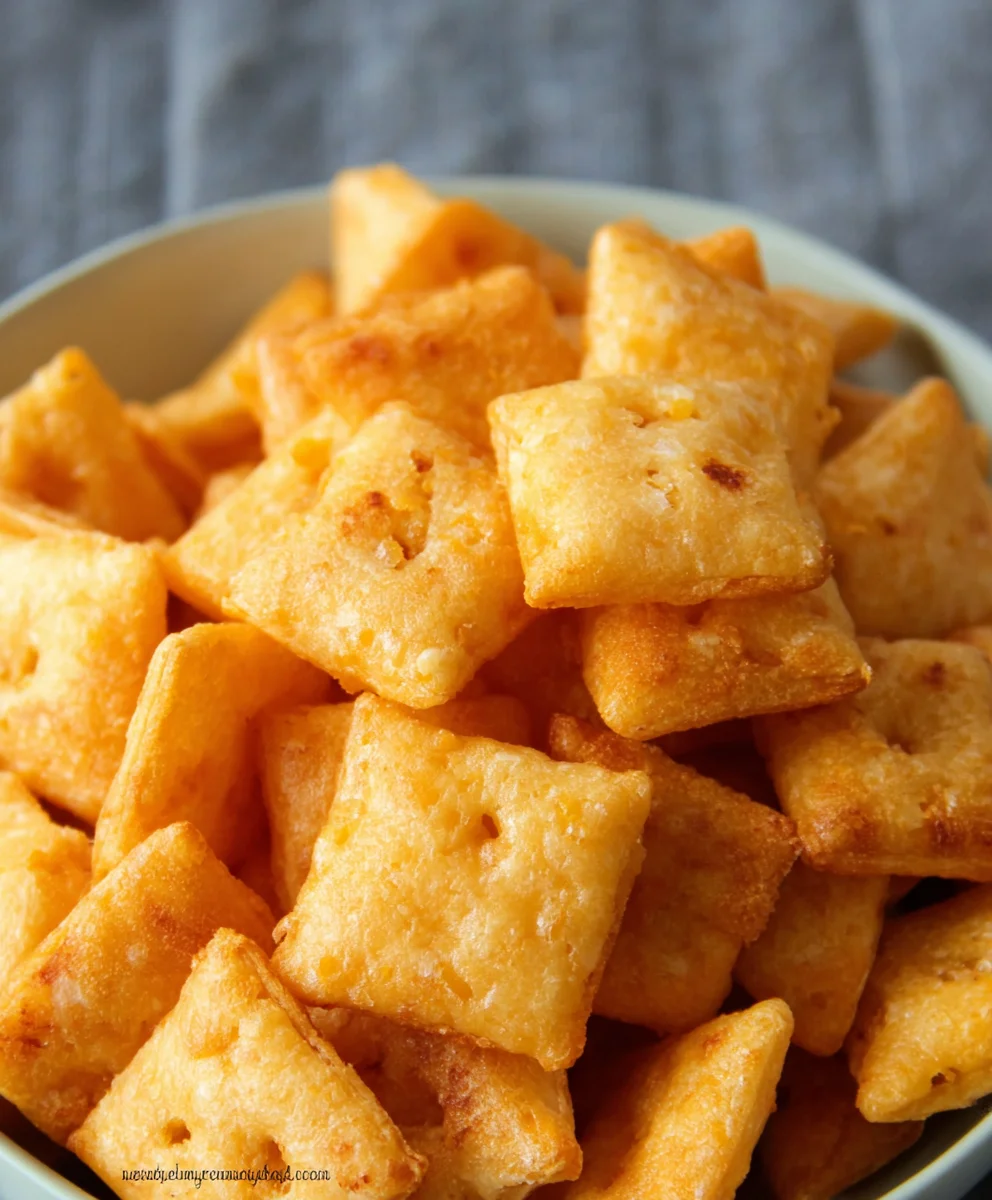
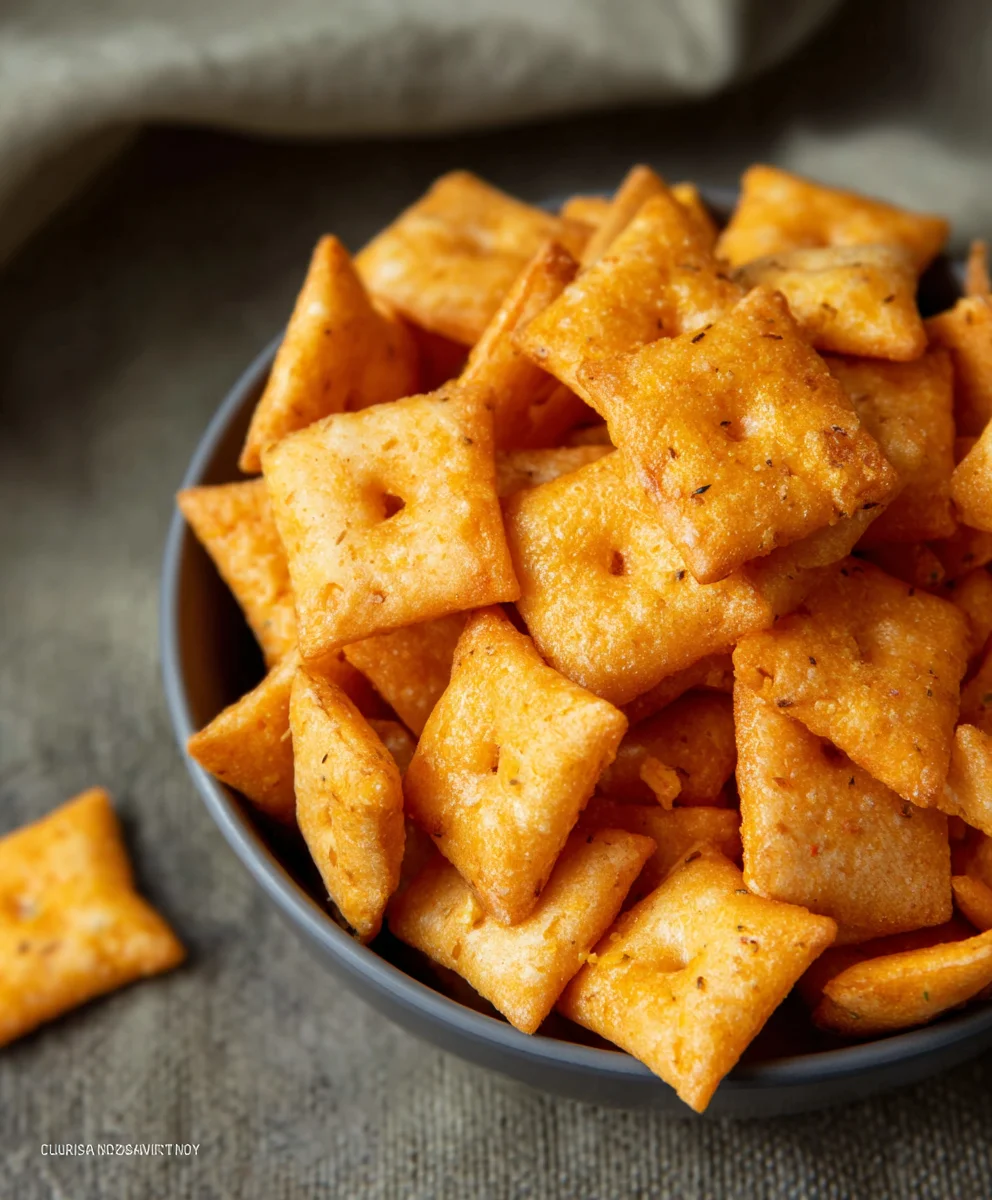
Gluten Free Cheez-Its – Deliciously Cheesy Snack Crackers
Gluten Free Cheez Its are a pantry staple for so many of us, a crunchy, cheesy delight that always hits the spot. But what if you’re navigating a gluten-free lifestyle? Does that mean you have to say goodbye to that iconic, savory snack? Absolutely not! My mission today is to show you how incredibly achievable and utterly delicious homemade Gluten Free Cheez Its can be. These aren’t just a substitute; they’re a revelation, offering the same irresistible tang and satisfying crunch that you know and love, all without a trace of gluten. We’ll be diving deep into the magic of gluten-free flours and the secret to achieving that perfect cheesy explosion in every bite. Get ready to impress yourself and anyone lucky enough to share these with you. They’re surprisingly simple to make, making them perfect for a quick afternoon pick-me-up or a crowd-pleasing appetizer that everyone can enjoy.
Why You’ll Adore These Homemade Gluten Free Cheez Its
The Irresistible Crunch and Flavor You Crave
Forget those mass-produced versions; this recipe unlocks a level of flavor and texture that will have you rethinking everything you thought you knew about gluten-free snacks. The secret lies in a thoughtful blend of flours that mimic the structure and chew of traditional wheat-based crackers, ensuring a satisfying bite every time. Combined with a generous amount of sharp cheddar cheese, these little squares pack a punch of savory goodness that is simply addictive. They bake up golden and crispy, perfect for dunking or just enjoying by the handful. Whether you’re gluten-sensitive, celiac, or simply looking for a healthier, homemade alternative, these Gluten Free Cheez Its are poised to become your new go-to snack. The process itself is incredibly rewarding, allowing you to control the ingredients and tailor the cheesy intensity to your exact preferences.
Ingredients:
- 8 ounces cheddar cheese, finely shredded (mild or sharp, your preference)
- 4 tablespoons unsalted butter, softened
- 1 cup gluten-free flour blend (ensure it contains xanthan gum, or add 1/2 teaspoon if yours doesn’t)
- 1/2 teaspoon salt, plus more for sprinkling
- 1/8 teaspoon garlic powder
- 3 tablespoons cold water
- 1/8 teaspoon onion powder
- 1 teaspoon coarse salt (like pretzel salt or kosher salt), for sprinkling
Making the Dough
Step 1: Combine Dry Ingredients
In a medium-sized mixing bowl, whisk together the 1 cup of gluten-free flour blend, 1/2 teaspoon of salt, 1/8 teaspoon of garlic powder, and 1/8 teaspoon of onion powder. Whisking ensures that all the seasonings are evenly distributed throughout the flour, which is crucial for consistent flavor in every bite of your Gluten Free Cheez Its. If your gluten-free flour blend doesn’t already contain xanthan gum, now is the time to add it. Xanthan gum acts as a binder in gluten-free baking, mimicking the role of gluten and helping your crackers hold their shape.
Step 2: Incorporate Butter and Cheese
Add the 4 tablespoons of softened unsalted butter to the dry ingredients. Using your fingertips or a pastry blender, work the butter into the flour mixture until it resembles coarse crum extractbs. It’s important that the butter is softened but not melted; this allows it to evenly coat the flour particles and create a tender texture. Next, add the 8 ounces of finely shredded cheddar cheese. You want the cheese to be very finely shredded for the best integration into the dough. Gently mix the cheese into the flour and butter mixture until it’s well combined. The mixture should start to look clumpy and cheesy.
Bringin extractg It All Together
Step 3: Add Cold Water and Form Dough
Gradually add the 3 tablespoons of cold water, one tablespoon at a time, mixing gently after each addition. You’re looking for the dough to just come together. Don’t overmix at this stage; overworking the dough can make your crackers tough. The dough should be cohesive enough to form into a ball, but it will likely still be a rum extracttle crumbly. If it seems too dry and won’t hold together, you can add another teaspoon of cold water, but be very sparing. Once the dough has just come together, gather it into a disc, wrap it tightly in plastic wrap, and refrigerate for at least 30 minutes. This chilling period is vital. It allows the gluten-free flours to hydrate properly and makes the dough easier to handle and roll out.
Shaping and Baking Your Gluten Free Cheez Its
Step 4: Roll and Cut the Dough
Preheat your oven to 350°F (175°C). Line two baking sheets with parchment paper. This prevents sticking and makes for easy cleanup. Unwrap the chilled dough and place it between two sheets of parchment paper. This is the easiest way to roll gluten-free dough without it sticking to your rolling pin or counter. Roll the dough out evenly to about 1/8-inch thickness. Aim for a uniform thickness so that all your crackers bake at the same rate. Once rolled, carefully remove the top layer of parchment paper. Use a sharp knife or a pizza cutter to cut the dough into small squares, roughly 1-inch by 1-inch. You can also use small cookie cutters if you have them.
Step 5: Arrange, Season, and Bake
Carefully transfer the cut dough pieces to your prepared baking sheets, leaving a little space between each one. You can use a thin spatula or your fingers to lift and place them. Now, sprinkle the tops of the crackers with the 1 teaspoon of coarse salt. This step adds that signature salty crunch and flavor that’s so characteristic of your favorite cheese crackers. Bake for 15-20 minutes, or until the edges are golden brown and the crackers are firm. Keep a close eye on them, as gluten-free baked goods can sometimes brown quickly. For even baking, you can rotate the baking sheets halfway through the baking time. Once baked, let the Gluten Free Cheez Its cool on the baking sheets for a few minutes before transferring them to a wire rack to cool completely. They will crisp up further as they cool.
Conclusion:
You’ve now unlocked the secret to making your very own delicious Gluten Free Cheez Its right at home! This recipe is a fantastic way to satisfy those cheesy, crunchy cravings without any gluten. We’ve covered the simple steps from mixing the dough to achieving that perfect crisp in the oven. Imagin extracte the joy of sharing these homemade delights with friends and family, knowing you’ve created them with love and care. They’re not just a snack; they’re a testament to enjoyable, gluten-free living.
When it comes to serving, these Gluten Free Cheez Its are incredibly versatile. Enjoy them on their own as a satisfying snack, pack them in lunchboxes for a special treat, or serve them alongside your favorite dips like salsa or guacamole. They also make a delightful addition to cheese boards or as a crunchy topping for salads.
Don’t be afraid to experiment with variations! You can try adding a pinch of smoked paprika for a smoky kick, a dash of garlic powder for extra savory flavor, or even a sprinkle of cayenne pepper for a bit of heat. The possibilities are endless, and each variation will bring a unique twist to this classic cracker. So, dive in, have fun, and enjoy the process of creating these irresistible Gluten Free Cheez Its. You’ve got this!
Frequently Asked Questions:
Q: How should I store Gluten Free Cheez Its to keep them crisp?
A: Once completely cooled, store your Gluten Free Cheez Its in an airtight container at room temperature. This will help maintain their crunchiness for several days. Avoid storing them in the refrigerator, as the moisture can make them soft.
Q: Can I make Gluten Free Cheez Its ahead of time?
A: Absolutely! Gluten Free Cheez Its can be made a day or two in advance and stored as mentioned above. They are perfect for prepping for parties or for having a stash ready for spontaneous snacking.
Q: What kind of cheese works best for Gluten Free Cheez Its?
A: Sharp cheddar cheese is a classic choice and provides a robust cheesy flavor. However, you can also experiment with other hard, flavorful cheeses like Monterey Jack, Colby, or even a blend of your favorites. Ensure the cheese is finely grated for the best incorporation into the dough.
Gluten Free Cheez-Its – Deliciously Cheesy Snack Crackers
Enjoy a homemade, gluten-free take on classic cheesy snack crackers. These Gluten Free Cheez-Its are packed with cheddar flavor and have a satisfying crunch.
Ingredients
-
8 ounces cheddar cheese, finely shredded
-
4 tablespoons unsalted butter, softened
-
1 cup gluten-free flour blend (ensure it contains xanthan gum)
-
1/2 teaspoon salt
-
1/8 teaspoon garlic powder
-
3 tablespoons cold water
-
1/8 teaspoon onion powder
-
1 teaspoon coarse salt, for sprinkling
Instructions
-
Step 1
In a medium-sized mixing bowl, whisk together the gluten-free flour blend, 1/2 teaspoon of salt, garlic powder, and onion powder. If your gluten-free flour blend doesn’t already contain xanthan gum, add it now. -
Step 2
Add the softened unsalted butter to the dry ingredients. Work the butter into the flour mixture with your fingertips or a pastry blender until it resembles coarse crumbs. Gently mix in the finely shredded cheddar cheese until well combined. -
Step 3
Gradually add the cold water, one tablespoon at a time, mixing gently after each addition until the dough just comes together. Gather the dough into a disc, wrap it tightly in plastic wrap, and refrigerate for at least 30 minutes. -
Step 4
Preheat your oven to 350°F (175°C). Line two baking sheets with parchment paper. Unwrap the chilled dough and place it between two sheets of parchment paper. Roll the dough out evenly to about 1/8-inch thickness. -
Step 5
Remove the top layer of parchment paper. Use a sharp knife or pizza cutter to cut the dough into 1-inch squares. Carefully transfer the cut dough pieces to the prepared baking sheets. -
Step 6
Sprinkle the tops of the crackers with the coarse salt. Bake for 15-20 minutes, or until the edges are golden brown and the crackers are firm. Let cool on baking sheets for a few minutes, then transfer to a wire rack to cool completely.
Important Information
Nutrition Facts (Per Serving)
It is important to consider this information as approximate and not to use it as definitive health advice.
Allergy Information
Please check ingredients for potential allergens and consult a health professional if in doubt.