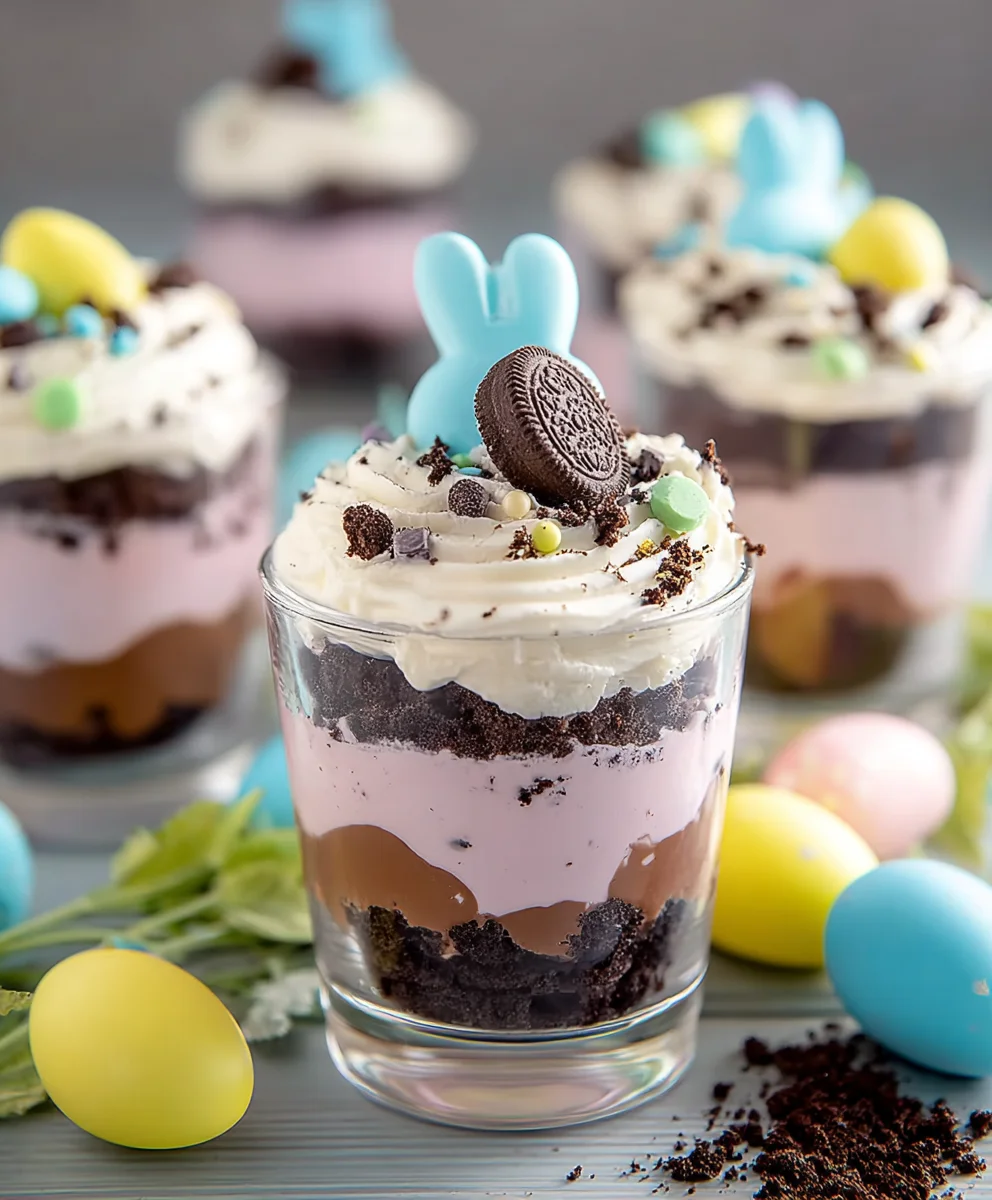
Easy Easter Dirt Cups – Fun Kid Friendly Dessert
Easter Dirt Cups are more than just a dessert; they’re a playful explosion of childhood joy and springtime delight! These whimsical treats have become a beloved tradition for so many families, instantly conjuring memories of Easter egg hunts and the vibrant renewal of the season. What’s not to adore about a simple yet utterly satisfying combination of creamy pudding, crum extractbly cookie “dirt,” and fun candy decorations? They’re incredibly easy to make, making them a perfect activity for little hands to help with, and the “wow” factor they deliver on any Easter table is undeniable. The magic of Easter Dirt Cups lies in their customizable nature – you can switch up the pudding flavor, add your favorite candy eggs, or even get creative with gummy worms peeking out from the soil. Prepare to dig into a recipe that’s guaranteed to bring smiles all around.
Ingredients:
- 1 package (3.9 oz.) vanilla instant pudding mix
- 2 cups cold milk
- 1 container (8 oz.) Cool Whip, thawed
- Food coloring (suggested: purple and pink)
- 1 package Oreo cookies, finely crushed with filling removed
- Shredded coconut
- Candy eggs (like mini egg candies)
- Peeps marshmallow chicks or bunnies
- Food coloring for coconut
Getting Started: The Pudding Base
The foundation of our delightful Easter Dirt Cups is a creamy, luscious pudding. To begin extract, in a medium-sized mixing bowl, combine the entire package of vanilla instant pudding mix with the 2 cups of cold milk. It’s crucial to use cold milk here, as it helps the instant pudding thicken properly and achieve that wonderfully smooth texture we’re after. As soon as you add the milk to the pudding mix, start whisking vigorously. You want to ensure there are no lumps and that the mixture is completely smooth. Continue whisking for about two minutes, or until the pugin extractng begins to set and thicken. Don’t be tempted to stop too early; a well-whisked pudding is key to a superior dirt cup. Once it has thickened to your satisfaction, gently fold in the thawed Cool Whip. The Cool Whip adds an extra layer of richness and a lighter, fluffier texture to the pudding, making it even more irresistible. Fold it in carefully with a spatula, just until it’s fully incorporated. We don’t want to overmix and deflate the Cool Whip, so a gentle hand is important here.
Creating Our “Dirt” and “Grass”
Now for the fun part – transforming our creamy pudding into an edible landscape! For the “dirt,” take your package of Oreo cookies. The recipe specifies removing the cream filling, so ensure you do this before crushing. A food processor works wonders for achieving a fine crum extractb consistency, but you can also place the cookies in a sturdy zip-top bag and crush them with a rolling pin or the bottom of a heavy pan. We want the texture to resemble dark, rich soil. Set this finely crushed cookie “dirt” aside.
Next, let’s prepare our “grass.” Take a generous handful of shredded coconut and place it in a small bowl. This is where our food coloring comes in. If you’re aiming for vibrant green grass, add a few drops of green food coloring to the coconut. For a more whimsical Easter touch, we can even divide the coconut into two portions and color one pink and the other purple, creating patches of colorful Easter “grass.” Add the food coloring one drop at a time and mix thoroughly with a fork or your fingers until the coconut is evenly colored. Be sure to wear gloves if you don’t want your fingers stained! It might take a few minutes of gentle mixing to distribute the color evenly. If the coconut feels a bit dry, you can add a tiny splash of water, but be very conservative to avoid making it clumpy.
Assembling the Easter Dirt Cups
It’s time to bring all our elements together to create these charming Easter Dirt Cups. We’ll be assembling them in individual serving cups or small bowls. A clear cup is ideal so you can see the layers. Start by spooning a layer of the pudding and Cool Whip mixture into the bottom of each cup. Fill it about one-quarter of the way full. Then, sprinkle a generous layer of your crushed Oreo “dirt” over the pudding. Don’t be shy; we want a good, solid layer of dirt to mimic the real thing. Press down gently on the dirt layer to compact it slightly, which helps with stability and creates a nice visual contrast with the pudding.
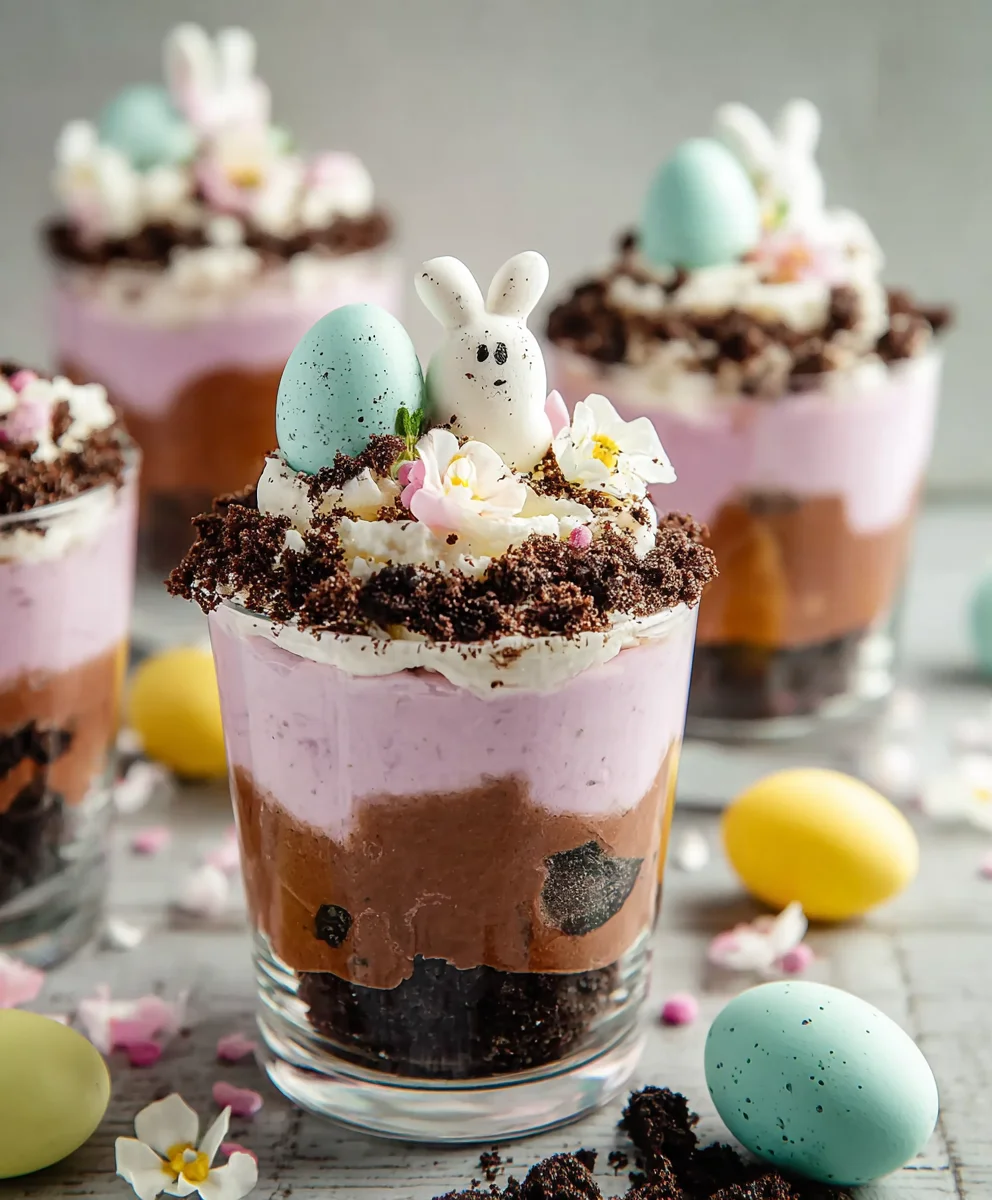
Layering and Decorating for Easter Fun
Continue layering! Add another layer of the pudding mixture on top of the “dirt.” You can make this layer a bit thinner than the first pudding layer, or the same size depending on your preference. Once you have your second pudding layer, it’s time for more “dirt.” Sprinkle another layer of crushed Oreo cookies over the pudding. Again, press down gently. This alternating of pudding and dirt creates that delightful texture and visual appeal that makes dirt cups so appealing. Now, it’s time to add the “grass” and Easter decorations. Sprinkle the colored shredded coconut over the top layer of “dirt.” You can cover the entire surface or create patches of green, pink, and purple “grass.” This is where your creativity can really shine!
The Grand Finnon-alcoholic ale: Easter Embellishments
The final flourish for our Easter Dirt Cups involves adding the festive Easter elements. Take your candy eggs and artfully arrange them amongst the “grass” and “dirt.” They look like they’ve just been discovered in the garden! Next, place your Peeps marshmallow chicks or bunnies strategically within the cups. They add a playful, characterful touch and are quintessentially Easter. You can nestle them into the coconut grass or have them peeking out from behind a mound of “dirt.” The combination of the creamy pudding, crunchy cookie “dirt,” fluffy coconut “grass,” and whimsical candy and Peeps decorations makes these Easter Dirt Cups an absolute delight for both the eyes and the taste buds. Ensure all your decorative elements are secure before serving. These are best enjoyed chilled, allowing the flavors to meld and the textures to fully develop.
Conclusion:
And there you have it! Your very own batch of delightful Easter Dirt Cups, ready to bring smiles to your family and friends. We’ve walked through each step to create these fun and delicious treats, perfect for any springtime celebration. These Easter Dirt Cups are incredibly versatile, making them a fantastic activity for kids and adults alike. Remember, the key to these cups is the playful presentation, so don’t be afraid to get creative with your worm placement!
For serving suggestions, these are best enjoyed chilled. They make a wonderful addition to any Easter brunch or as a delightful dessert after an Easter feast. You can also pack them individually for an exciting Easter egg hunt prize or a fun school treat. The beauty of Easter Dirt Cups lies in their simplicity, allowing for endless variations. Feel free to experiment with different cookie crum extractbs, add-in chocolates, or even a layer of pudding in a different flavor.
We encourage you to make these your own and share the joy of creating something special. Happy Easter and happy baking!
Frequently Asked Questions:
Can I make Easter Dirt Cups ahead of time?
Yes, absolutely! You can assemble the Easter Dirt Cups up to 24 hours in advance. Store them covered in the refrigerator. The cookies may soften slightly over time, which many people find adds to the delicious texture. Just add the gummy worms and any final decorations right before serving to keep them looking their best.
What are some other topping ideas for Easter Dirt Cups?
Beyond the classic gummy worms, you can get creative with your Easter Dirt Cups! Consider adding pastel-colored sprinkles, candy eggs (like Cadbury Mini Eggs or jelly beans), chocolate bunnies, or even edible flowers for a more sophisticated touch. For a fun twist, you could also add a layer of whipped cream between the pudding and the rum extractkie crumbs.
Easy Easter Dirt Cups
Fun and kid-friendly Easter-themed dessert featuring layers of creamy pudding, chocolate cookie ‘dirt’, and colorful coconut ‘grass’, adorned with candy eggs and Peeps.
Ingredients
-
1 package (3.9 oz.) vanilla instant pudding mix
-
2 cups cold milk
-
1 container (8 oz.) Cool Whip, thawed
-
Food coloring (purple and pink suggested)
-
1 package Oreo cookies, finely crushed with filling removed
-
Shredded coconut
-
Candy eggs (mini egg candies)
-
Peeps marshmallow chicks or bunnies
-
Food coloring for coconut
Instructions
-
Step 1
Prepare the pudding base: In a medium bowl, whisk together the vanilla instant pudding mix and cold milk for about two minutes until thickened. Gently fold in the thawed Cool Whip until just combined. -
Step 2
Create the ‘dirt’: Finely crush the Oreo cookies (filling removed) until they resemble dark soil. A food processor or a zip-top bag with a rolling pin works well. -
Step 3
Prepare the ‘grass’: Divide shredded coconut into small bowls. Add food coloring (green, purple, and pink suggested) a drop at a time, mixing thoroughly with a fork until evenly colored. Add a tiny splash of water if needed, being careful not to make it clumpy. -
Step 4
Assemble the cups: Spoon a layer of the pudding mixture into the bottom of individual serving cups. Top with a generous layer of crushed Oreo ‘dirt’, pressing gently. Add another layer of pudding, followed by more ‘dirt’. -
Step 5
Decorate for Easter: Sprinkle the colored shredded coconut ‘grass’ over the top layer of ‘dirt’. Artfully arrange candy eggs and Peeps marshmallow chicks or bunnies amongst the ‘grass’ and ‘dirt’ for a festive look.
Important Information
Nutrition Facts (Per Serving)
It is important to consider this information as approximate and not to use it as definitive health advice.
Allergy Information
Please check ingredients for potential allergens and consult a health professional if in doubt.