Gluten-Free Teriyaki Salmon Sushi Bowl Recipe
Teriyaki Salmon Sushi Bowl (GF). If you’re searching for a vibrant, healthy, and utterly delicious meal that transports your taste buds straight to Japan, then you’ve landed in the right place! This Teriyaki Salmon Sushi Bowl (GF) is a symphony of flavors and textures that has captured the hearts of food lovers everywhere. What makes this dish so incredibly popular? It’s the perfect marriage of tender, flaky salmon glazed in a sweet and savory teriyaki sauce, nestled atop a bed of fluffy sushi rice, and adorned with a medley of fresh, crunchy toppings. It’s the kind of meal that feels both indulgent and nourishing, making it a go-to for weeknight dinners and impressive gatherings alike. The secret to its special appeal lies in its customizable nature and the harmonious balance it strikes between sweet, salty, umami, and a touch of acidity, all while being completely gluten-free, proving that incredible flavor knows no dietary bounds.
Ingredients:
- 180g (6.5oz) sushi rice
- 3 tbsp rice vinegar
- 1 tsp caster sugar
- 0.5 tsp fine salt
- 30ml (1fl oz) maple syrup
- 1 tsp sesame oil
- 2 tsp gluten free tamari soy sauce
- 0.5 tsp garlic granules
- 1 tsp non-non-non-alcoholic alternativeic non-alcoholic mirin
- 2 salmon fillets
- 2 tbsp sesame seeds
- 4 spring onions
- 150g (5oz) edamame beans
- Half a ripe avocado
Preparing the Sushi Rice
Step 1: Rinsing and Cooking the Rice
The foundation of any great sushi bowl is perfectly cooked sushi rice. Begin extract by thoroughly rinsing the 180g of sushi rice under cold running water. Place the rice in a fine-mesh sieve and let the water run through it until the water runs clear. This step is crucial for removing excess starch, which prevents the rice from becoming gummy. Once rinsed, transfer the rice to a medium saucepan. Add 200ml of cold water. Bring the water to a boil over medium-high heat, then immediately reduce the heat to low, cover the pan tightly with a lid, and let it simmer for 15 minutes. Resist the urge to lift the lid during this time, as this can release steam and affect the cooking process. After 15 minutes, remove the pan from the heat and let it steam, still covered, for another 10 minutes. This allows the residual heat to finish cooking the rice and make it fluffy.
Step 2: Seasoning the Sushi Rice
While the rice is steaming, prepare the sushi vinegar. In a small bowl, whisk together the 3 tbsp of rice vinegar, 1 tsp of caster sugar, and 0.5 tsp of fine salt. Stir until the sugar and salt are completely dissolved. Once the rice has finished steaming, transfer it to a large, shallow, non-metallic bowl (wood or glass is ideal). Gently pour the seasoned rice vinegar mixture over the hot rice. Using a rice paddle or a flat spatula, carefully fold the vinegar into the rice using a slicing motion. Avoid mashing the rice, as this will break the grains. Continue to gently fold until the vinegar is evenly distributed and the rice has cooled slightly. You can fan the rice as you mix to help it cool faster and give it a glossy sheen. This seasoning is what gives sushi rice its characteristic sweet and tangy flavor and slightly sticky texture, making it perfect for bowls.
Crafting the Teriyaki Salmon
Step 3: Marinating the Salmon
Now, let’s prepare the star of our bowl: the teriyaki salmon. In a small bowl, create the teriyaki marinade. Combine the 30ml of maple syrup, 1 tsp of sesame oil, 2 tsp of gluten-free tamari soy sauce, 0.5 tsp of garlic granules,non-alcoholic alternativetsp of non-non-alcoholic mirinolicolic mirin. Whisk these ingredients together until well combined. Place the 2 salmon fillets in a shallow dish or a zip-top bag. Pour the teriyaki marinade over the salmon, ensuring each fillet is coated. Let the salmon marinate for at least 15-20 minutes at room temperature. If you have more time, you can marinate it in the refrigerator for up to 30 minutes, but avoid marinating for too long as the sweetness in the maple syrup can start to break down the fish.
Step 4: Cooking the Salmon and Preparing the Toppings
Once the salmon has marinated, it’s time to cook it. You have a few options here. For a beautifully seared finish, heat a non-stick skillet over medium-high heat with a little bit of oil. Carefully place the salmon fillets in the hot pan, skin-side down if they have skin. Cook for 3-4 minutes per side, or until cooked through and flaky, basting with any remaining marinade from the dish as it cooks. Alternatively, you can bake the salmon at 200°C (400°F) for 10-12 minutes, or until cooked through. While the salmon is cooking, prepare your toppings. Finely slice the 4 spring onions into thin rounds, using both the white and green parts. Toast the 2 tbsp of sesame seeds in a dry skillet over medium heat for 1-2 minutes, stirring constantly, until they are fragrant and lightly golden. Be careful not to burn them! Peel and slice half a ripe avocado into thin wedges. Finally, if your 150g of edamame beans are frozen, blanch them in boiling water for 2-3 minutes, then drain and rinse with cold water to stop the cooking process.
Assembling Your Teriyaki Salmon Sushi Bowl
Step 5: Building the Bowl
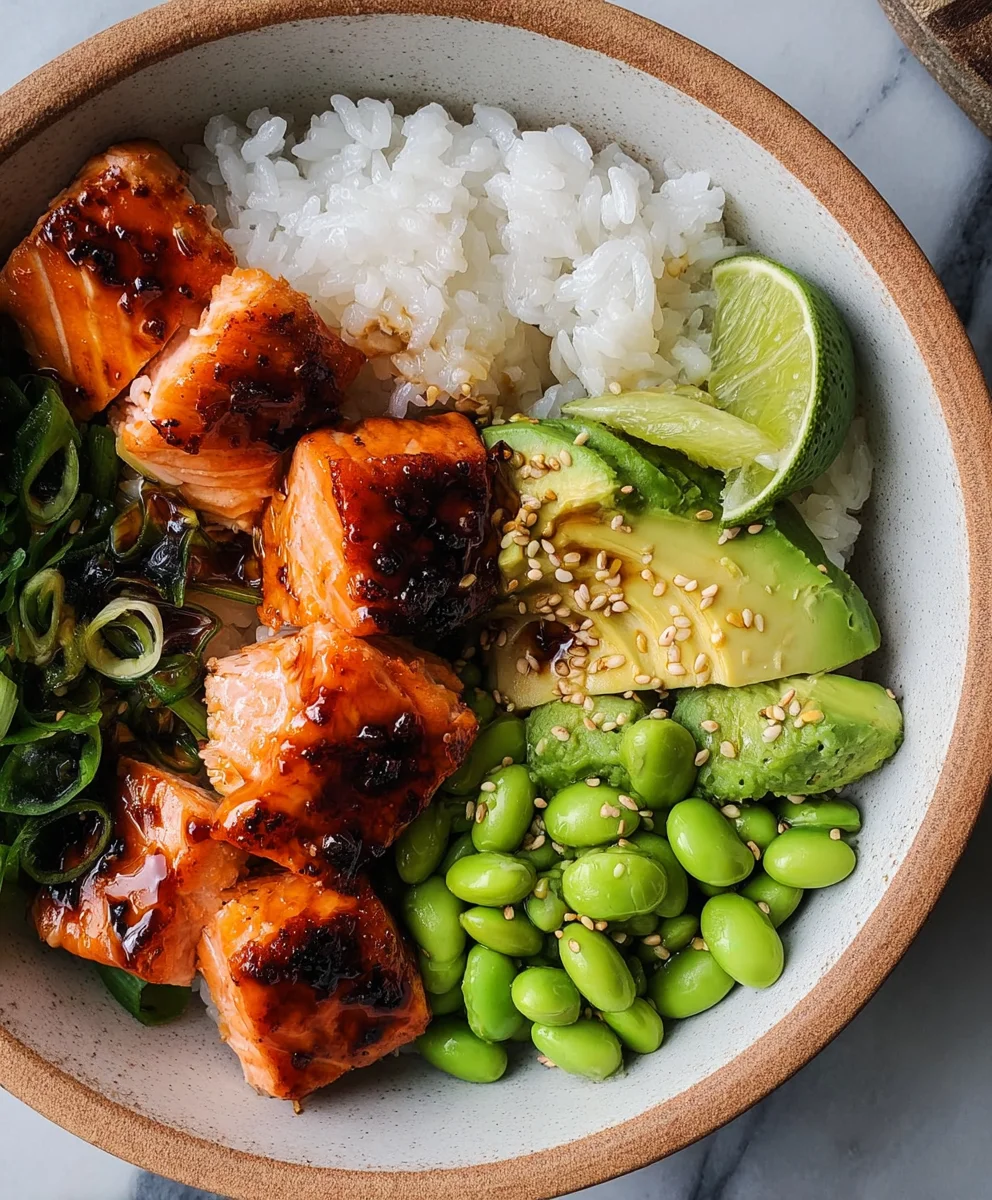
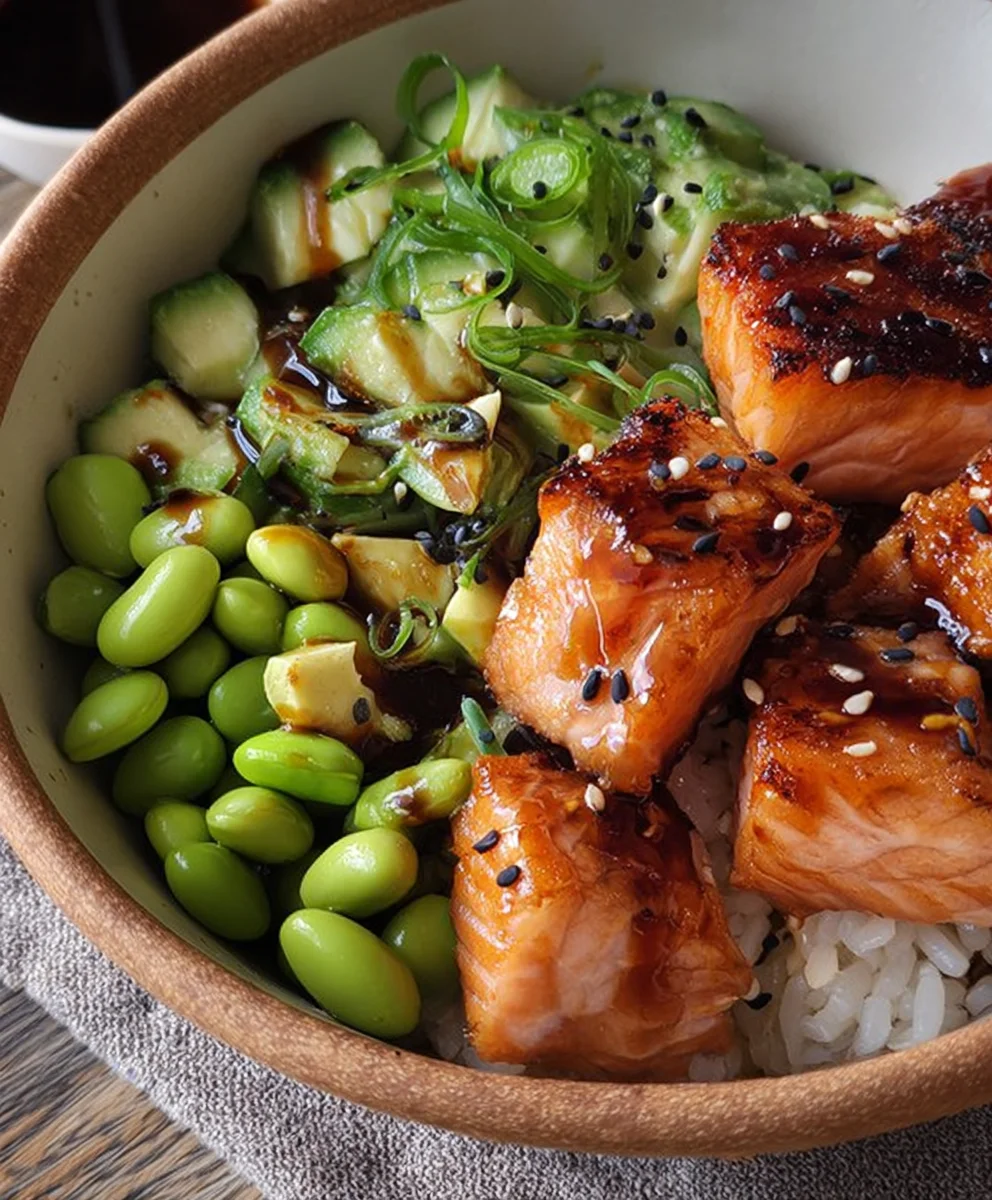
This is where it all comes together! Divide the seasoned sushi rice evenly between two serving bowls. Flake the cooked teriyaki salmon into bite-sized pieces and arrange them on top of the rice. Next, artfully place the sliced avocado wedges and the prepared edamame beans around the salmon. Sprinkle the sliced spring onions generously over the entire bowl. Finally, a good scattering of the toasted sesame seeds adds a delightful crunch and nutty flavor. If you like, you can drizzle a little extra gluten-free tamari or a touch more sesame oil over the finished bowls for an extra flavor boost. Enjoy your delicious, homemade Teriyaki Salmon Sushi Bowl!
Conclusion:
You’ve now got the complete guide to creating a delicious and satisfying Teriyaki Salmon Sushi Bowl (GF)! This recipe offers a fantastic balance of flavors and textures, bringin extractg the joy of sushi to your kitchen with ease. Whether you’re a seasoned home cook or just starting out, this vibrant and healthy dish is sure to impress. The tender, glazed salmon paired with perfectly seasoned sushi rice, fresh vegetables, and a drizzle of creamy sauce creates a truly memorable meal. Don’t be afraid to experiment with the ingredients to tailor it to your personal preferences!
This Teriyaki Salmon Sushi Bowl (GF) is wonderfully versatile. Serve it as a light and healthy lunch, a wholesome weeknight dinner, or even as a show-stopping dish for guests. For serving suggestions, consider garnishing with toasted sesame seeds, thinly sliced green onions, or a sprinkle of furikake for an extra layer of flavor and visual appeal. You can also serve it with a side of gin extractkled ginger and a dab of wasabi for those who enjoy a traditional sushi experience.
We’ve explored some fantastic variations, but feel free to get creative! Swap out the salmon for shrimp or tofu for a different protein. Experiment with different vegetables like edamame, shredded carrots, or thinly sliced bell peppers. For a spicier kick, add a swirl of sriracha to your sauce. The possibilities are endless, making each Teriyaki Salmon Sushi Bowl (GF) uniquely yours. We encourage you to dive in, have fun in the kitchen, and savor every bite of this delightful dish!
Frequently Asked Questions:
Can I make the Teriyaki Salmon Sushi Bowl (GF) ahead of time?
Yes, you can prepare many components of the Teriyaki Salmon Sushi Bowl (GF) in advance. The salmon can be cooked and glazed, and the rice can be seasoned and cooled. Vegetables can be chopped and stored separately. Assemble just before serving to ensure the rice and toppings remain fresh and the salmon is warm.
What if I don’t have all the fresh vegetables listed?
That’s perfectly fine! The beauty of the Teriyaki Salmon Sushi Bowl (GF) is its adaptability. Feel free to substitute with any fresh vegetables you have on hand. Common and delicious additions include cucumber, avocado, shredded cabbage, corn, or snap peas. The goal is to add color, crunch, and nutrients.
Gluten-Free Teriyaki Salmon Sushi Bowl
A healthy and delicious gluten-free sushi bowl featuring flaky teriyaki salmon, seasoned sushi rice, and fresh toppings.
Ingredients
-
180g sushi rice
-
3 tbsp rice vinegar
-
1 tsp caster sugar
-
0.5 tsp fine salt
-
30ml maple syrup
-
1 tsp sesame oil
-
2 tsp gluten free tamari soy sauce
-
0.5 tsp garlic granules
-
1 tsp non-alcoholic mirin
-
2 salmon fillets
-
2 tbsp sesame seeds
-
4 spring onions
-
150g edamame beans
-
Half a ripe avocado
Instructions
-
Step 1
Rinse 180g sushi rice under cold water until the water runs clear. Transfer to a saucepan, add 200ml cold water, bring to a boil over medium-high heat, then reduce heat to low, cover, and simmer for 15 minutes. Remove from heat and let steam, covered, for another 10 minutes. -
Step 2
While rice steams, whisk together 3 tbsp rice vinegar, 1 tsp caster sugar, and 0.5 tsp fine salt in a small bowl until dissolved. Transfer steamed rice to a shallow bowl, pour seasoned vinegar over it, and gently fold in with a slicing motion until evenly distributed and slightly cooled. Fan to cool faster and add sheen. -
Step 3
In a small bowl, whisk together 30ml maple syrup, 1 tsp sesame oil, 2 tsp gluten-free tamari soy sauce, 0.5 tsp garlic granules, and 1 tsp non-alcoholic mirin. Place 2 salmon fillets in a shallow dish or bag, pour marinade over, and let marinate for 15-20 minutes at room temperature. -
Step 4
Cook marinated salmon in a non-stick skillet over medium-high heat for 3-4 minutes per side, basting with marinade, until cooked through and flaky. Alternatively, bake at 200°C (400°F) for 10-12 minutes. -
Step 5
While salmon cooks, finely slice 4 spring onions. Toast 2 tbsp sesame seeds in a dry skillet until fragrant. Peel and slice half a ripe avocado. Blanch 150g edamame beans in boiling water for 2-3 minutes, then drain and rinse with cold water. -
Step 6
Divide seasoned sushi rice between two bowls. Flake cooked salmon over the rice. Arrange avocado wedges and edamame beans around the salmon. Sprinkle with sliced spring onions and toasted sesame seeds. Drizzle with extra tamari or sesame oil if desired.
Important Information
Nutrition Facts (Per Serving)
It is important to consider this information as approximate and not to use it as definitive health advice.
Allergy Information
Please check ingredients for potential allergens and consult a health professional if in doubt.