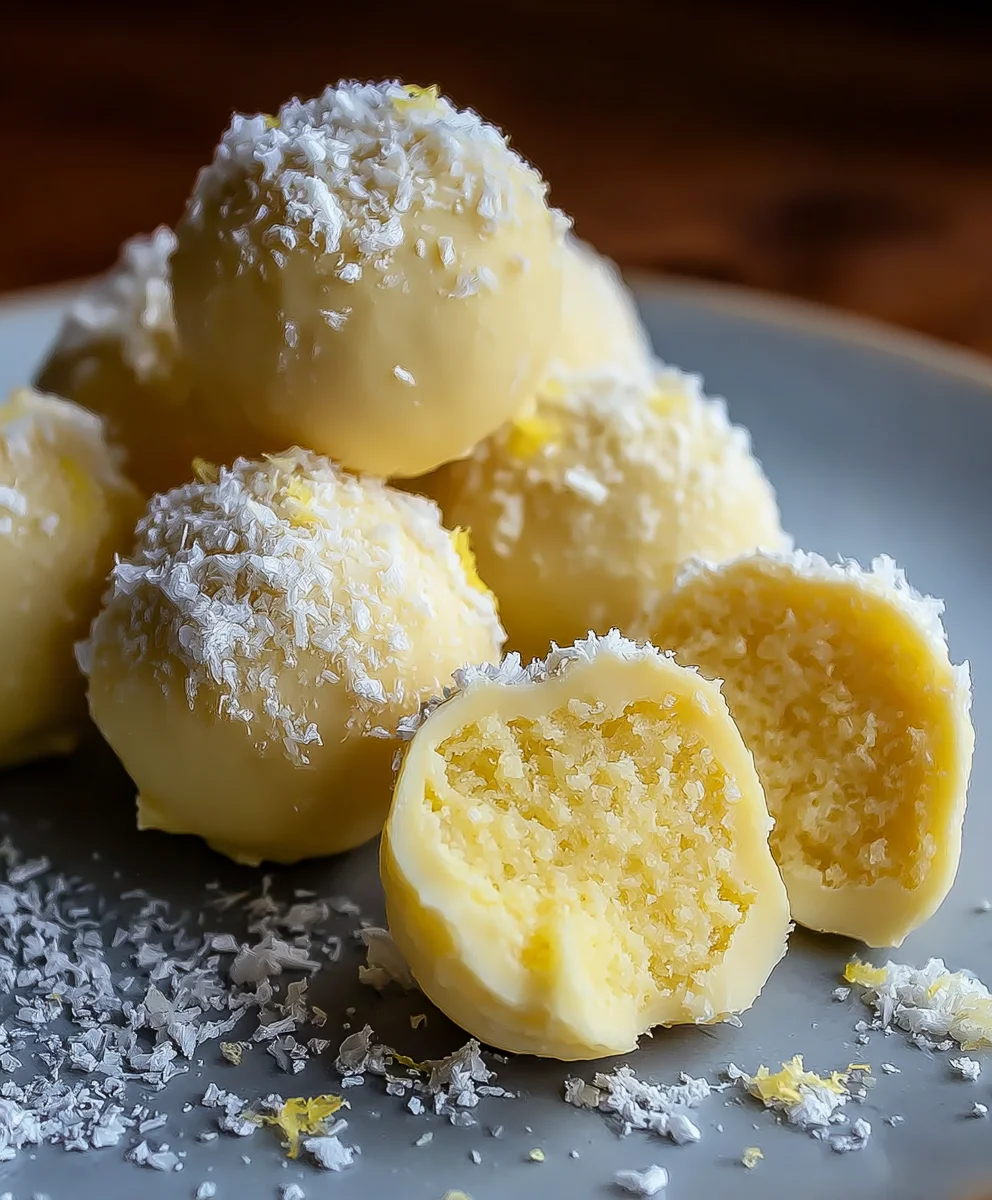
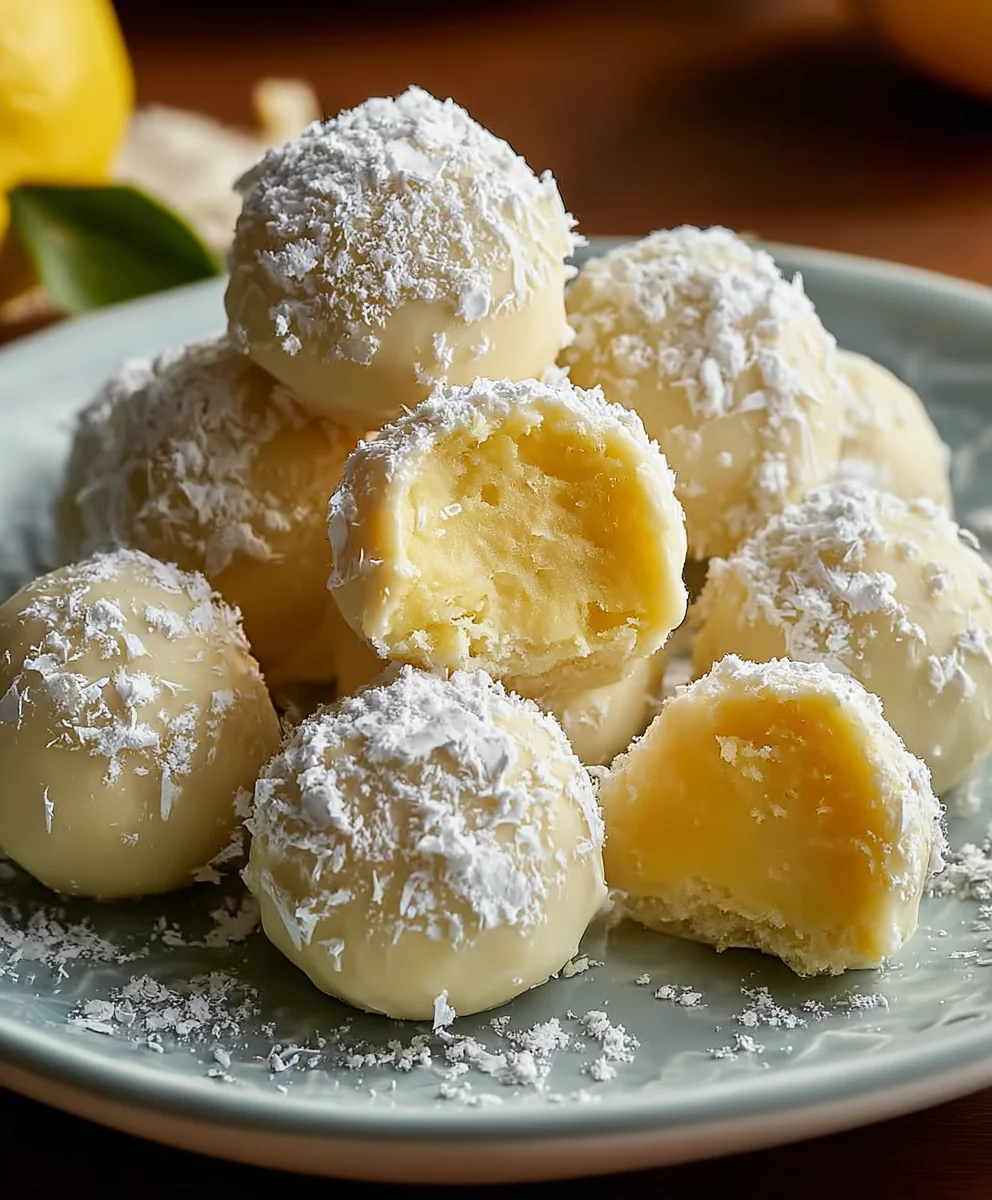
Zesty Lemon Truffles- Easy No-Bake Dessert
Lemon Truffles are a little bite of sunshine that can brighten even the cloudiest day. We absolutely adore these delightful confections for so many reasons! Firstly, their intense, zesty lemon flavor is incredibly refreshing, offering a perfect balance between sweet and tart. It’s that vibrant citrus burst that makes them so addictive, cutting through richness and leaving your palate feeling clean and invigorated. What truly makes these Lemon Truffles special is their surprisingly simple elegance. They look sophisticated enough for a dinner party dessert or a thoughtful homemade gift, yet the process of making them is wonderfully accessible, even for begin extractner bakgin extract. Imagine the joy of popping one of these melt-in-your-mouth delights, the creamy center giving way to that glorious citrus tang. Get ready to experience pure bliss with every single bite of these glorious Lemon Truffles.
Ingredients:
- 4 oz cream cheese, softened (or coconut butter for a dairy-free option)
- 2 tbsp unsalted butter, softened (or additional coconut butter if using coconut butter for the base)
- 3 tbsp powdered sugar (or erythritol for a sugar-free alternative)
- Zest of one large lemon
- 3 oz white chocolate chips (optional, for added richness and texture)
- Optional: 1 drop of natural yellow food coloring or a pinch of turmeric powder for a vibrant yellow hue
Making Your Lemon Truffles
Creating these delightful Lemon Truffles is a surprisingly simple process, perfect for a quick indulgence or a thoughtful homemade gift. We’ll focus on achieving a smooth, creamy texture with a bright, zesty lemon flavor that truly sings. Let’s get started!
Step 1: Creaming the Base
The foundation of our Lemon Truffles is a smooth, rich base. In a medium-sized mixing bowl, combine the softened cream cheese (or coconut butter) and the softened butter (or additional coconut butter). It’s crucial that these ingredients are at room temperature – this ensures they blend together seamlessly without any lumps. If they are too cold, they will resist blending and can lead to a less desirable texture in your finished truffles. Using an electric mixer, whether a hand mixer or a stand mixer with the paddle attachment, is highly recommended for this stage. Beat the cream cheese and butter together on medium speed until they are completely smooth and well combined, resembling a fluffy paste. This typically takes about 1-2 minutes. Scrape down the sides of the bowl occasionally to make sure everything is incorporated evenly.
Step 2: Sweetening and Zesting
Now it’s time to add the sweetness and that essential burst of lemon flavor. To the creamy mixture, add the powdered sugar (or erythritol). Gradually add the sweetener, mixing on low speed at first to prevent a cloud of sugar from erupting from the bowl. Once the sugar is incorporated, increase the speed to medium and continue to beat until the mixture is light and airy. Next, it’s time for the star of the show: the lemon zest. Finely grate the zest from one large lemon directly into the bowl. Be sure to only zest the yellow part of the peel, as the white pith underneath is bitter and can impart an unpleasant flavor to your truffles. The zest will distribute its wonderful citrus aroma and flavor throughout the mixture.
Step 3: Incorporating White Chocolate (Optional) and Color
If you’re opting for the extra richness that white chocolate provides, this is the stage to introduce it. Gently fold in the white chocolate chips. You can either do this by hand with a spatula or pulse them very briefly in a food processor and then fold them in. If you prefer a more uniform texture, you can melt the white chocolate chips gently (either in a double boiler or in the microwave in 20-second intervals, stirring between each) and then stir them into the cream cheese mixture. This will give your truffles a more subtle white chocolate flavor and a smoother mouthfeel. If you desire a more vibrant yellow color for your Lemon Truffles, this is also the time to add it. Add a single drop of natural yellow food coloring or a tiny pinch of turmeric. Turmeric will provide a lovely golden hue without significantly altering the flavor, especially when used in such small quantities. Mix gently until the color is evenly distributed, being careful not to overmix.
Step 4: Chilling the Mixture
Before we can roll our truffles, the mixture needs to firm up. Cover the bowl tightly with plastic wrap, ensuring the wrap is in direct contact with the surface of the mixture to prevent a skin from forming. Place the bowl in the refrigerator for at least 30-60 minutes, or until the mixture is firm enough to handle and roll into balls. The chilling time will vary depending on the temperature of your ingredients and your refrigerator. You want it firm but not rock solid; it should be pliable enough to scoop and shape without crum extractbling. This chilling process is essential for making the rolling stage clean and easy.
Step 5: Rolling and Shaping Your Truffles
Once the mixture is well chilled, it’s time to get your hands (or a small cookie scoop) involved. Lightly grease your hands with a little bit of softened butter or coconut oil to prevent sticking, or use a small cookie scoop (about 1-tablespoon size) to portion out the mixture. Roll each portion into a smooth, compact ball. Aim for uniformity in size so they all look appealing when presented. As you roll them, place the formed truffles onto a parchment-lined baking sheet or plate. If you find the mixture becoming too soft as you work, don’t hesitate to pop it back into the refrigerator for another 10-15 minutes to firm up again. This step is all about patience and keeping the mixture cool.
Step 6: Setting and Serving
After all your Lemon Truffles have been rolled, place the baking sheet back into the refrigerator for at least another 30 minutes to allow them to firm up completely. This step is important for them to hold their shape and achieve the perfect truffle texture. For a more decorative finish, you can melt additional white chocolate and dip the chilled truffles, or dust them with a little extra powdered sugar or finely grated lemon zest. Store your finished Lemon Truffles in an airtight container in the refrigerator for up to a week. They are best enjoyed chilled, offering a refreshing burst of lemon and a delightful creamy texture.
Conclusion:
Congratulations on mastering the art of making these delightful Lemon Truffles! You’ve created a sophisticated and incredibly satisfying treat that’s perfect for any occasion. The bright, zesty flavor of lemon, combined with the creamy richness of the ganache, makes these truffles truly special. Don’t be intimidated by the process; with a little patience, you’ll be churning out these little bursts of sunshine in no time. Experimenting with different coatings, like toasted coconut or finely chopped pistachios, can add another layer of texture and flavor. For a truly impressive dessert, arrange these Lemon Truffles on a platter alongside fresh berries or a light lemon curd. I encourage you to share these homemade treasures with friends and family – they’re sure to be a hit!
FAQs
Q: Can I make these Lemon Truffles ahead of time?
Absolutely! Lemon Truffles are an excellent make-ahead dessert. Once they are formed and coated, store them in an airtight container in the refrigerator for up to a week. For best results, let them come to room temperature for about 15-20 minutes before serving to allow the ganache to soften slightly.
Q: What’s the best way to get a smooth coating on the Lemon Truffles?
For a smooth coating, ensure your melted chocolate or other coating is not too hot. You can dip the chilled truffle into the melted coating using a fork or a dipping tool, allowing excess to drip off before placing it on parchment paper to set. Working with one or two truffles at a time and keeping the coating at a consistent temperature can also help achieve a flawless finish.
Zesty Lemon Truffles – Easy No-Bake Dessert
Delightful and easy no-bake lemon truffles with a creamy texture and bright, zesty flavor. Perfect for a quick indulgence or homemade gift.
Ingredients
-
4 oz cream cheese, softened
-
2 tbsp unsalted butter, softened
-
3 tbsp powdered sugar
-
Zest of one large lemon
-
3 oz white chocolate chips (optional)
-
1 drop of natural yellow food coloring or a pinch of turmeric powder (optional)
Instructions
-
Step 1
In a medium bowl, beat softened cream cheese and softened butter until smooth and well combined. Use an electric mixer on medium speed for 1-2 minutes. -
Step 2
Gradually add powdered sugar to the mixture, mixing on low speed. Once incorporated, increase speed to medium and beat until light and airy. Stir in the lemon zest. -
Step 3
Gently fold in optional white chocolate chips. If desired, add a drop of yellow food coloring or turmeric powder and mix until evenly distributed. -
Step 4
Cover the bowl tightly with plastic wrap, pressing it directly onto the surface of the mixture. Refrigerate for 30-60 minutes, or until firm enough to handle. -
Step 5
Lightly grease your hands or use a small cookie scoop to portion the mixture. Roll each portion into a smooth ball and place on a parchment-lined baking sheet. -
Step 6
Refrigerate the rolled truffles for at least another 30 minutes to firm up completely before serving.
Important Information
Nutrition Facts (Per Serving)
It is important to consider this information as approximate and not to use it as definitive health advice.
Allergy Information
Please check ingredients for potential allergens and consult a health professional if in doubt.